Outcome Caching
1 From a Designer Project, create a new Flow.
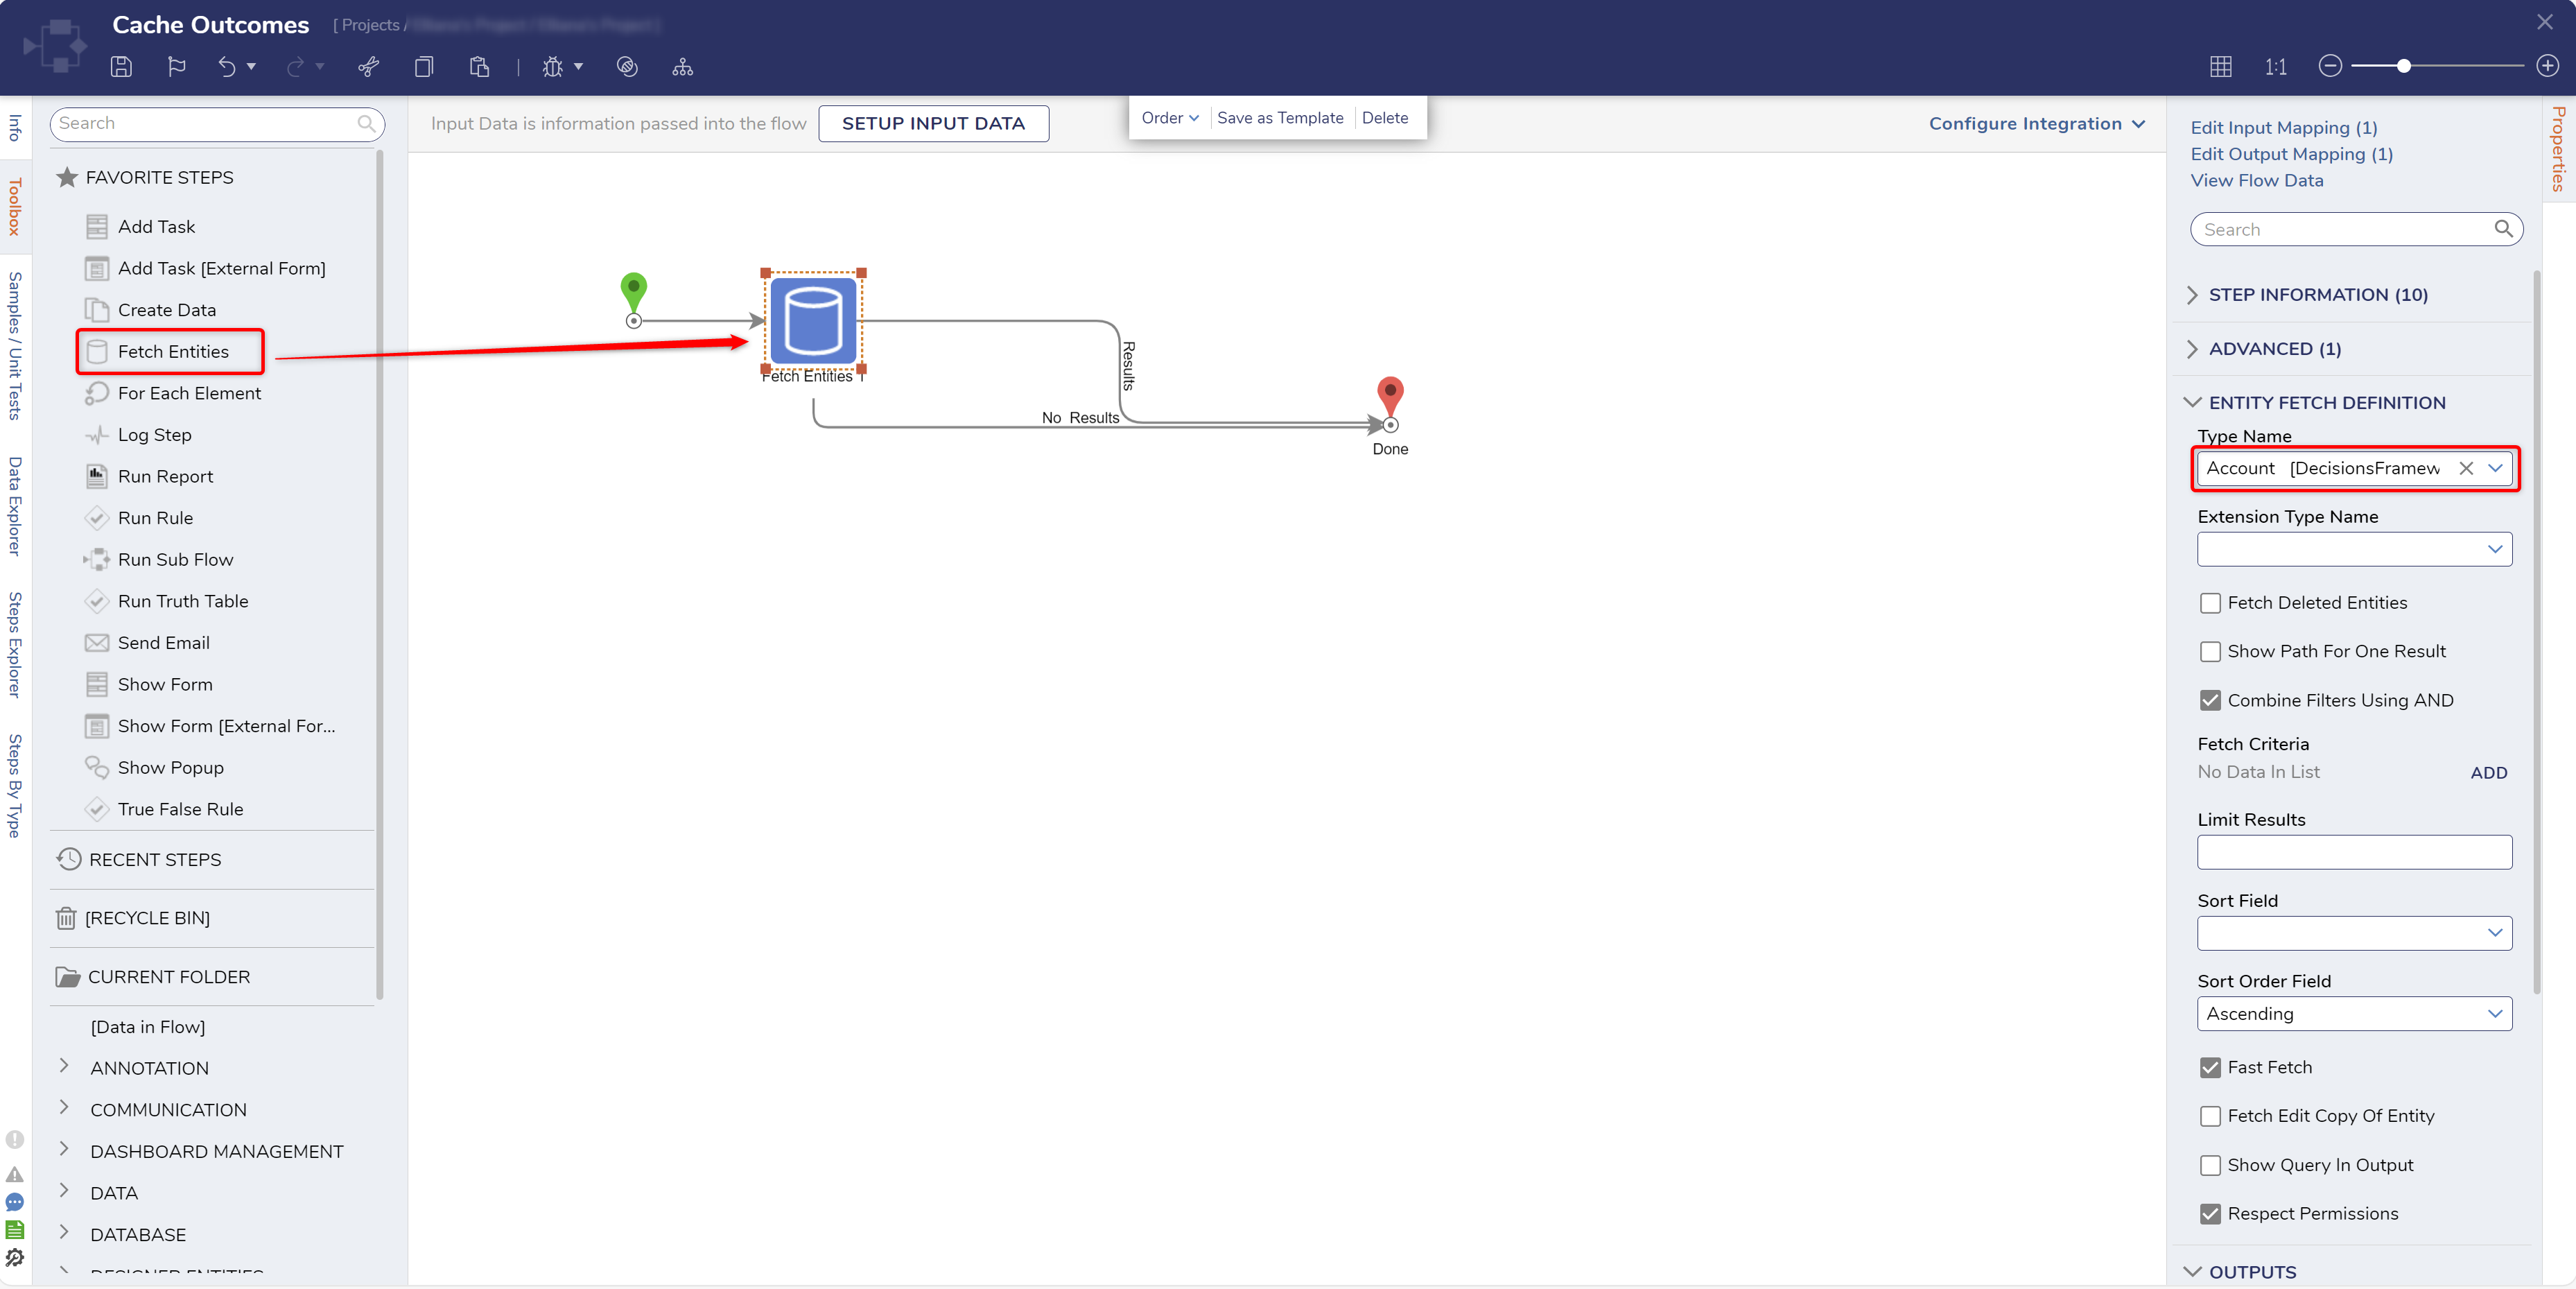
2 From the Flow Designer, add and configure Fetch Entities step to use the Account datatype.
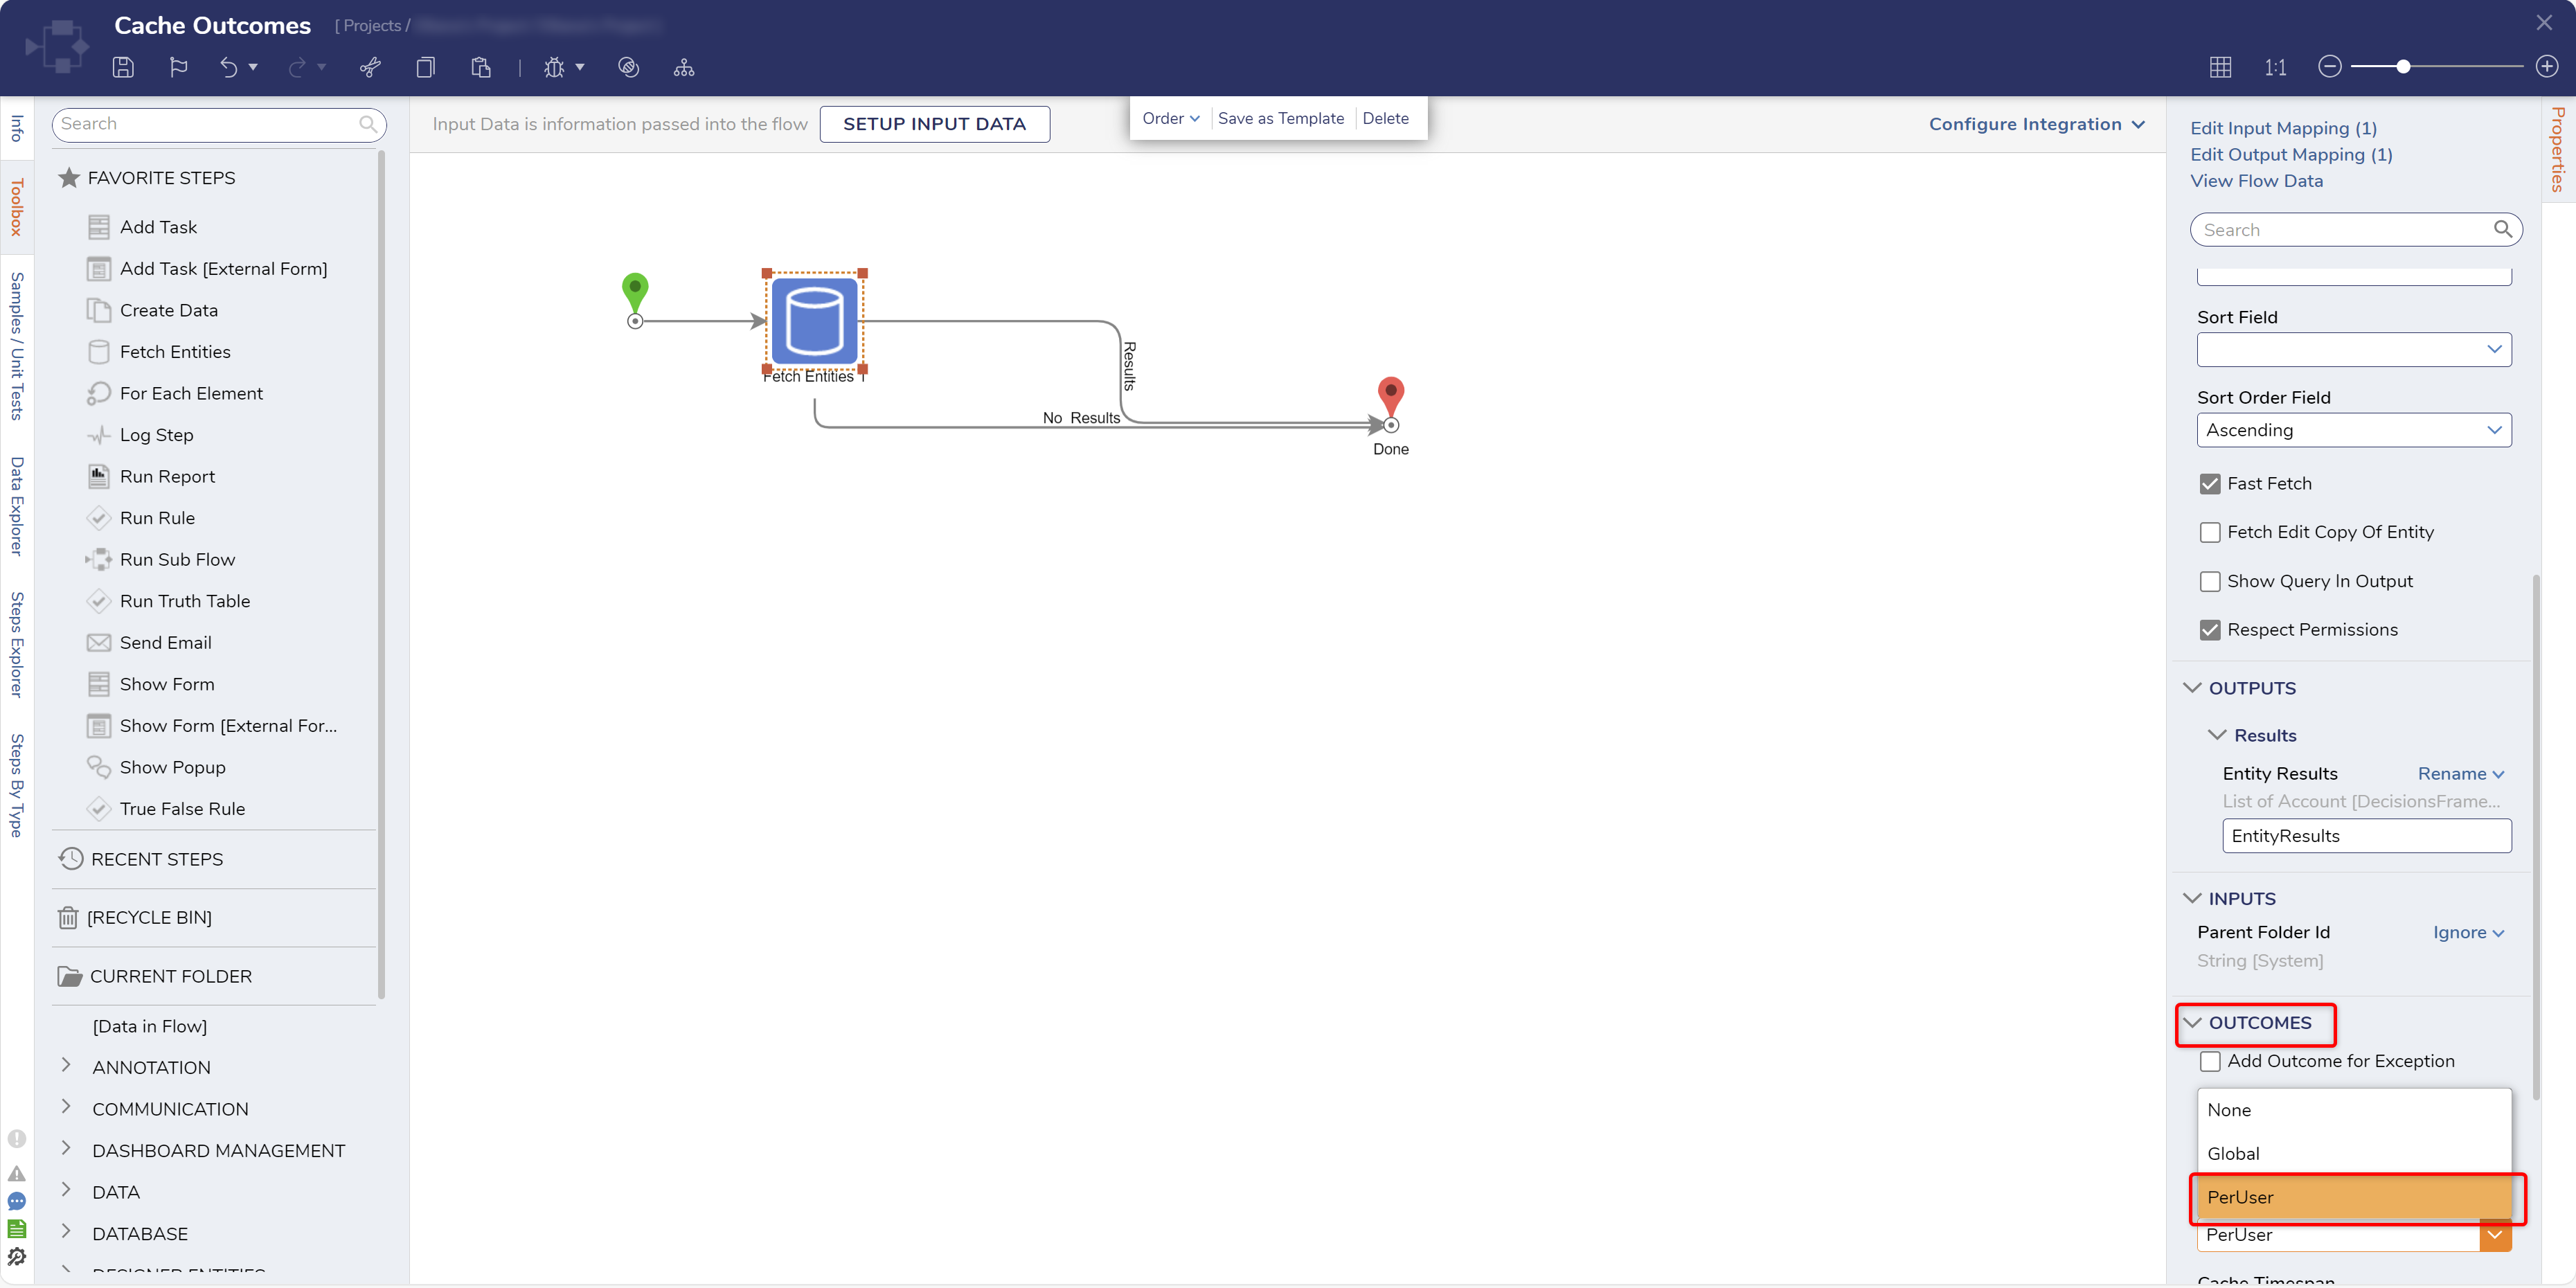
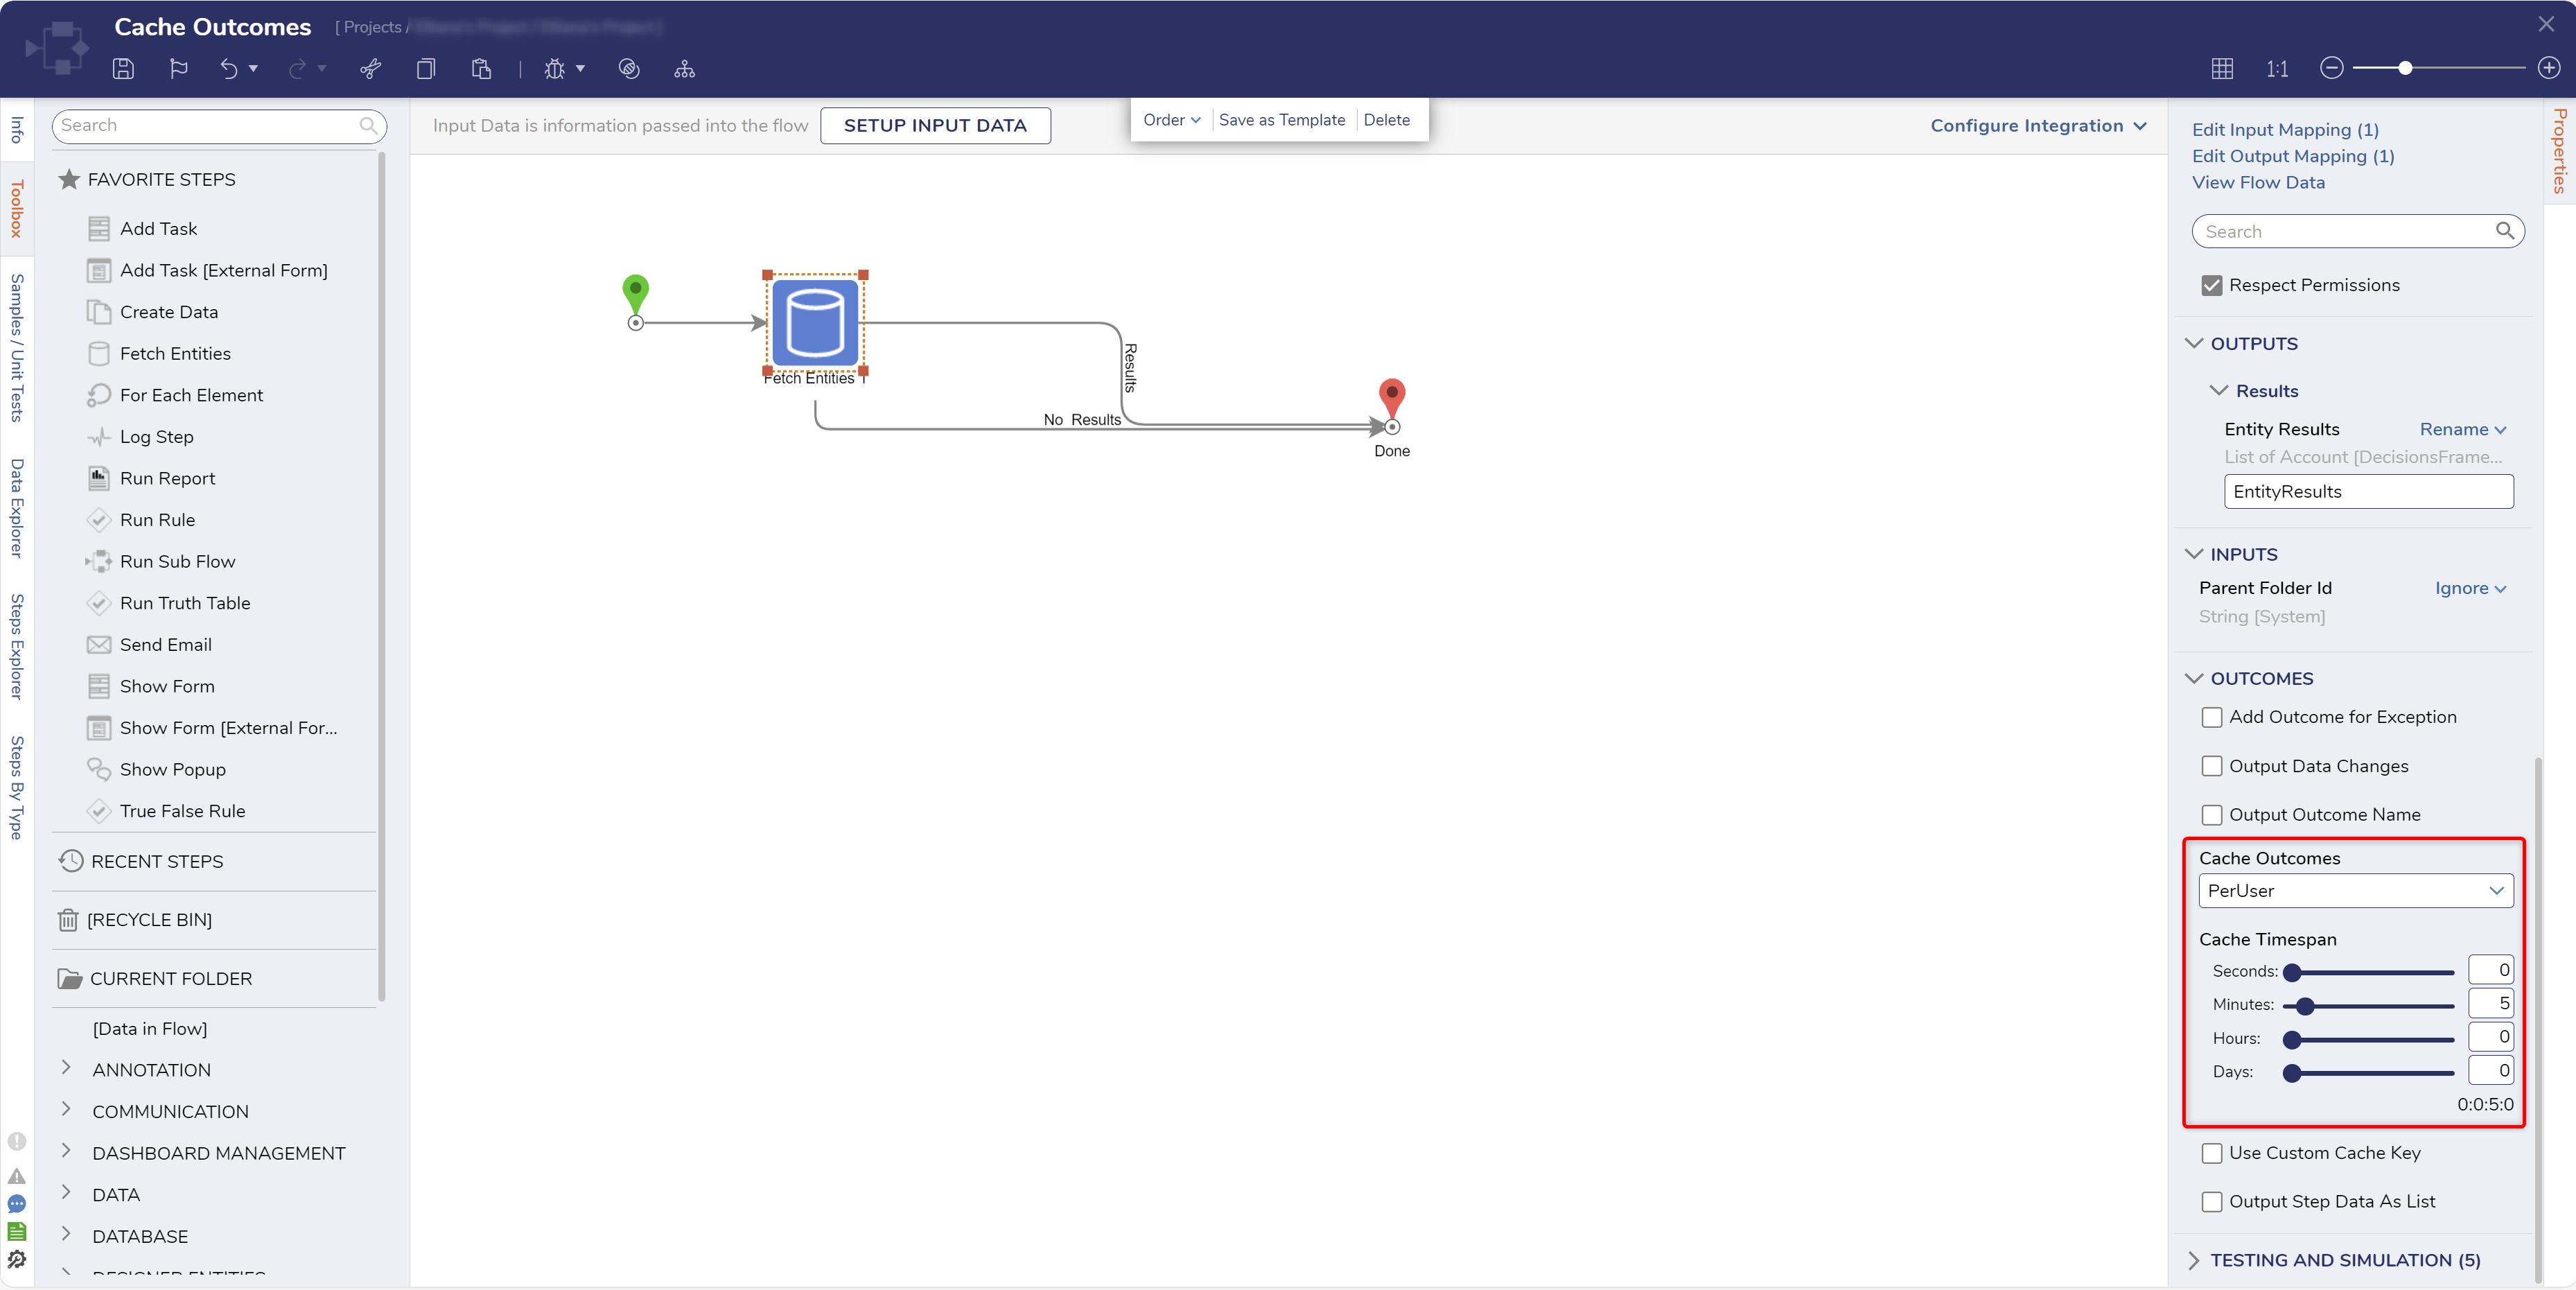
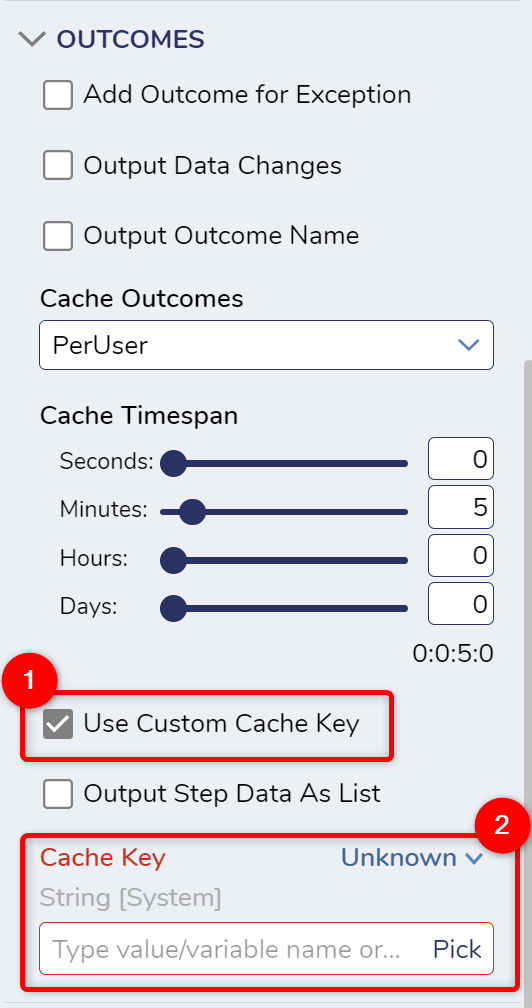
3 Still in the Properties tab, navigate and expand the OUTCOMES category. Then, select the desired setting from the Cache Outcomes dropdown (for this example, PerUser).
4 Set a Cache Timespan by inputting the values into each box, or adjusting the value via the slider. This will determine how long the Outcome data remains within the Cache.
5 Save the Flow.
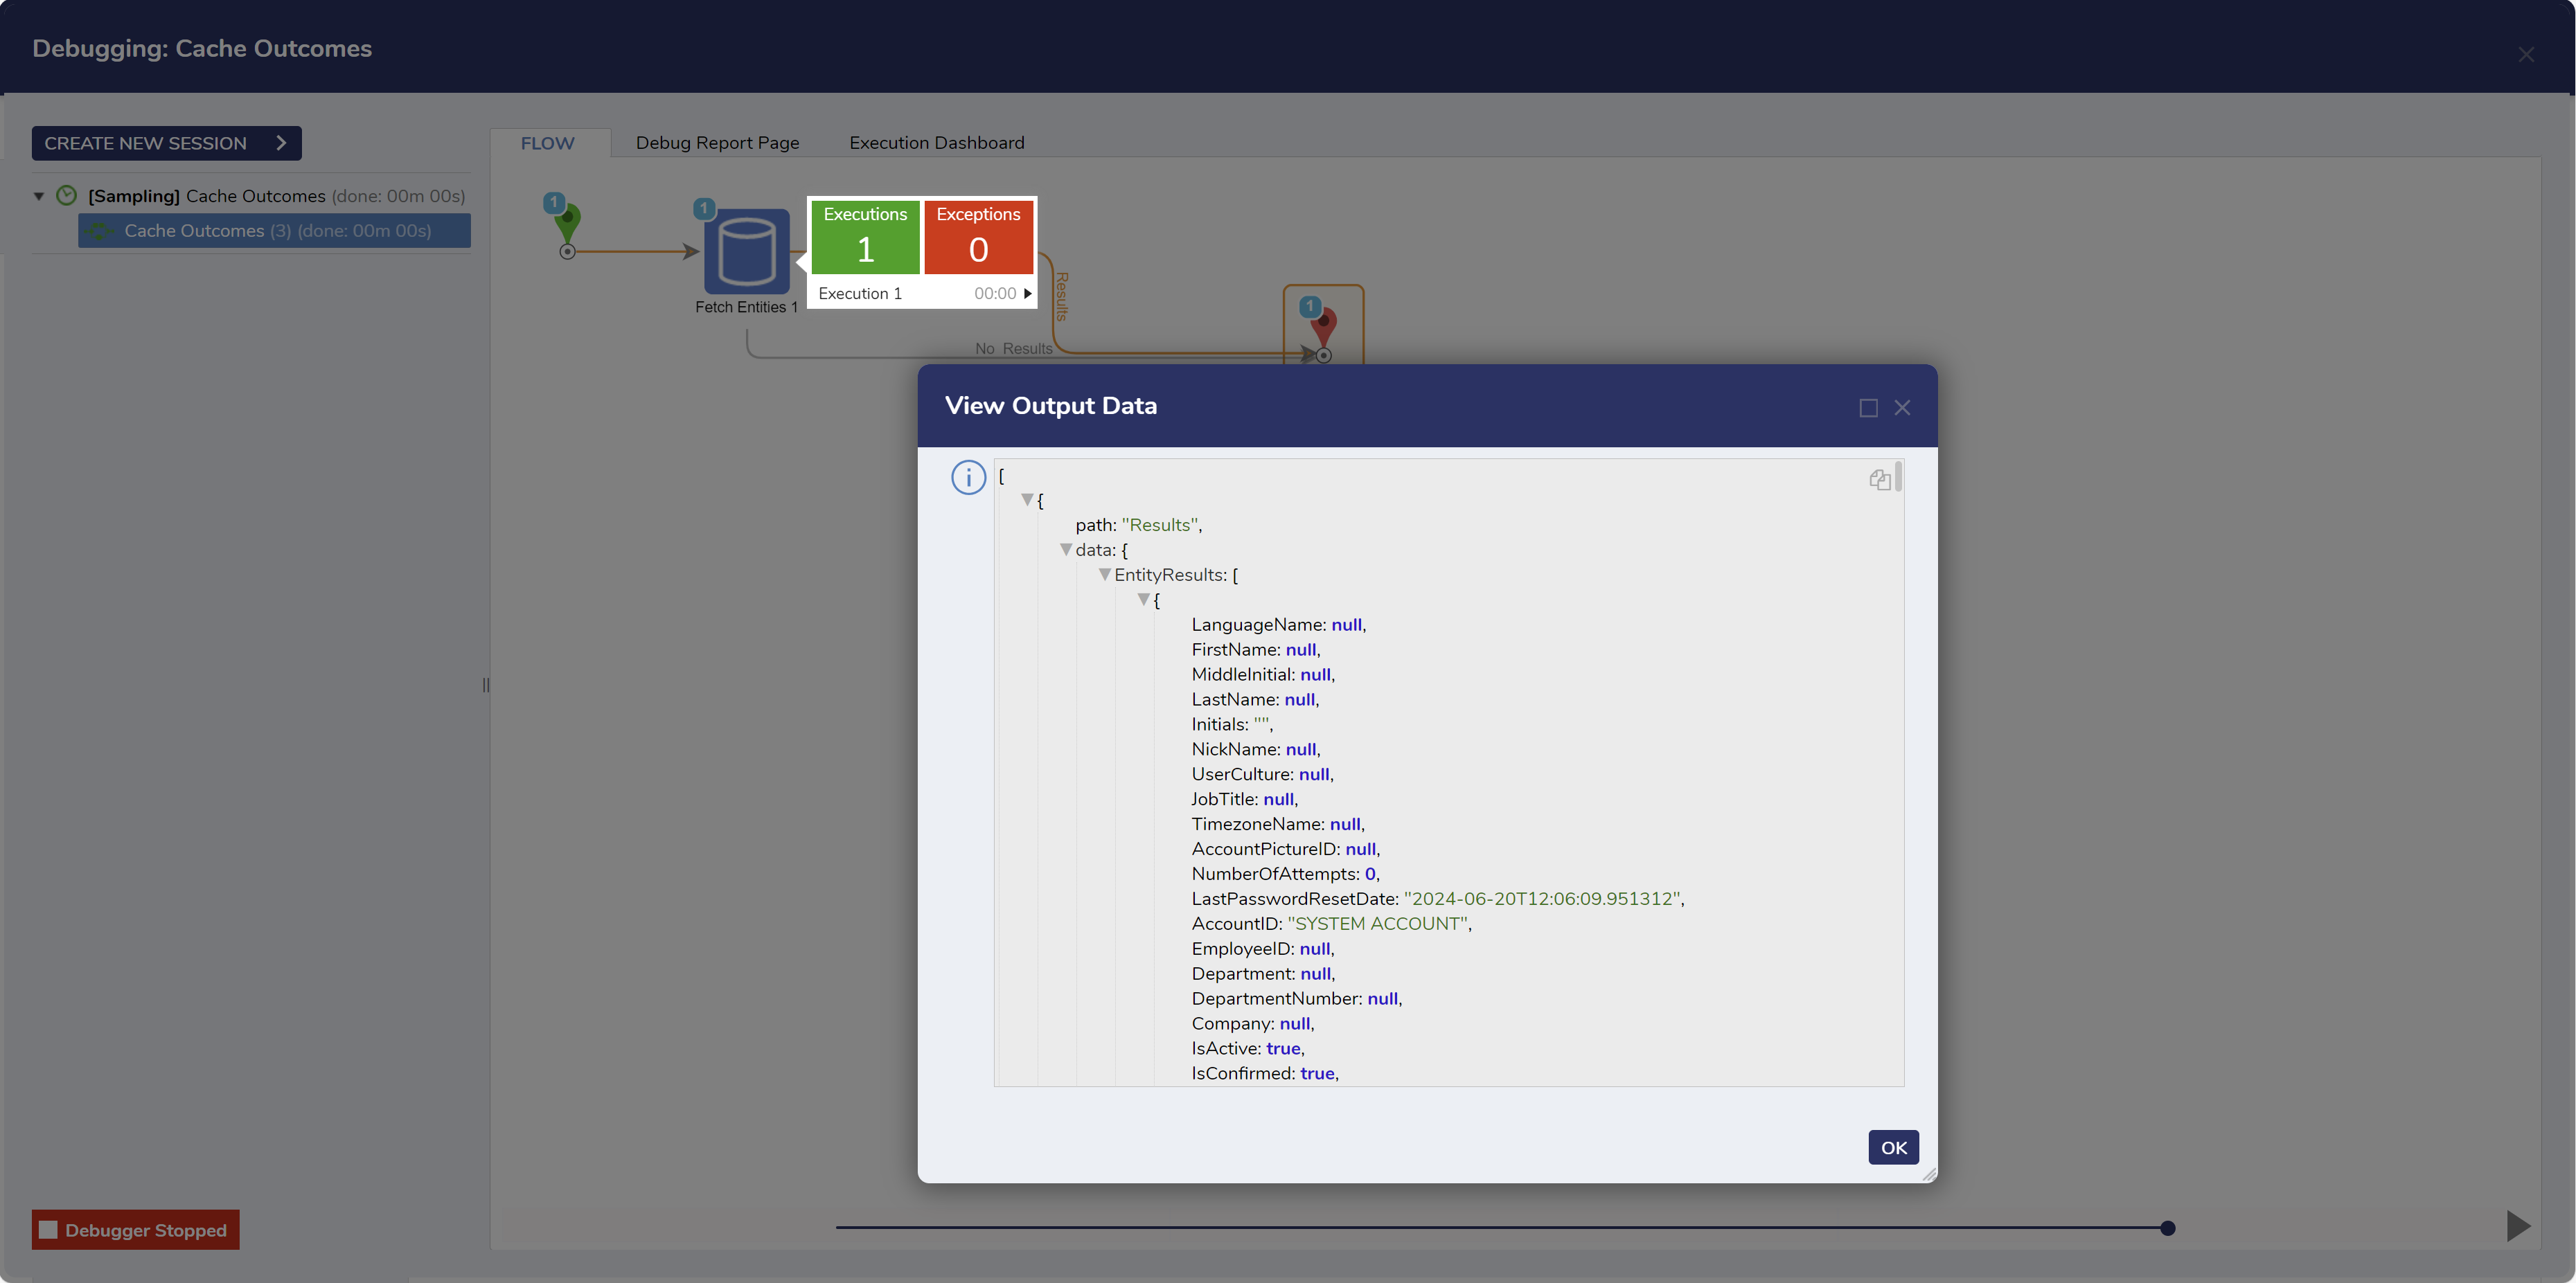
6 To confirm this from the Flow Designer, select the Debug link from the top Action Bar. Click START DEBUGGING. After the Flow runs, select Fetch Entities > Execution 1 > View Output Data. The Output Data will remain cached for five minutes.
Custom Cache Key
Rather than use the unique key that is generated by Decisions, a user can set a custom key.
Setting a Cache Key will cause a Step to return the initial cached outcome for the duration of the set timespan. The Step will ignore its inputs on future Flow runs.
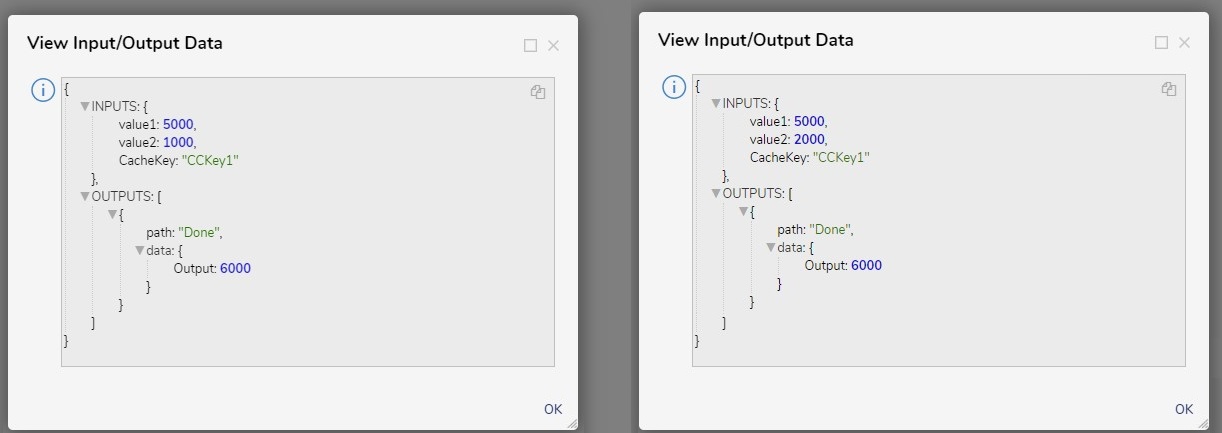
In this example a Flow adds two numbers (5000 and 1000) together to get a total of 6000. That total is given a Custom Key and the Output is 6000. When the Flow is run again, the values have changed, the same Custom Key is used, but the Output remains 6000.
To configure, follow steps 1-3 above, and select the Custom Cache Key option and set the Cache Key.
from: https://documentation.decisions.com/v9/docs/outcome-caching
