Okta Integration Troubleshooting
1 In Okta, create a Web and SAML 2.0 app.
2 Set the Base URL to http://[BASE PORTAL URL]/SAML/AssertionConsumer.ashx
3 Set Audience URI (SP Entity ID) to the base portal URL.
4 Set Name ID format to EmailAddress and click Next.
5 Select "I'm an Okta customer adding an internal app" then check the This is an internal app that we have created box. Click Finish to navigate to the Sign On tab.
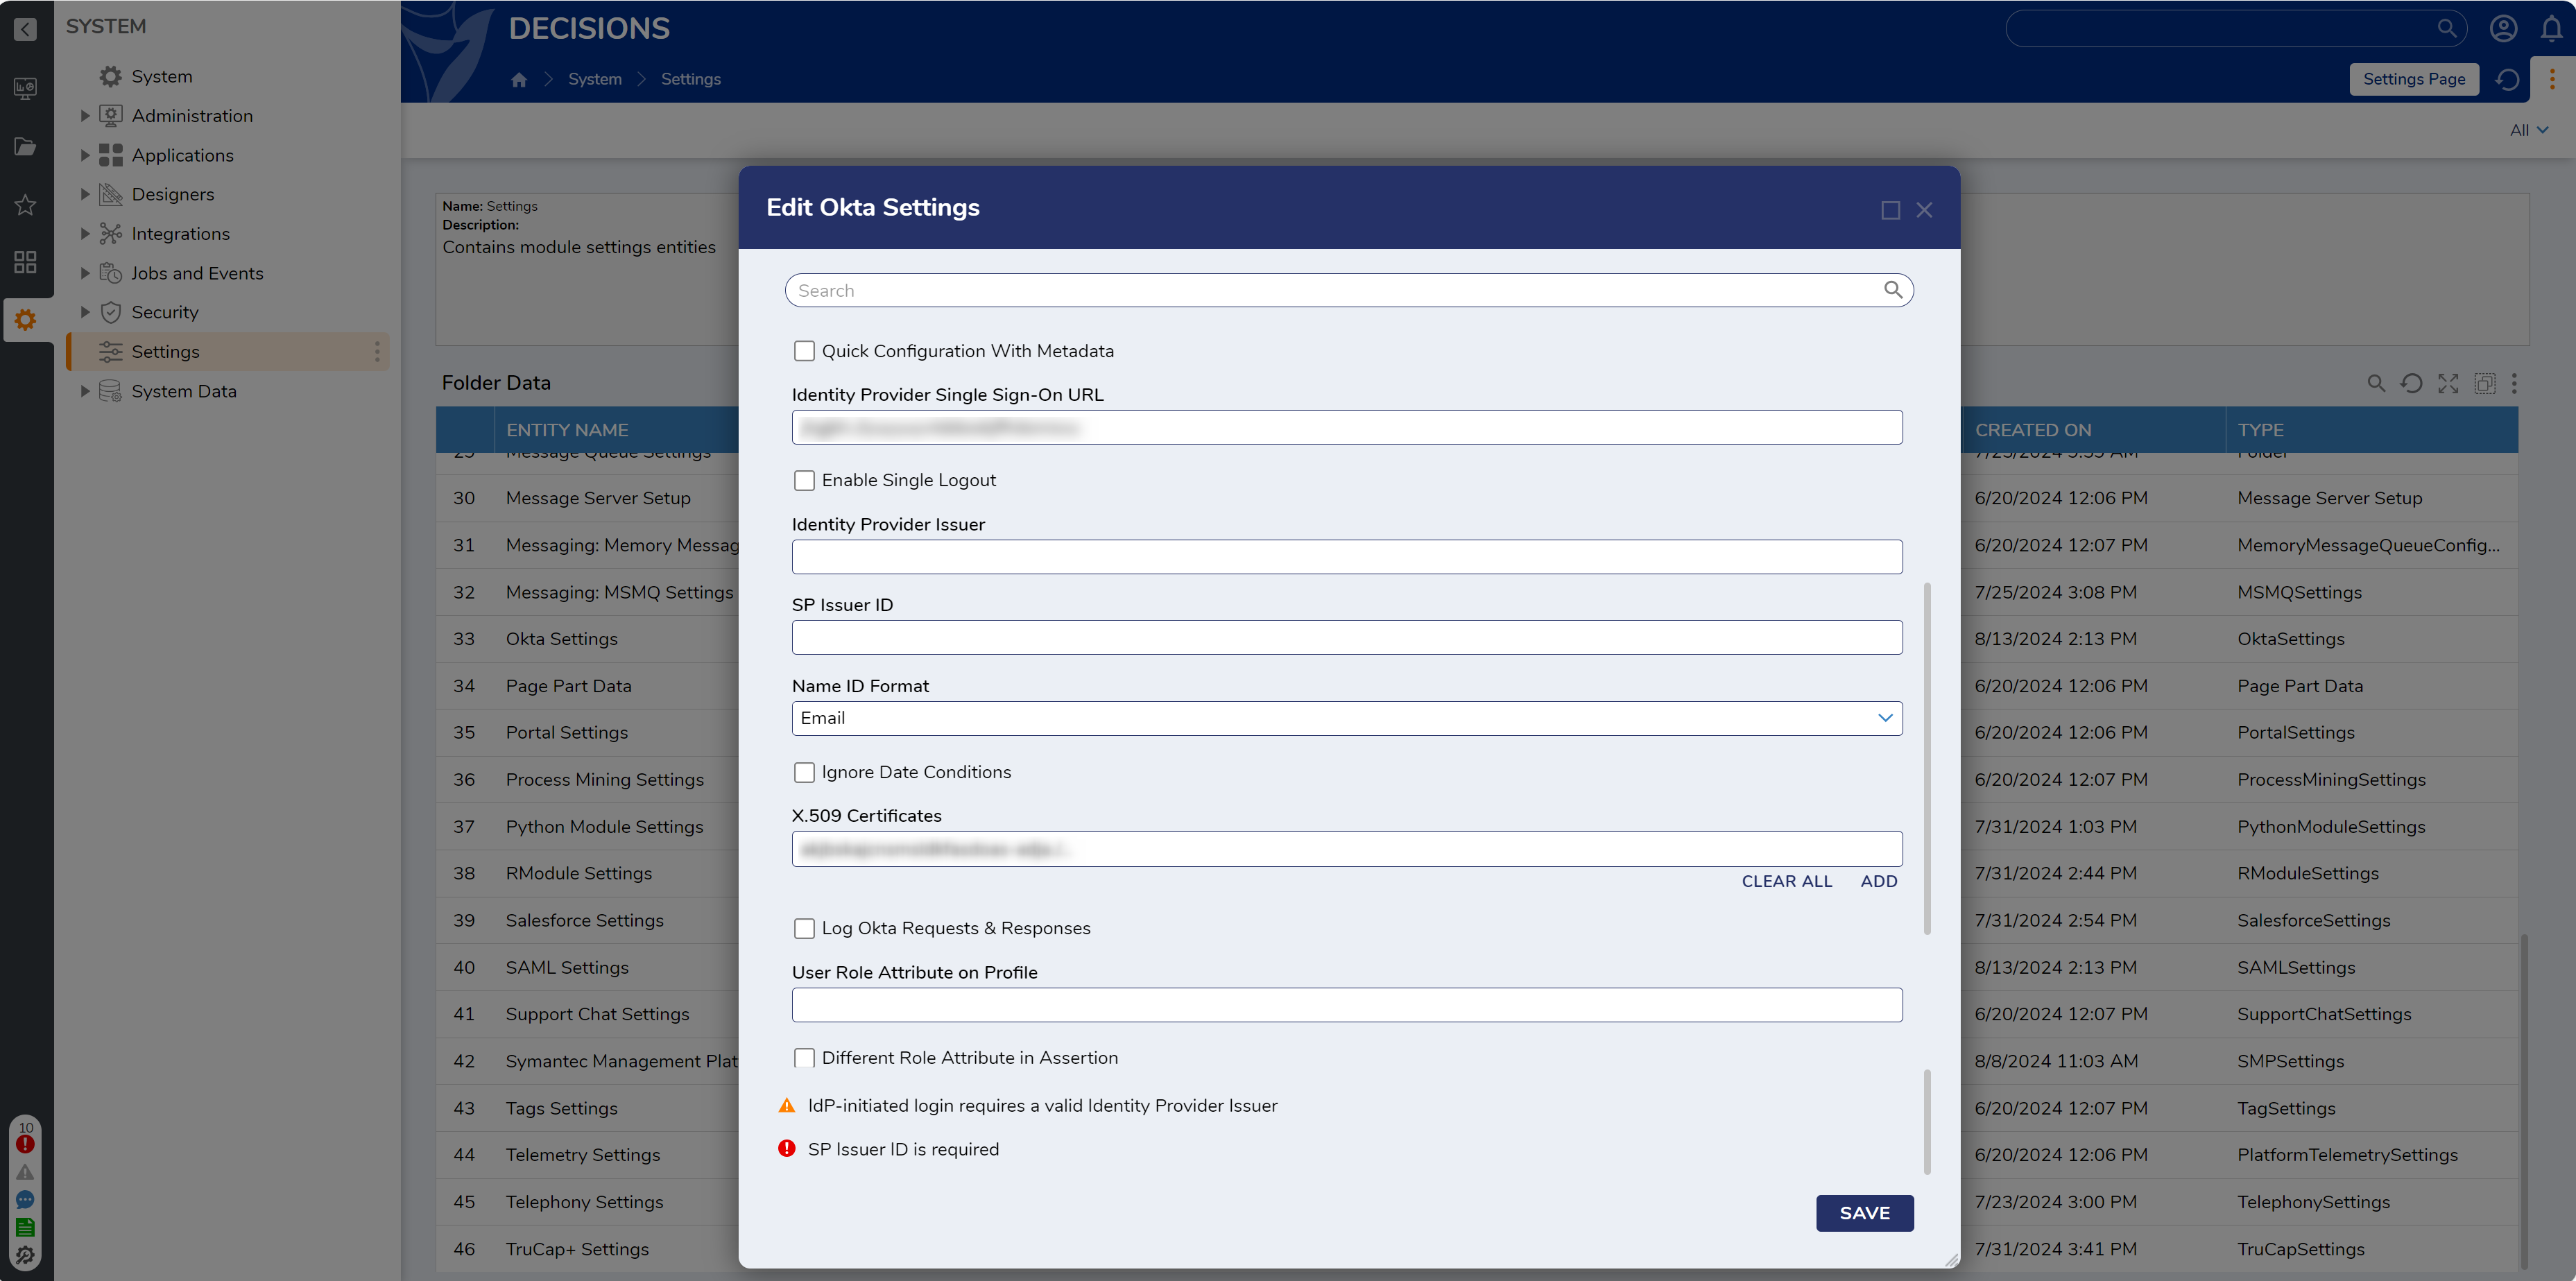
6 In Decisions, navigate to System > Settings. Right-click Okta Settings and click Edit.
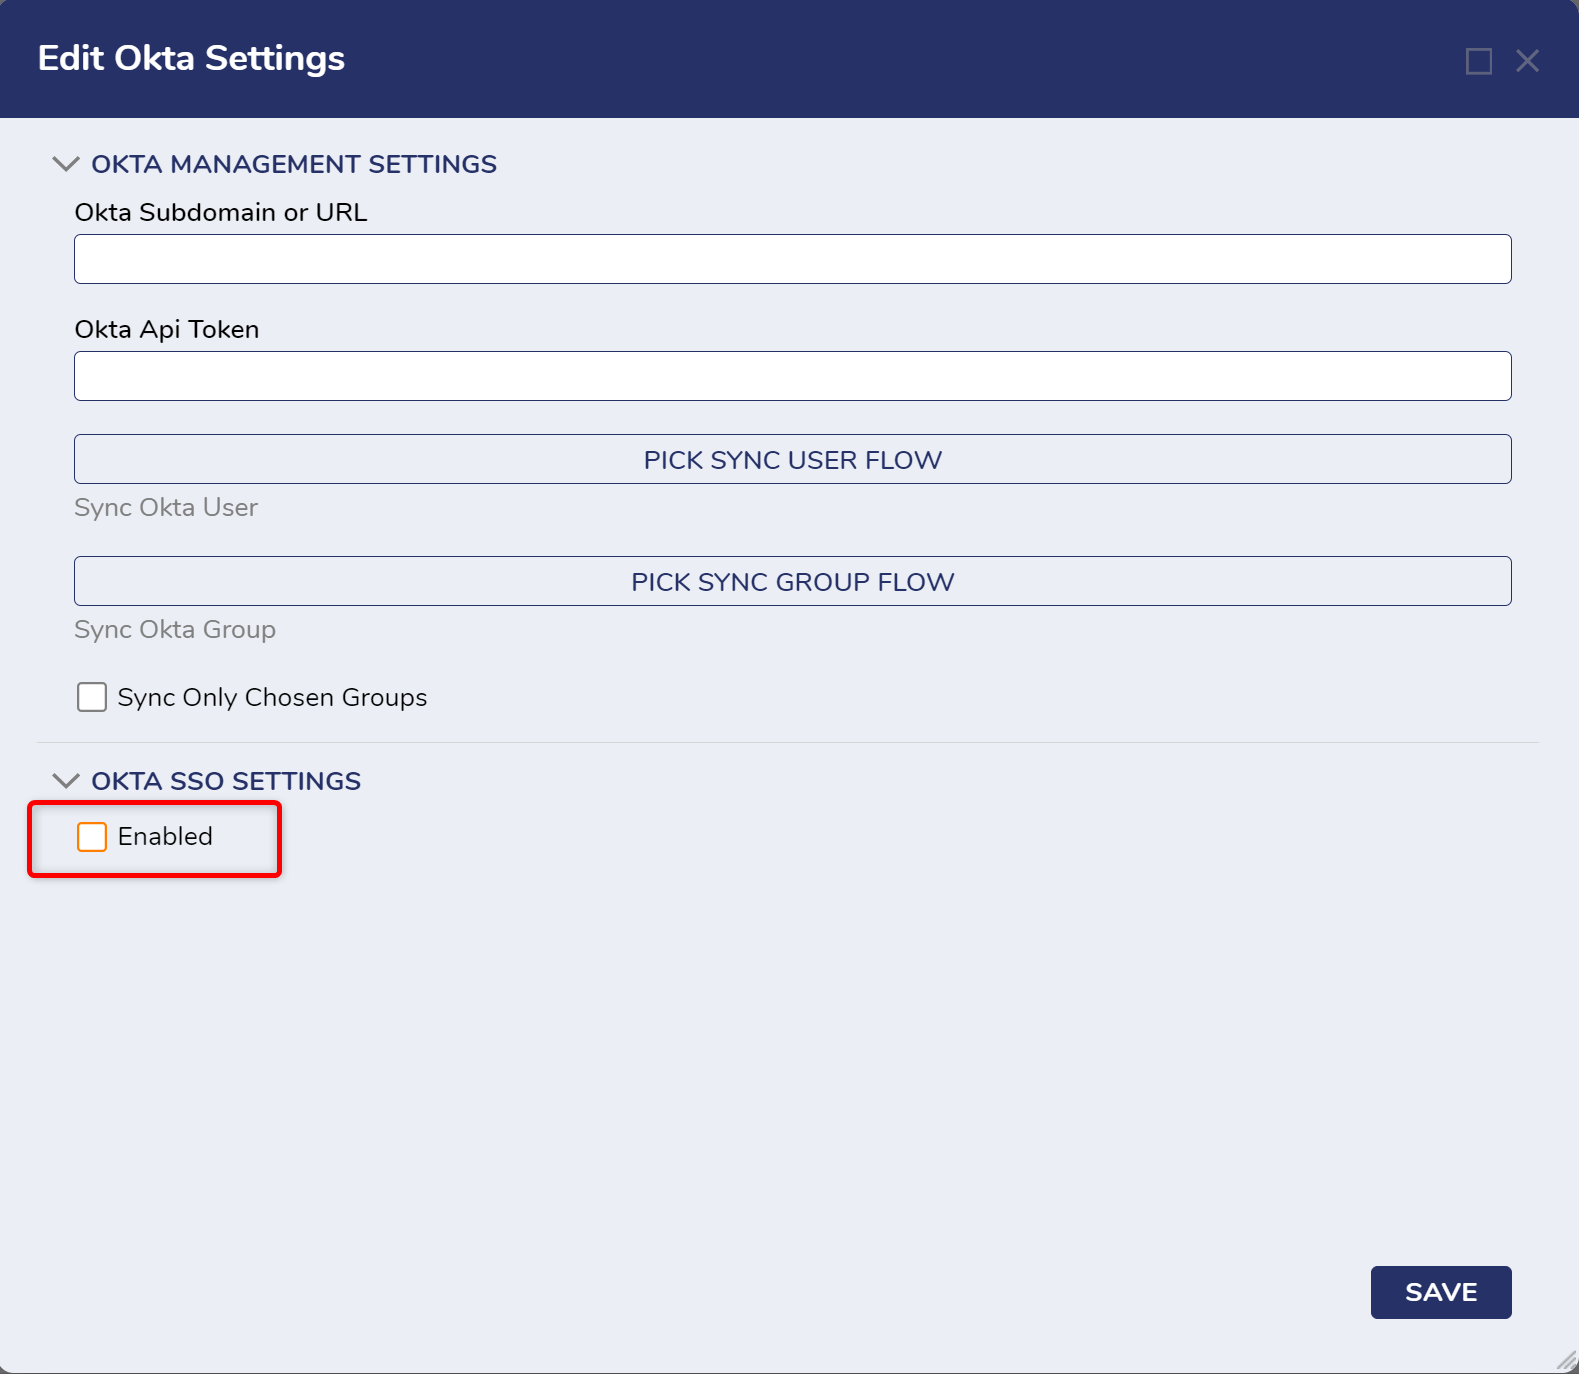
7 On the Edit Okta Settings window, check the Enabled checkbox.
8 On the Sign-On tab of the Okta app, click the View Setup Instructions button.
9 Locate the Identity Provider Single Sign-On URL and X.509 Certificate values and enter them in the appropriate fields on the Edit Okta Settings window.
10 The SP Issuer ID field can be set to the value of Identity Provider Issuer or any other value of choice.
11 Supply the Okta Subdomain or URL and an Okta API Token at the top of Okta Settings to automatically sync users & groups or to manage Okta accounts from Decisions. If the organization has is named myOrganization.okta.com, enter "myOrganization". If the organization is like dev-999999.oktapreview.com, enter " dev-999999.oktapreview.com". After all other fields are configured, click SAVE.
12 As the Okta app administrator, navigate to Security > API > Tokens > Create Token in Okta to generate API token.
13 Click OK to save settings.
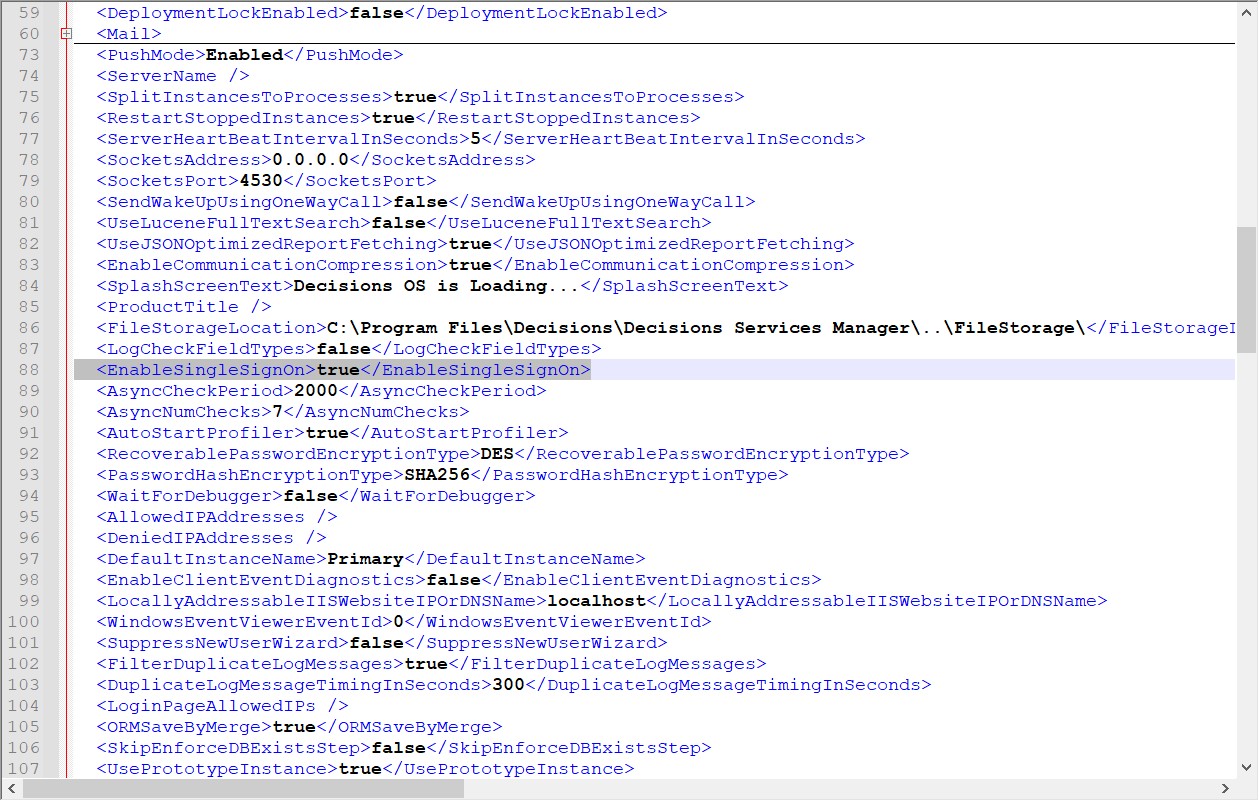
14 Set EnableSingleSignOn to true in Settings.xml and restart SHM. Logins will now be handled by Okta.
from: https://documentation.decisions.com/v9/docs/okta-integration-troubleshooting
.png)


