Installing a Failover (HA) Server

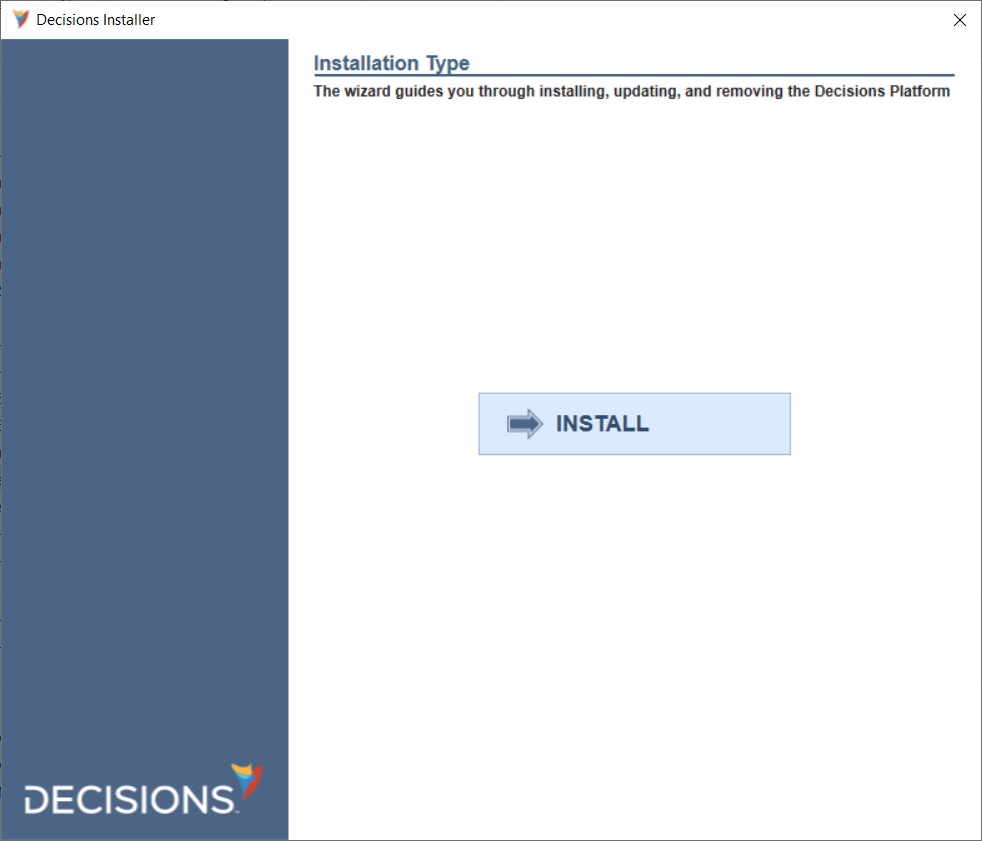
1 Right-click the downloaded DecisionsServerInstaller application to Run as administrator.
2 Select Install for the Installation Type.
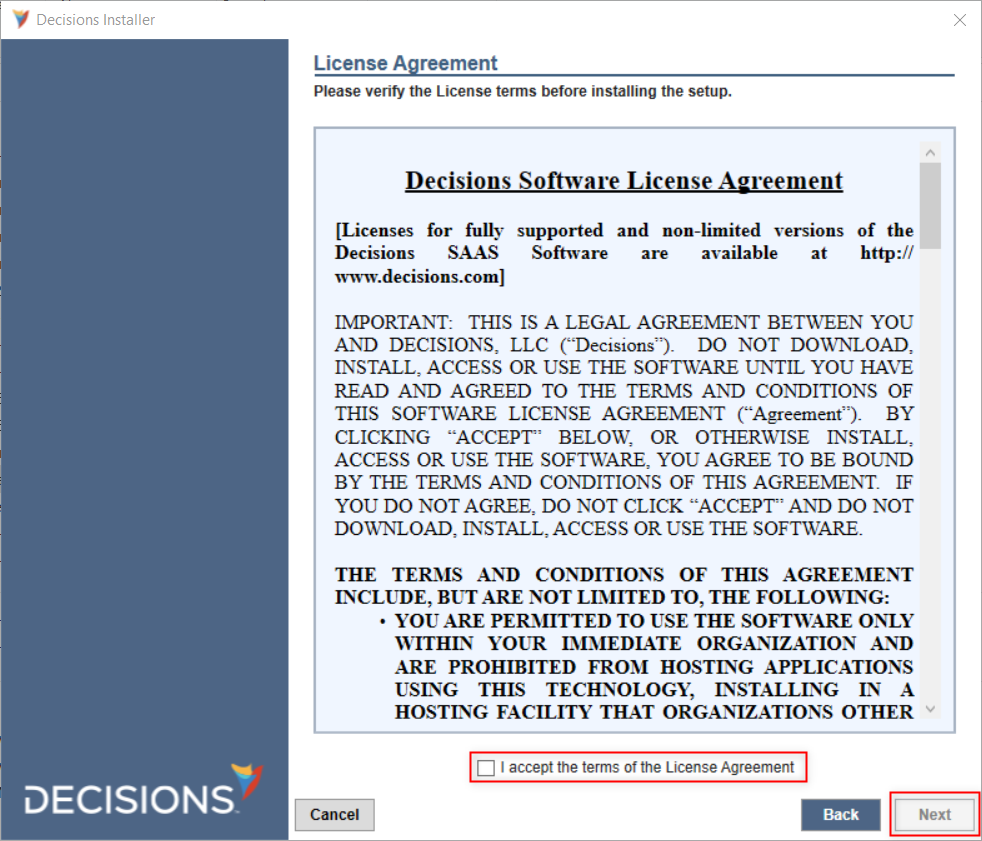
3 Then, read through the Decisions Software License Agreement and click the Next button.
4 Next, select the appropriate Installation Type. For this example, Failover (HA) Server is selected. Once done, click Next.
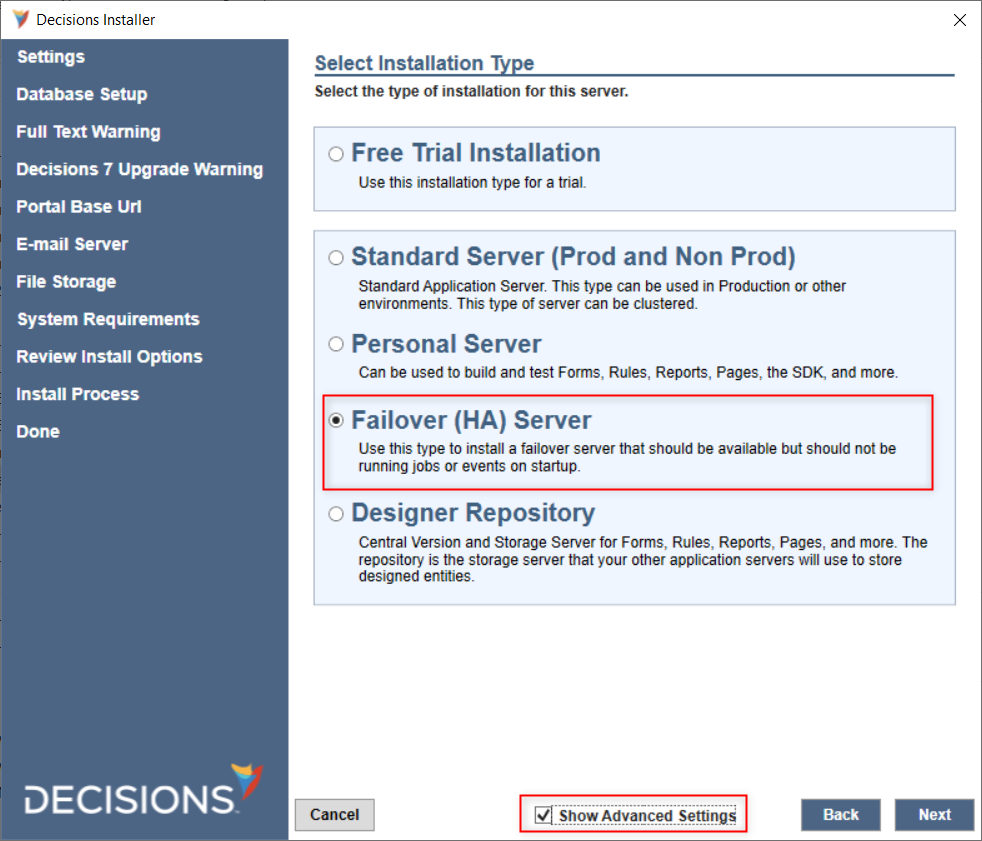
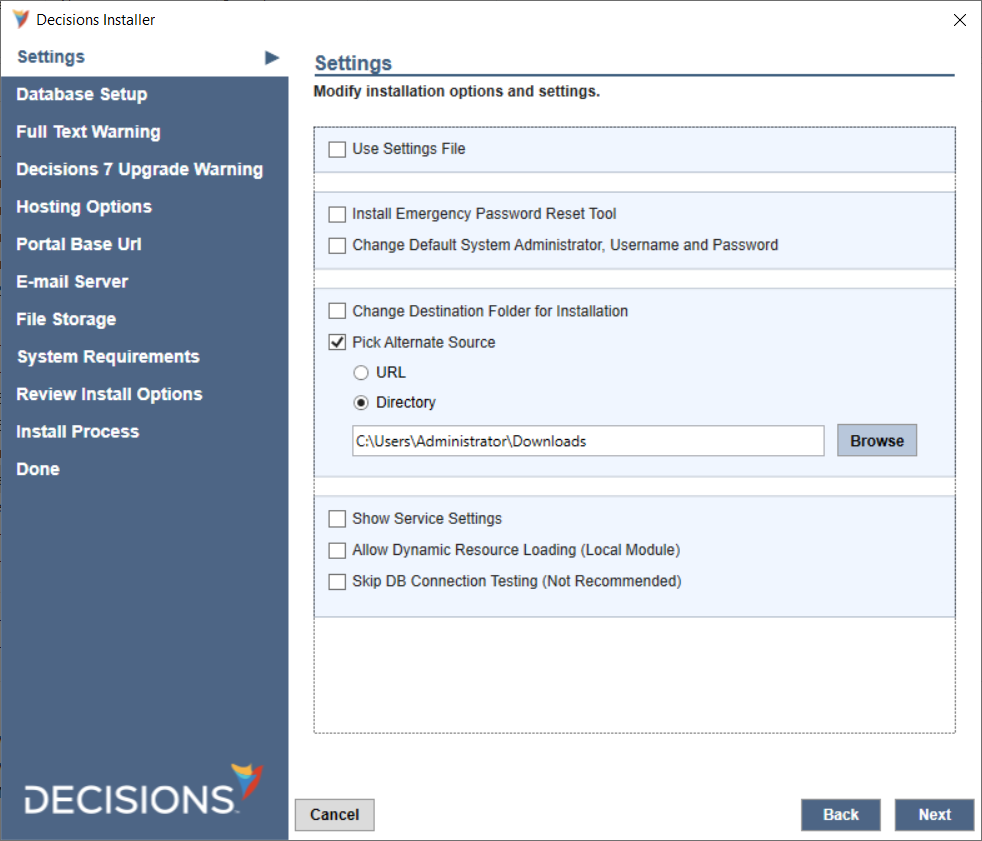
5 The Advanced Settings are listed and described in the table beneath the image below. Once done, click Next.
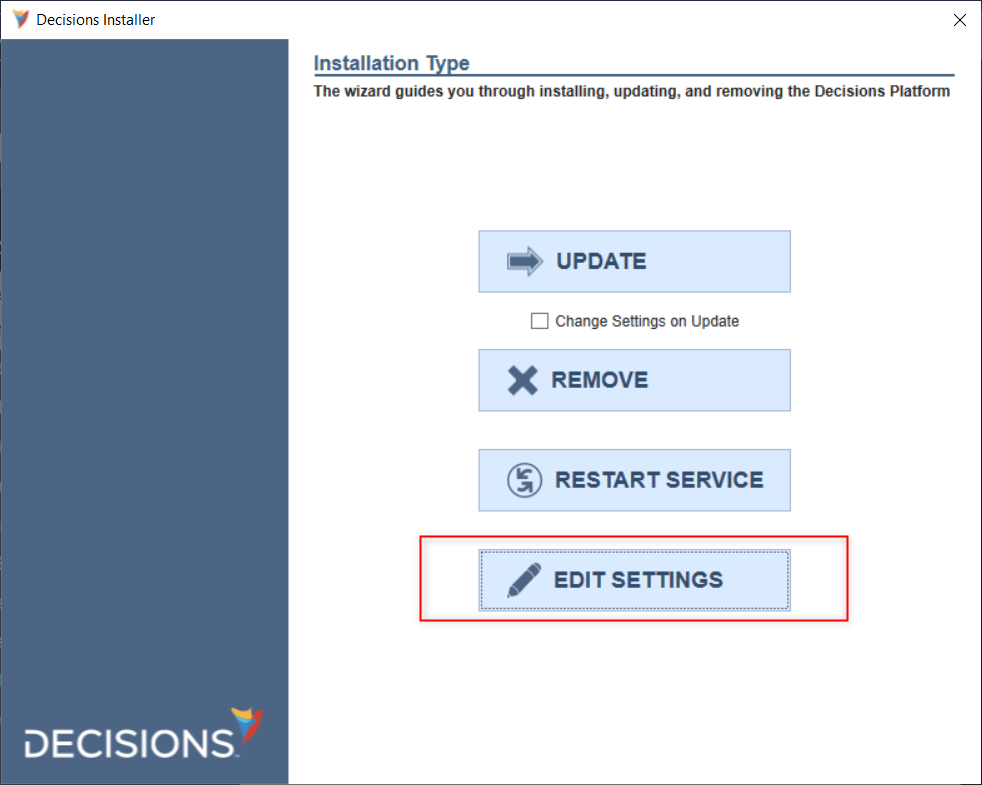
6 Continue the installation as demonstrated in the Installation Guide. Following a successful installation, reopen the Decisions installer, and click EDIT SETTINGS.
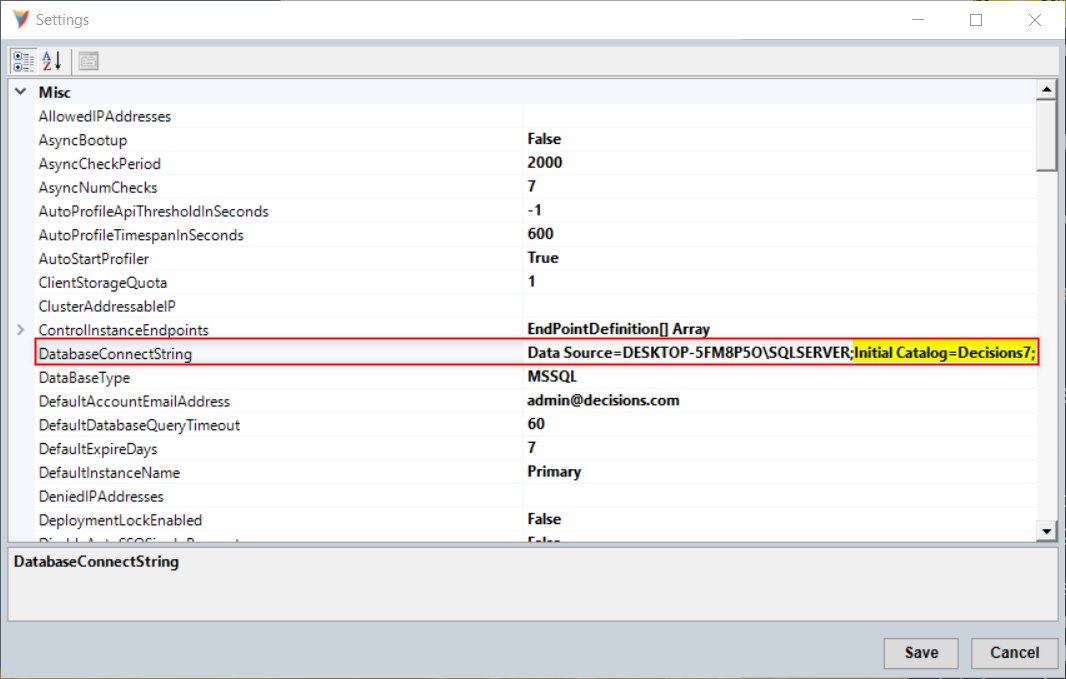
7 In the Settings window, navigate to the DatabaseConnectString and ensure the Initial Catalog matches the database name used for the primary server.
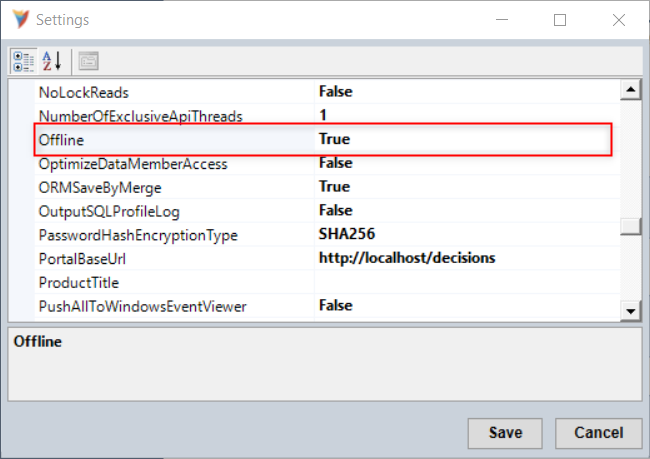
8 Then, navigate to the Offline attribute and use the drop-down menu to set it to "True". Click Save and exit.
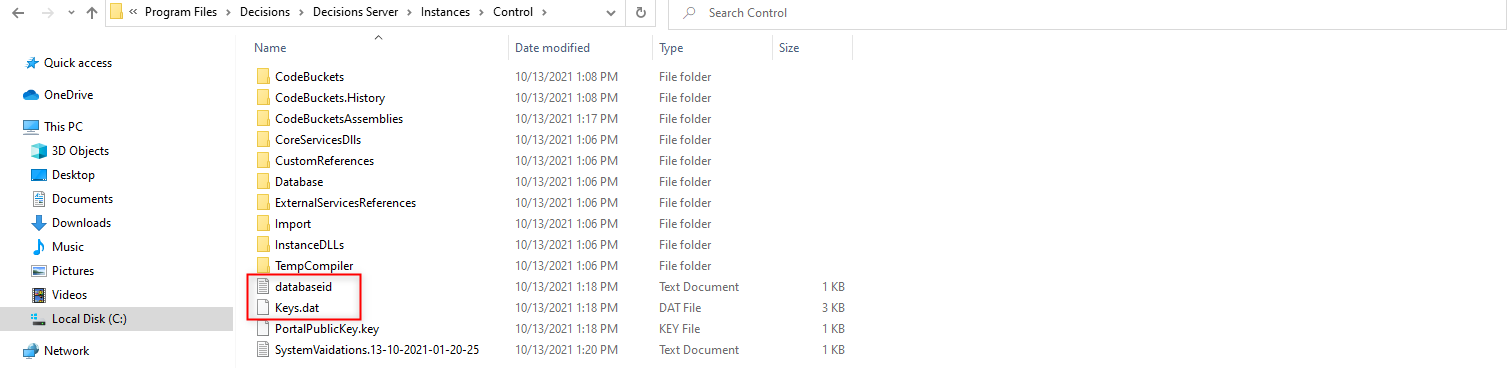
9 Lastly, replace the keys.dat and databaseid.txt files in the Failover (HA) Server file system with the keys.dat and databaseid.txt file from the primary server; the files must be identical in order for the new server to operate as the primary server in a disaster event. For this installation, the files can be found in the C:\Program Files\Decisions\Decisions Server\Instances\Control folder.
from: https://documentation.decisions.com/v9/docs/installing-a-failover-ha-server