Horizontal Folder Timeline

1 Create a new Page. In the Toolbox, open the Data > Folder headers. Select the Folder Horizontal Timeline component and add this to the workspace.
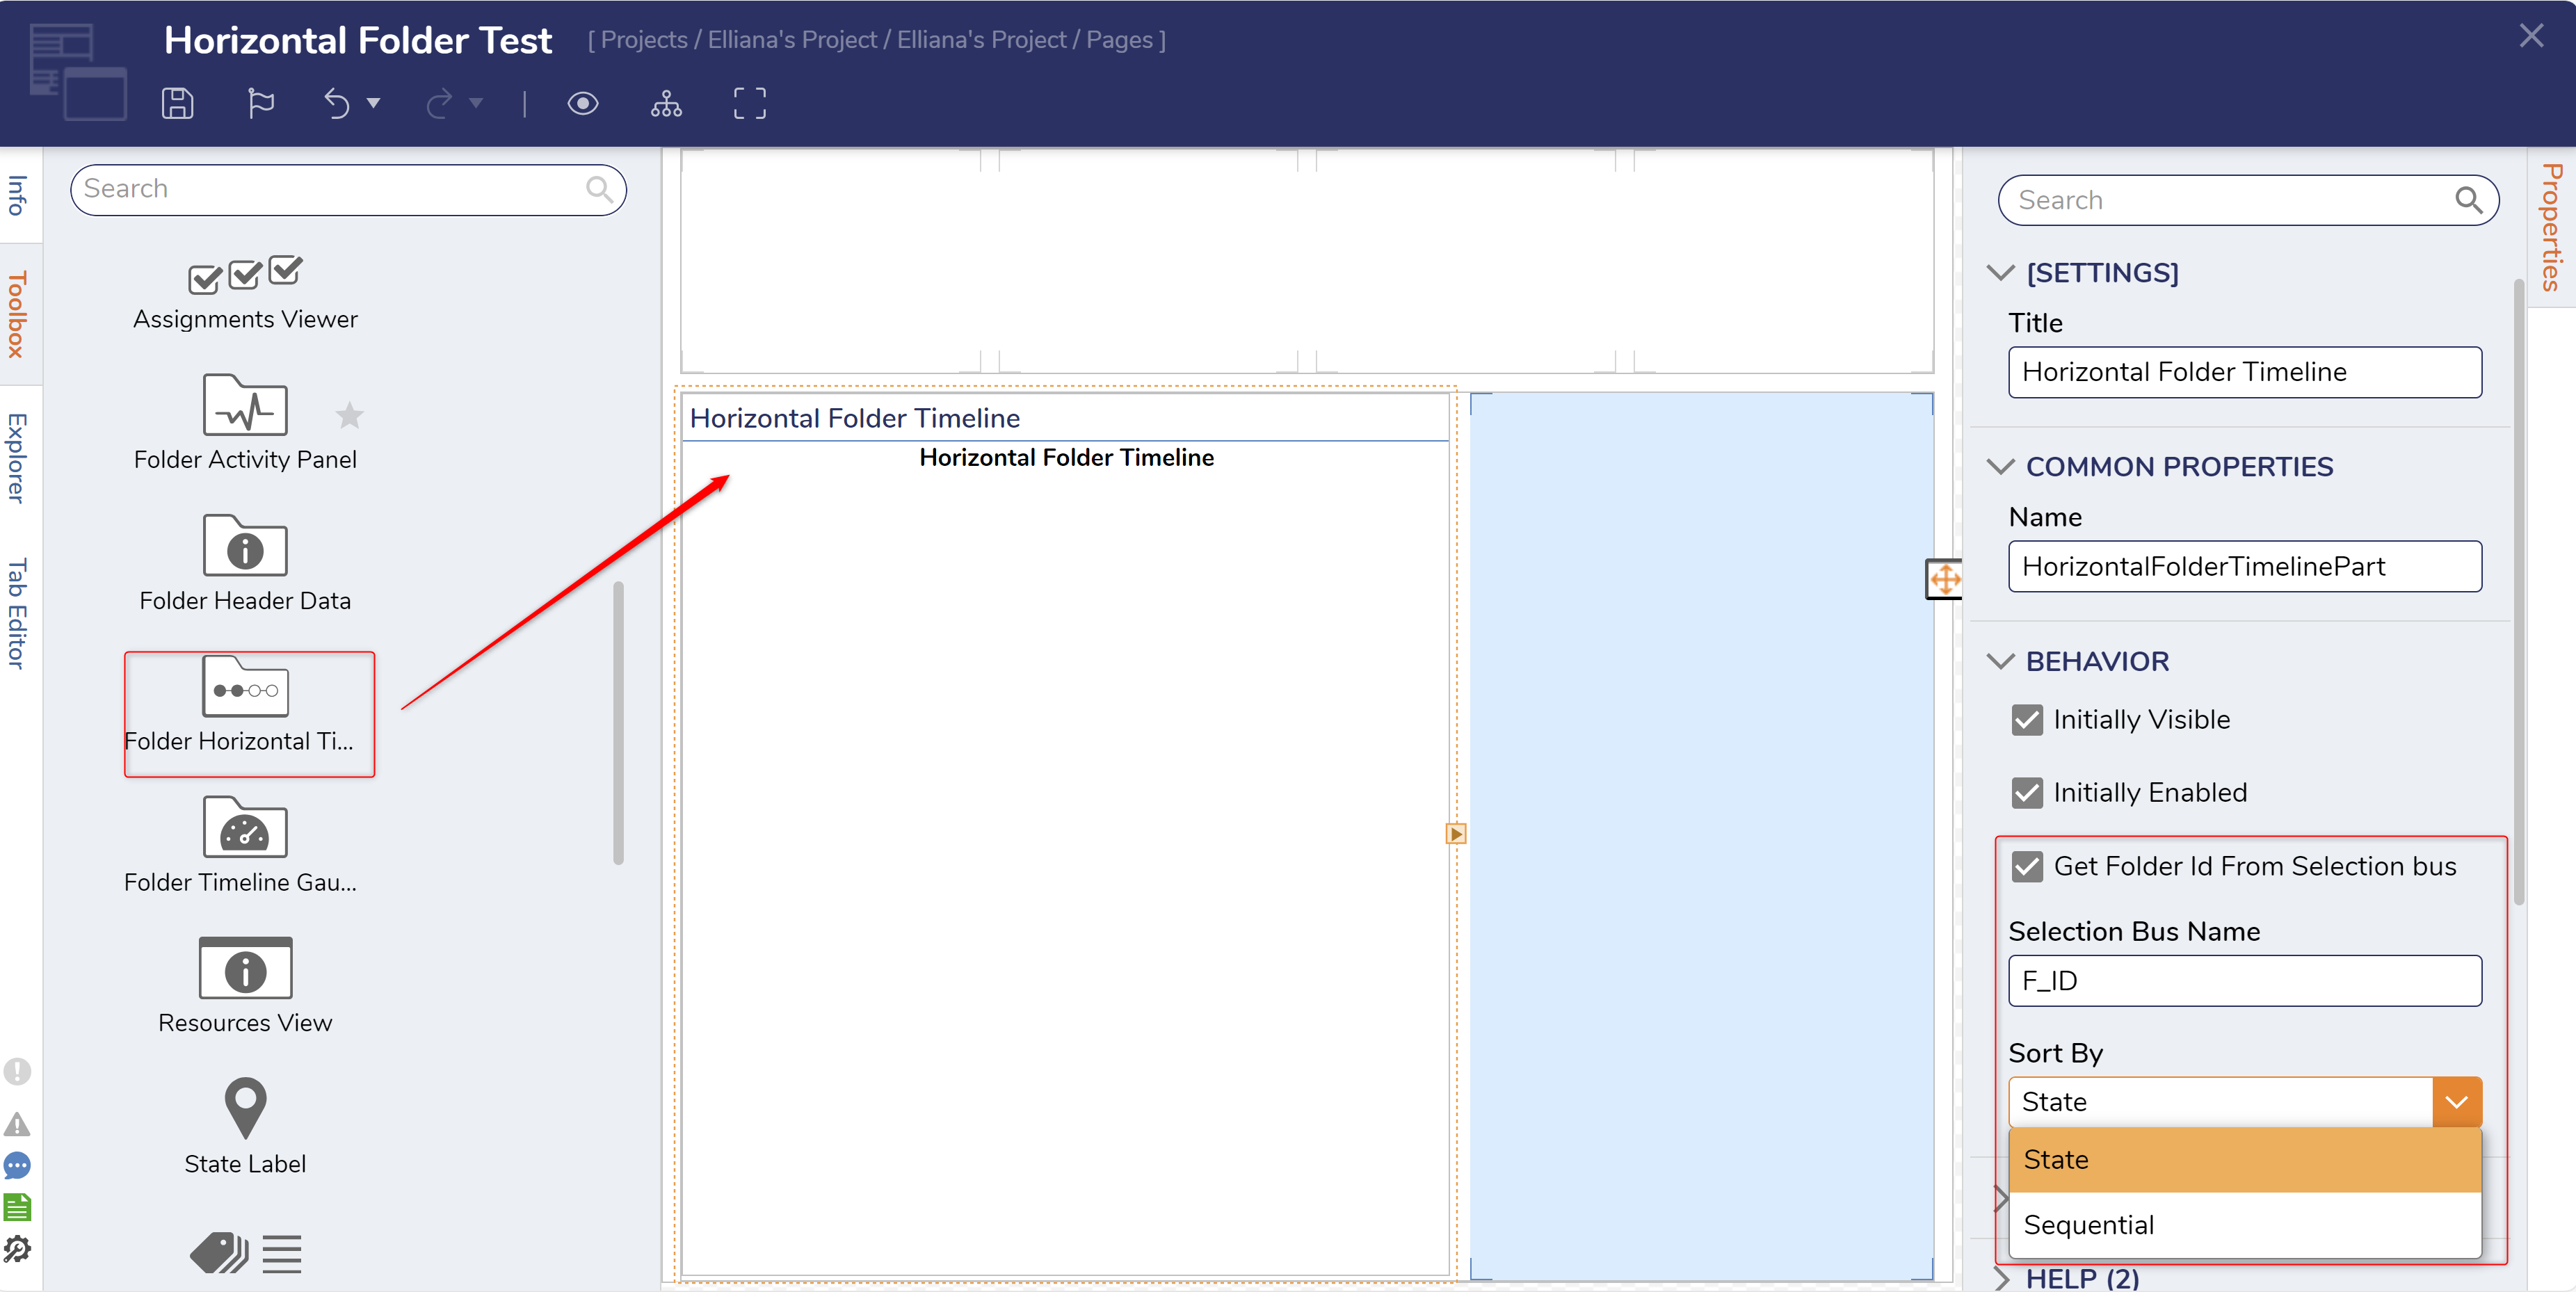
2 In the Properties panel for the control, open the BEHAVIOR section and check Get Folder ID by Selection Bus. Define the Selection Bus Name.
3 Under Sort By, select State or Sequential. The State setting will show the timeline in the order that the states are set on the Case Entity Structure, and the Sequential setting will show the timeline in which the Case Entity hits each state.
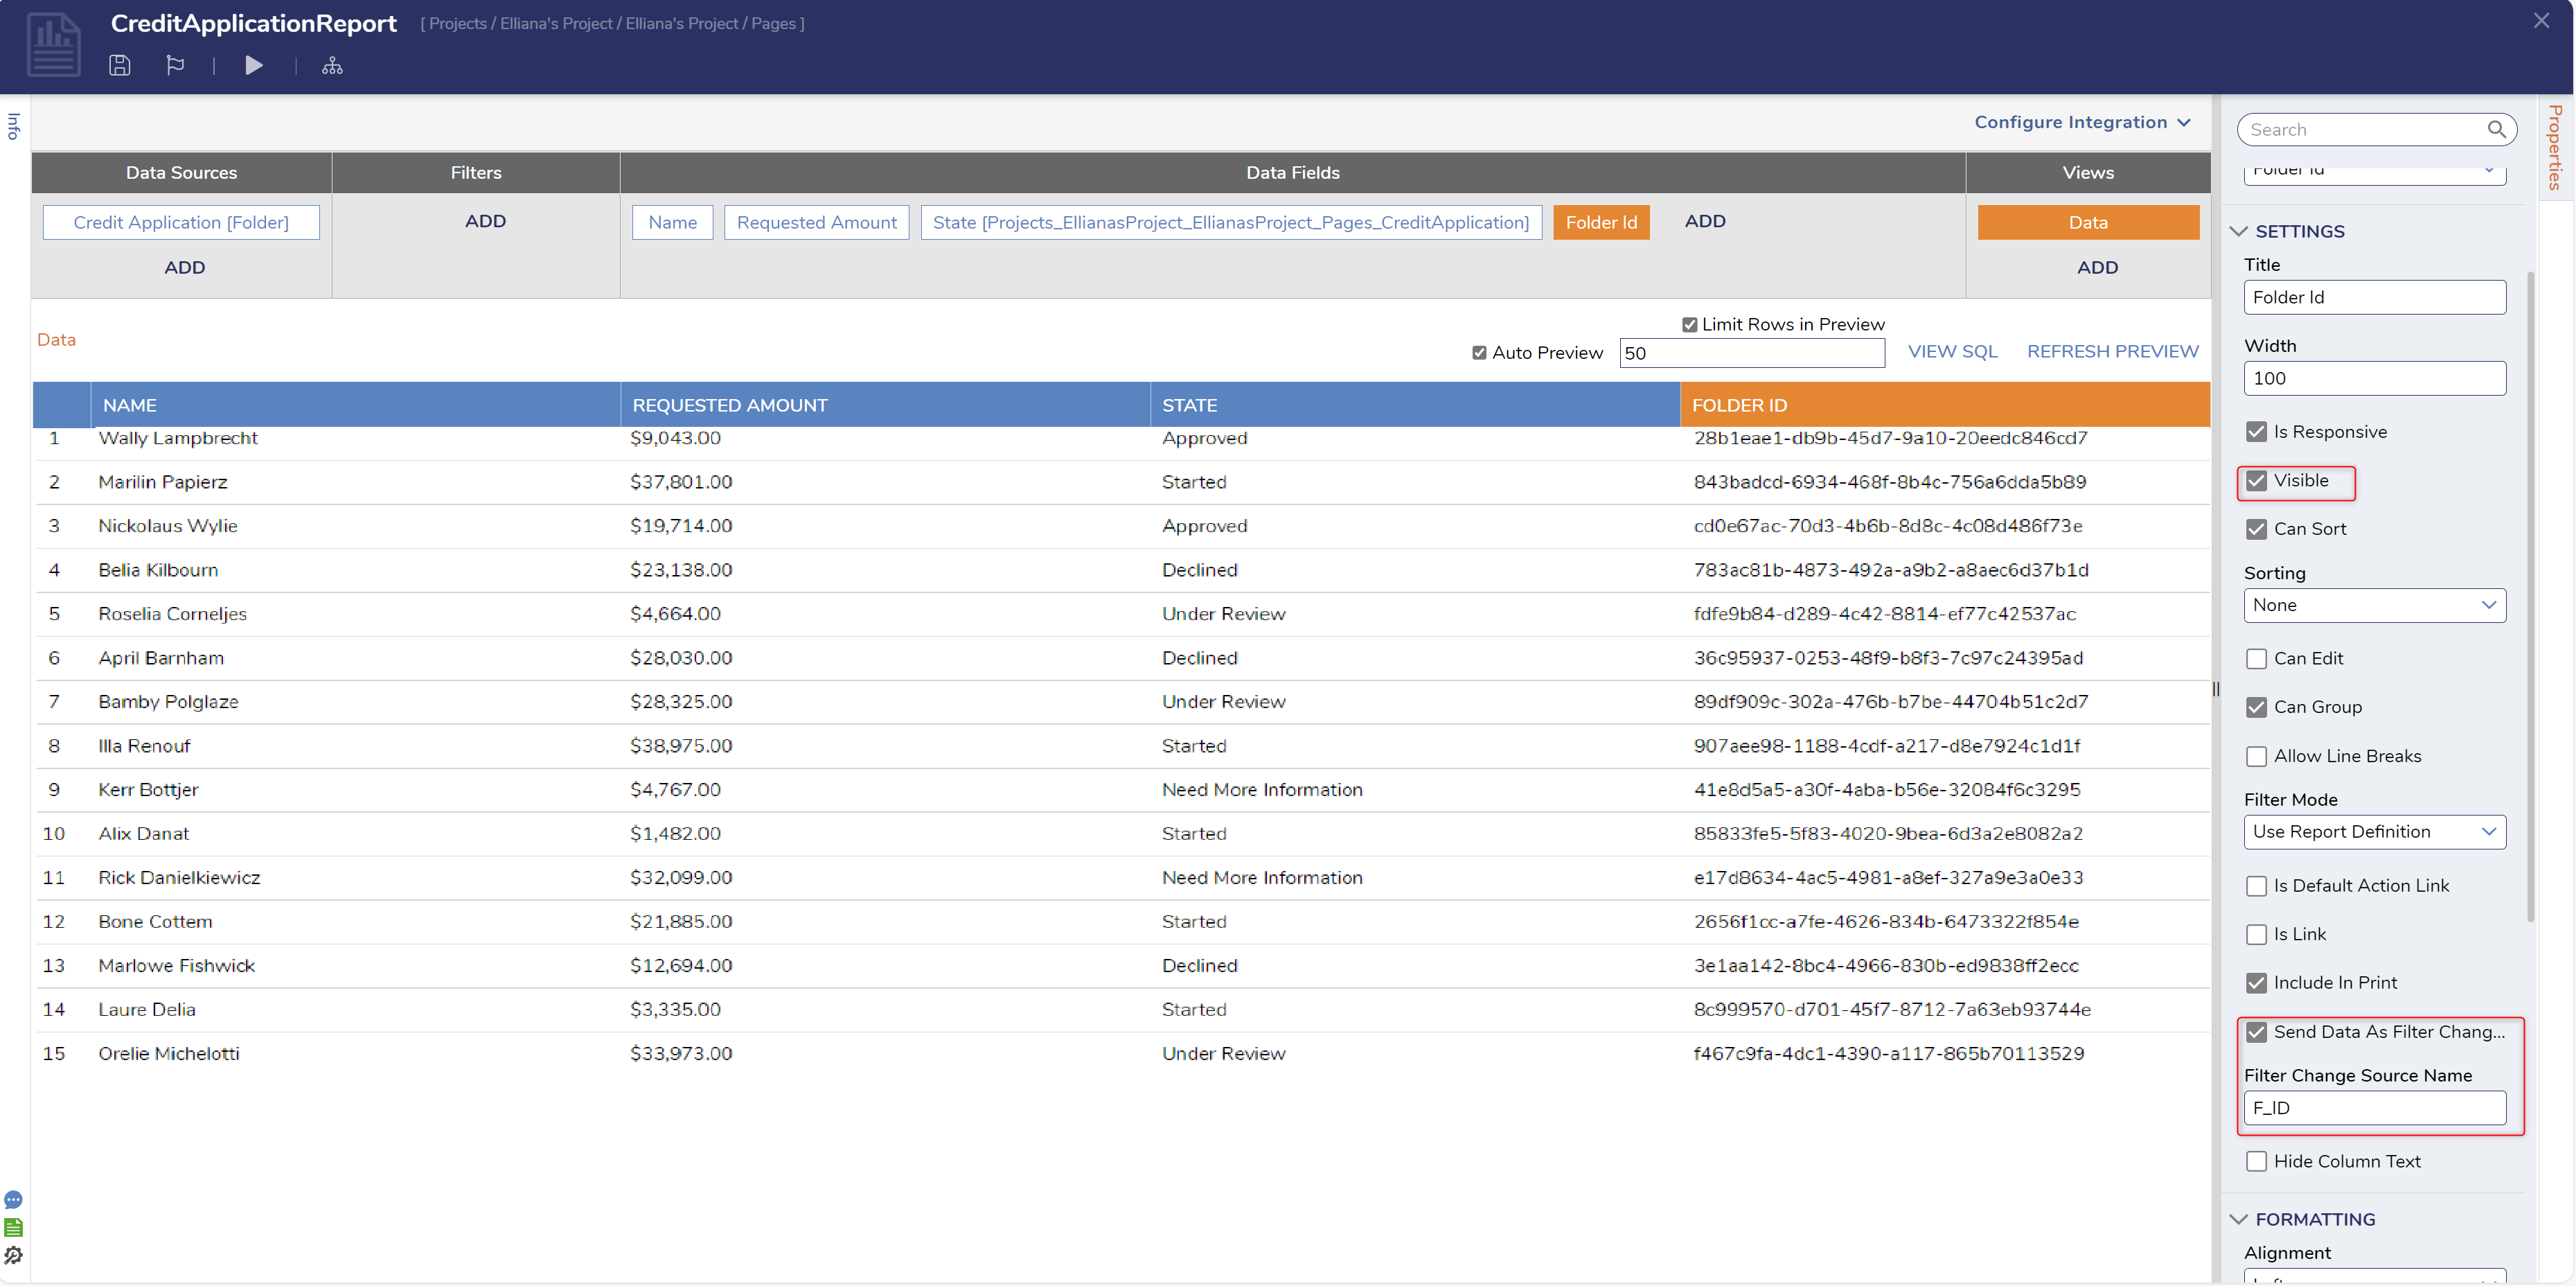
4 Add a Report Viewer to the Page. The Report used for this example uses a Case Entity called Credit Application. The Data Fields for this Report are Name, Requested Amount, State, and Folder ID. The Folder ID field is set to Send Data As Filter Change Source; this variable needs to be the same as the Selection Bus Name on the Horizontal Timeline. The Folder ID field is also set to be hidden.
5 Save and close the Page Designer. Add the created Page to a Folder.
6 On the Page, when selecting different Entities, notice the Horizontal Timeline changing to display the state of the selected Entity.
from: https://documentation.decisions.com/v9/docs/folder-horizontal-timeline