Editing CSV Records in a Form

1 From a Designer Project, select the CREATE FLOW button from the Global Action Bar; select Flow, provide a Name and click CREATE.
2 From the Flow Designer, click the SETUP INPUT DATA button. Then, click DEFINE.
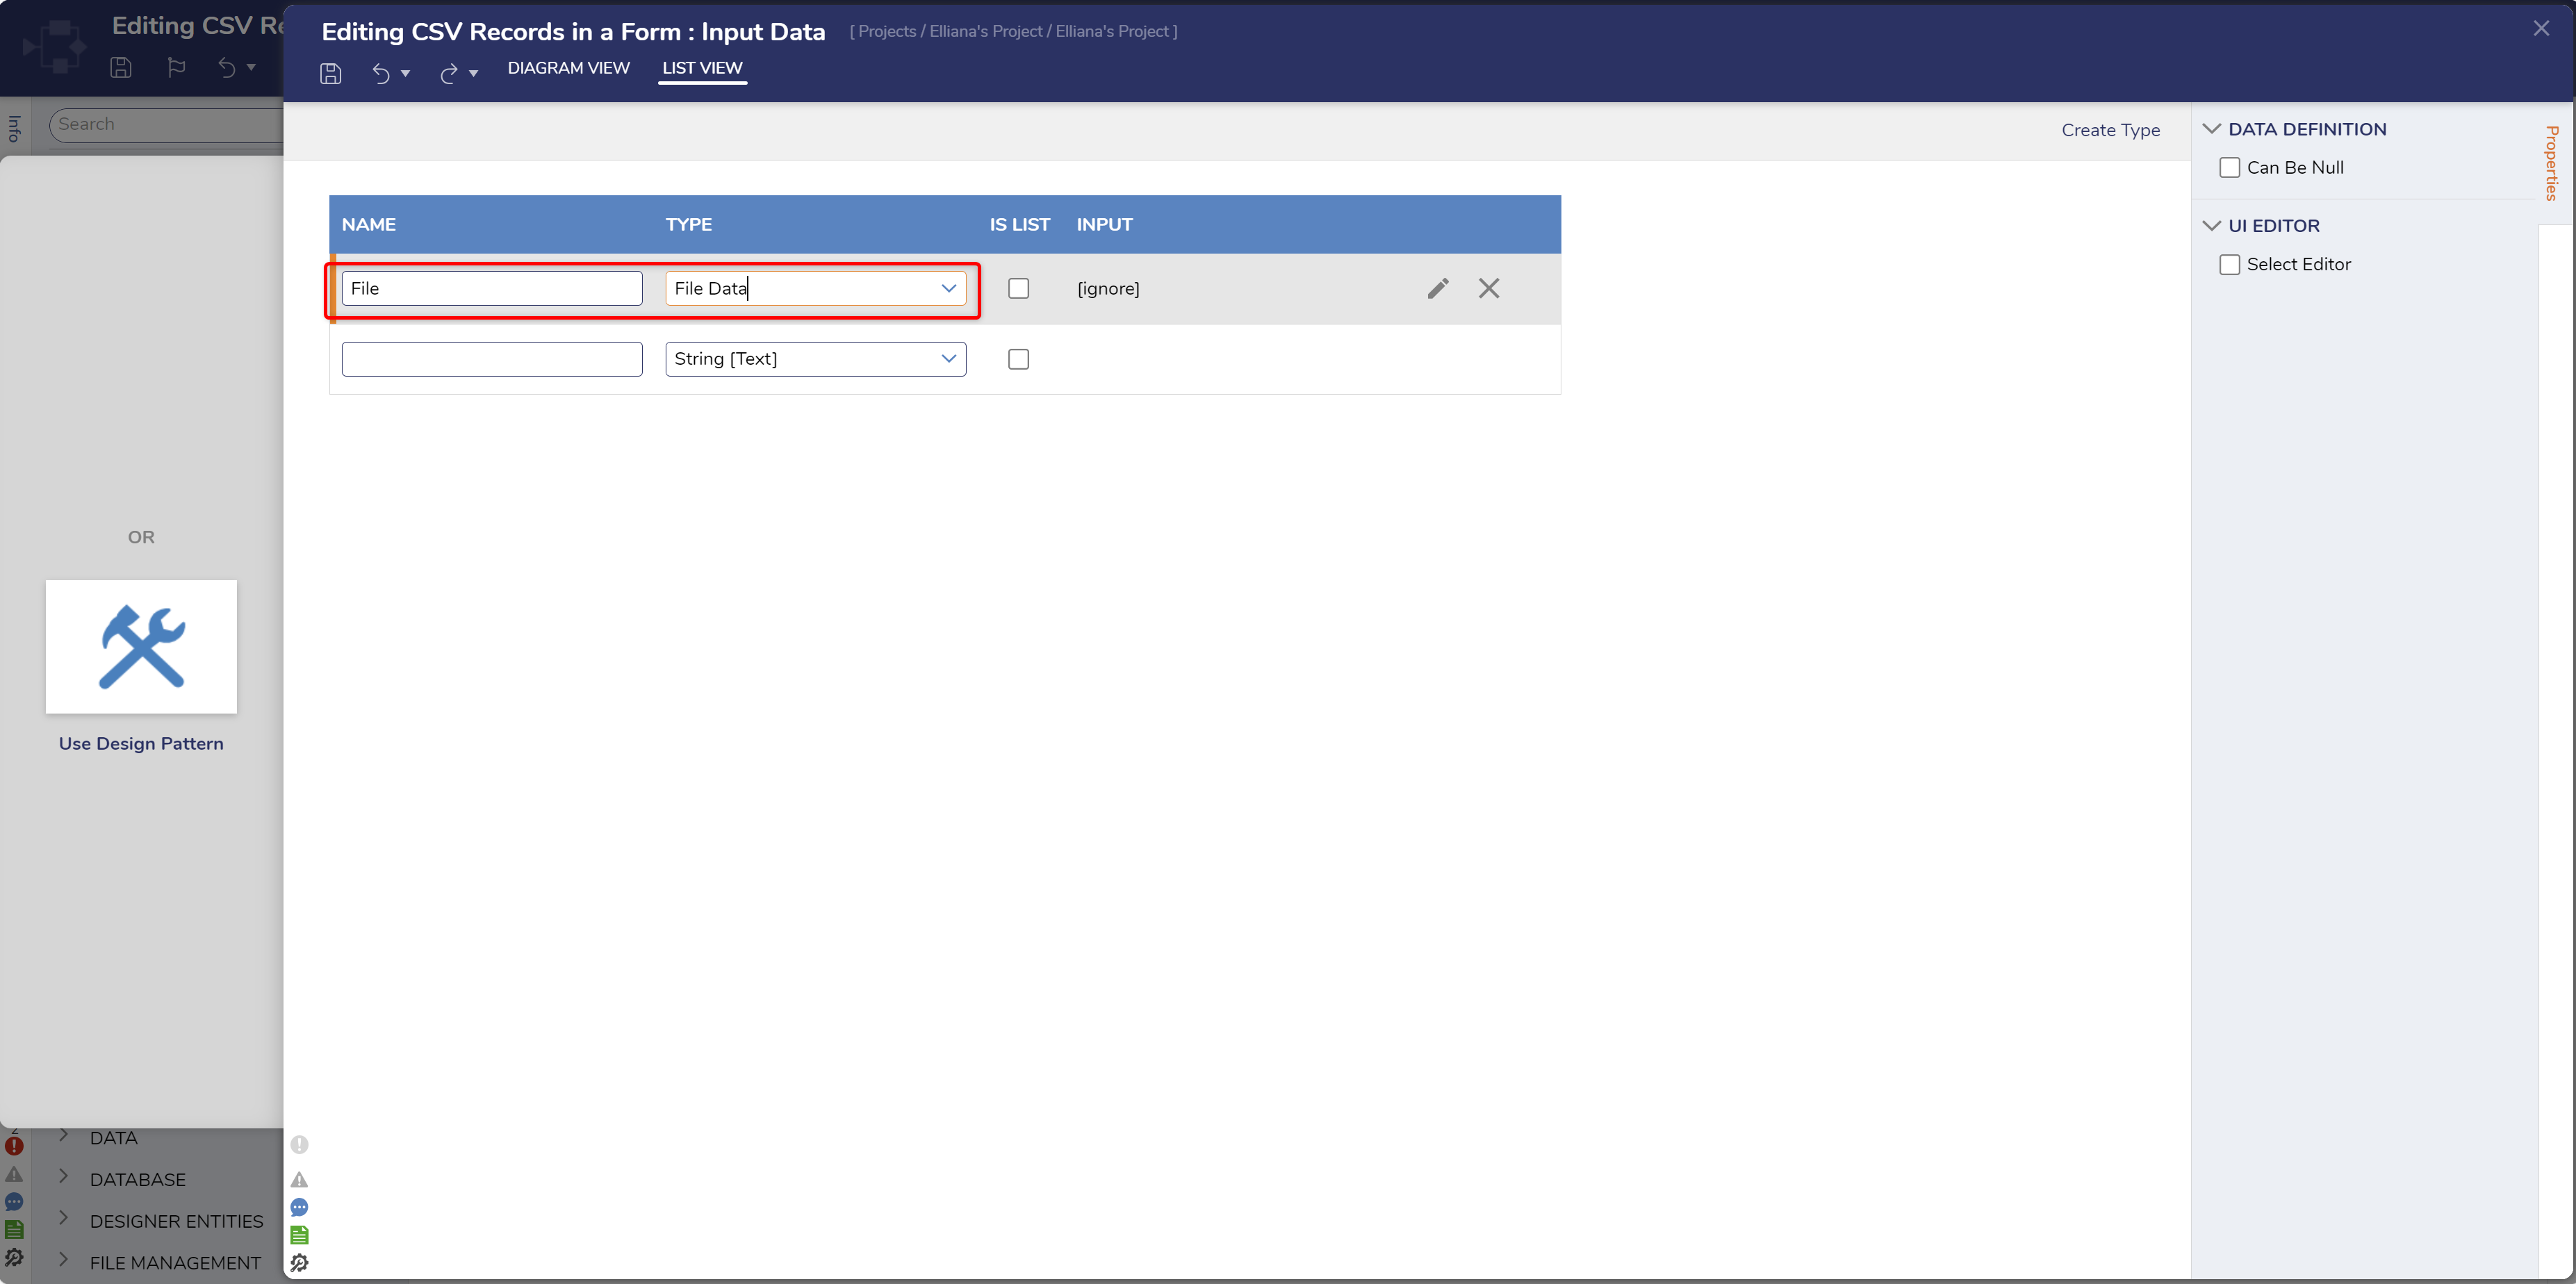
3 In the Data Definitions screen, NAME the Data "File", and select File Data from the TYPE drop-down. Save the Data Definition, then close the window.
4 Attach a Show Form step from the FAVORITE STEPS category of the Toolbox tab to the Start step.
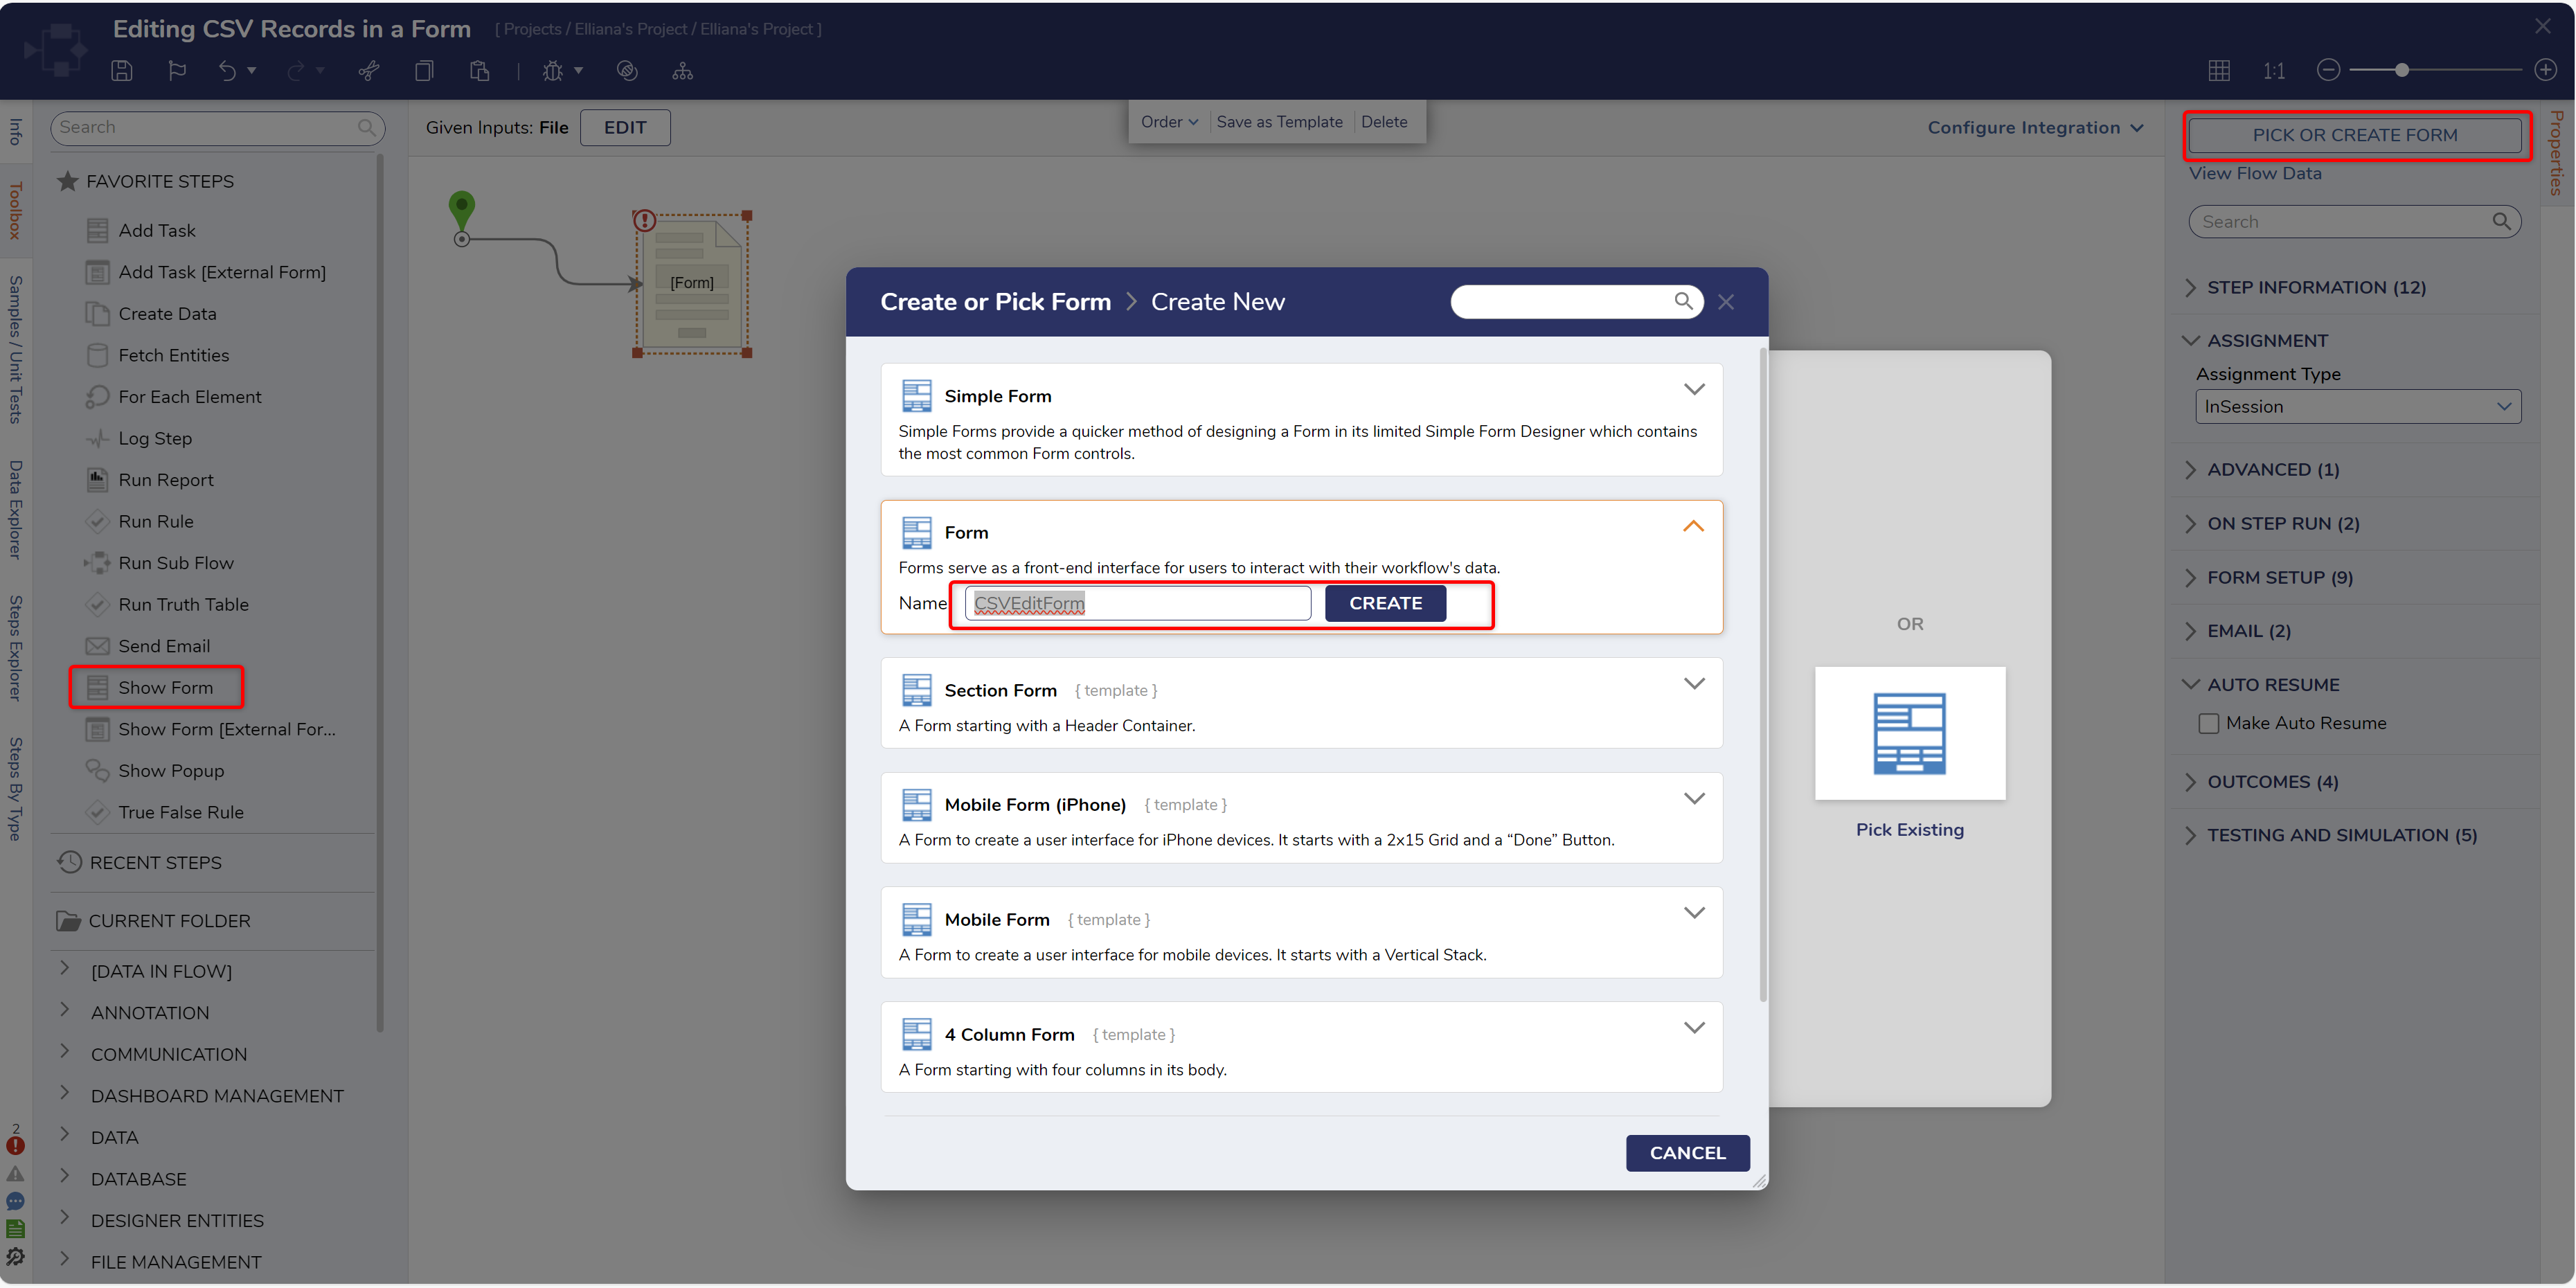
5 From the Show Form step's Properties tab, click PICK OR CREATE FORM, select CREATE, choose Form, provide a Name, then click CREATE.
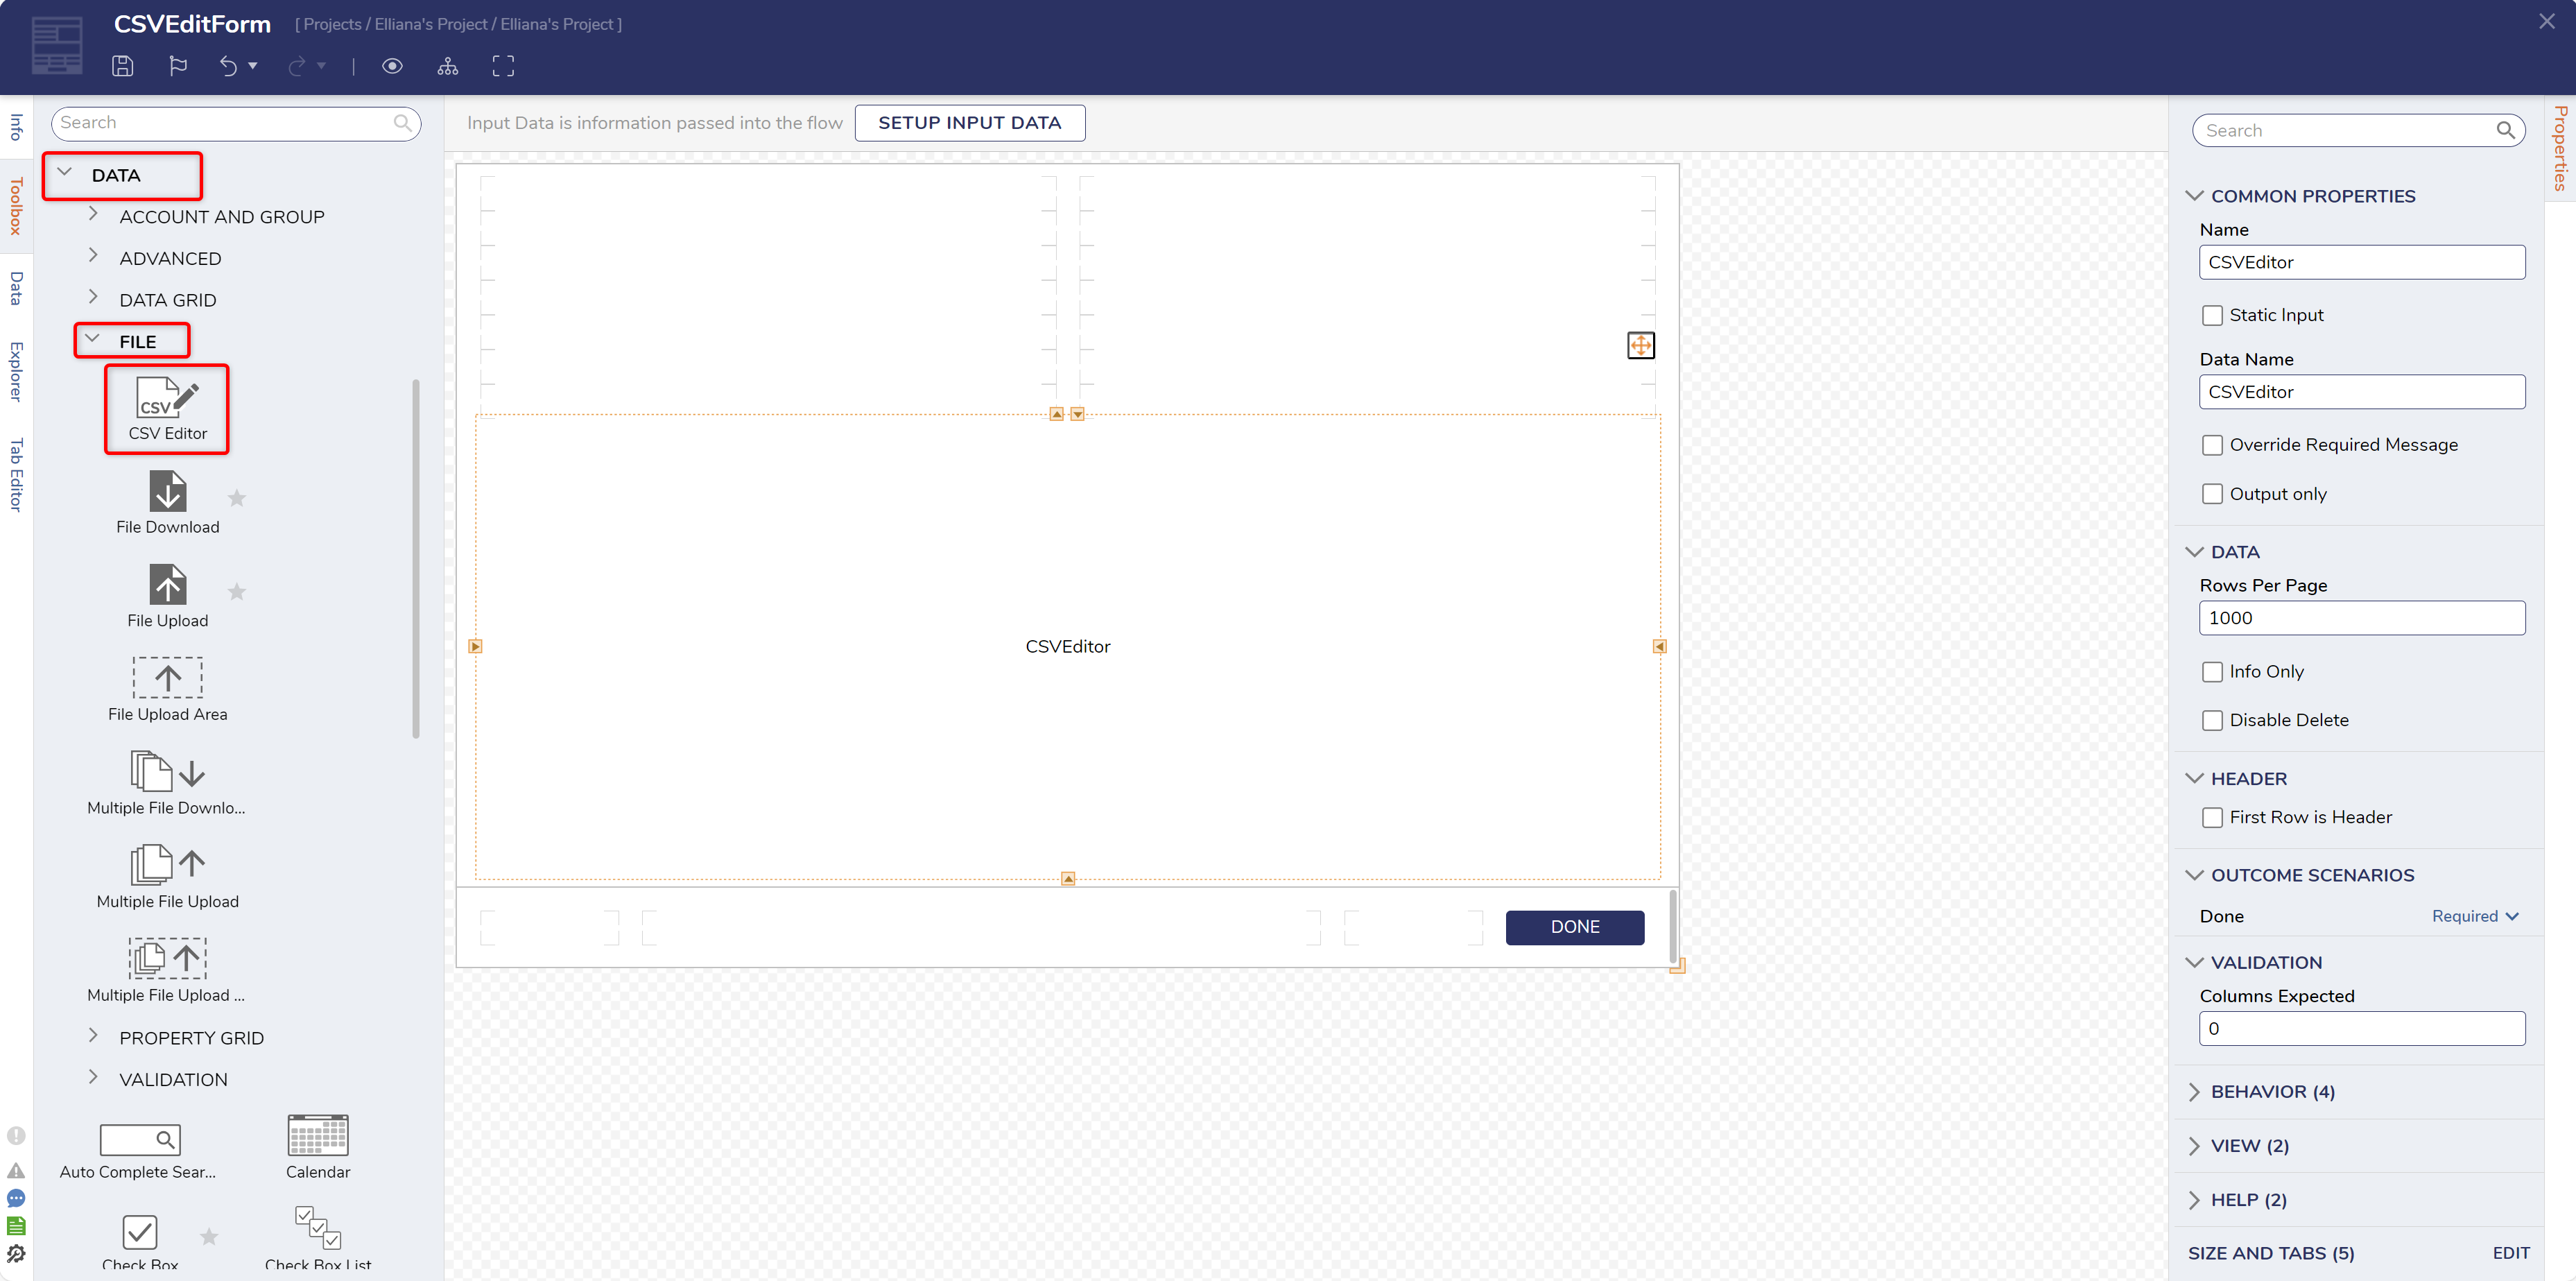
6 From the Form Designer, create a Form containing a Button component from the FAVORITES category of the Toolbox tab and a CSV Editor from Toolbox > DATA > FILE.
7 Save the Form, then close the Form Designer via X.
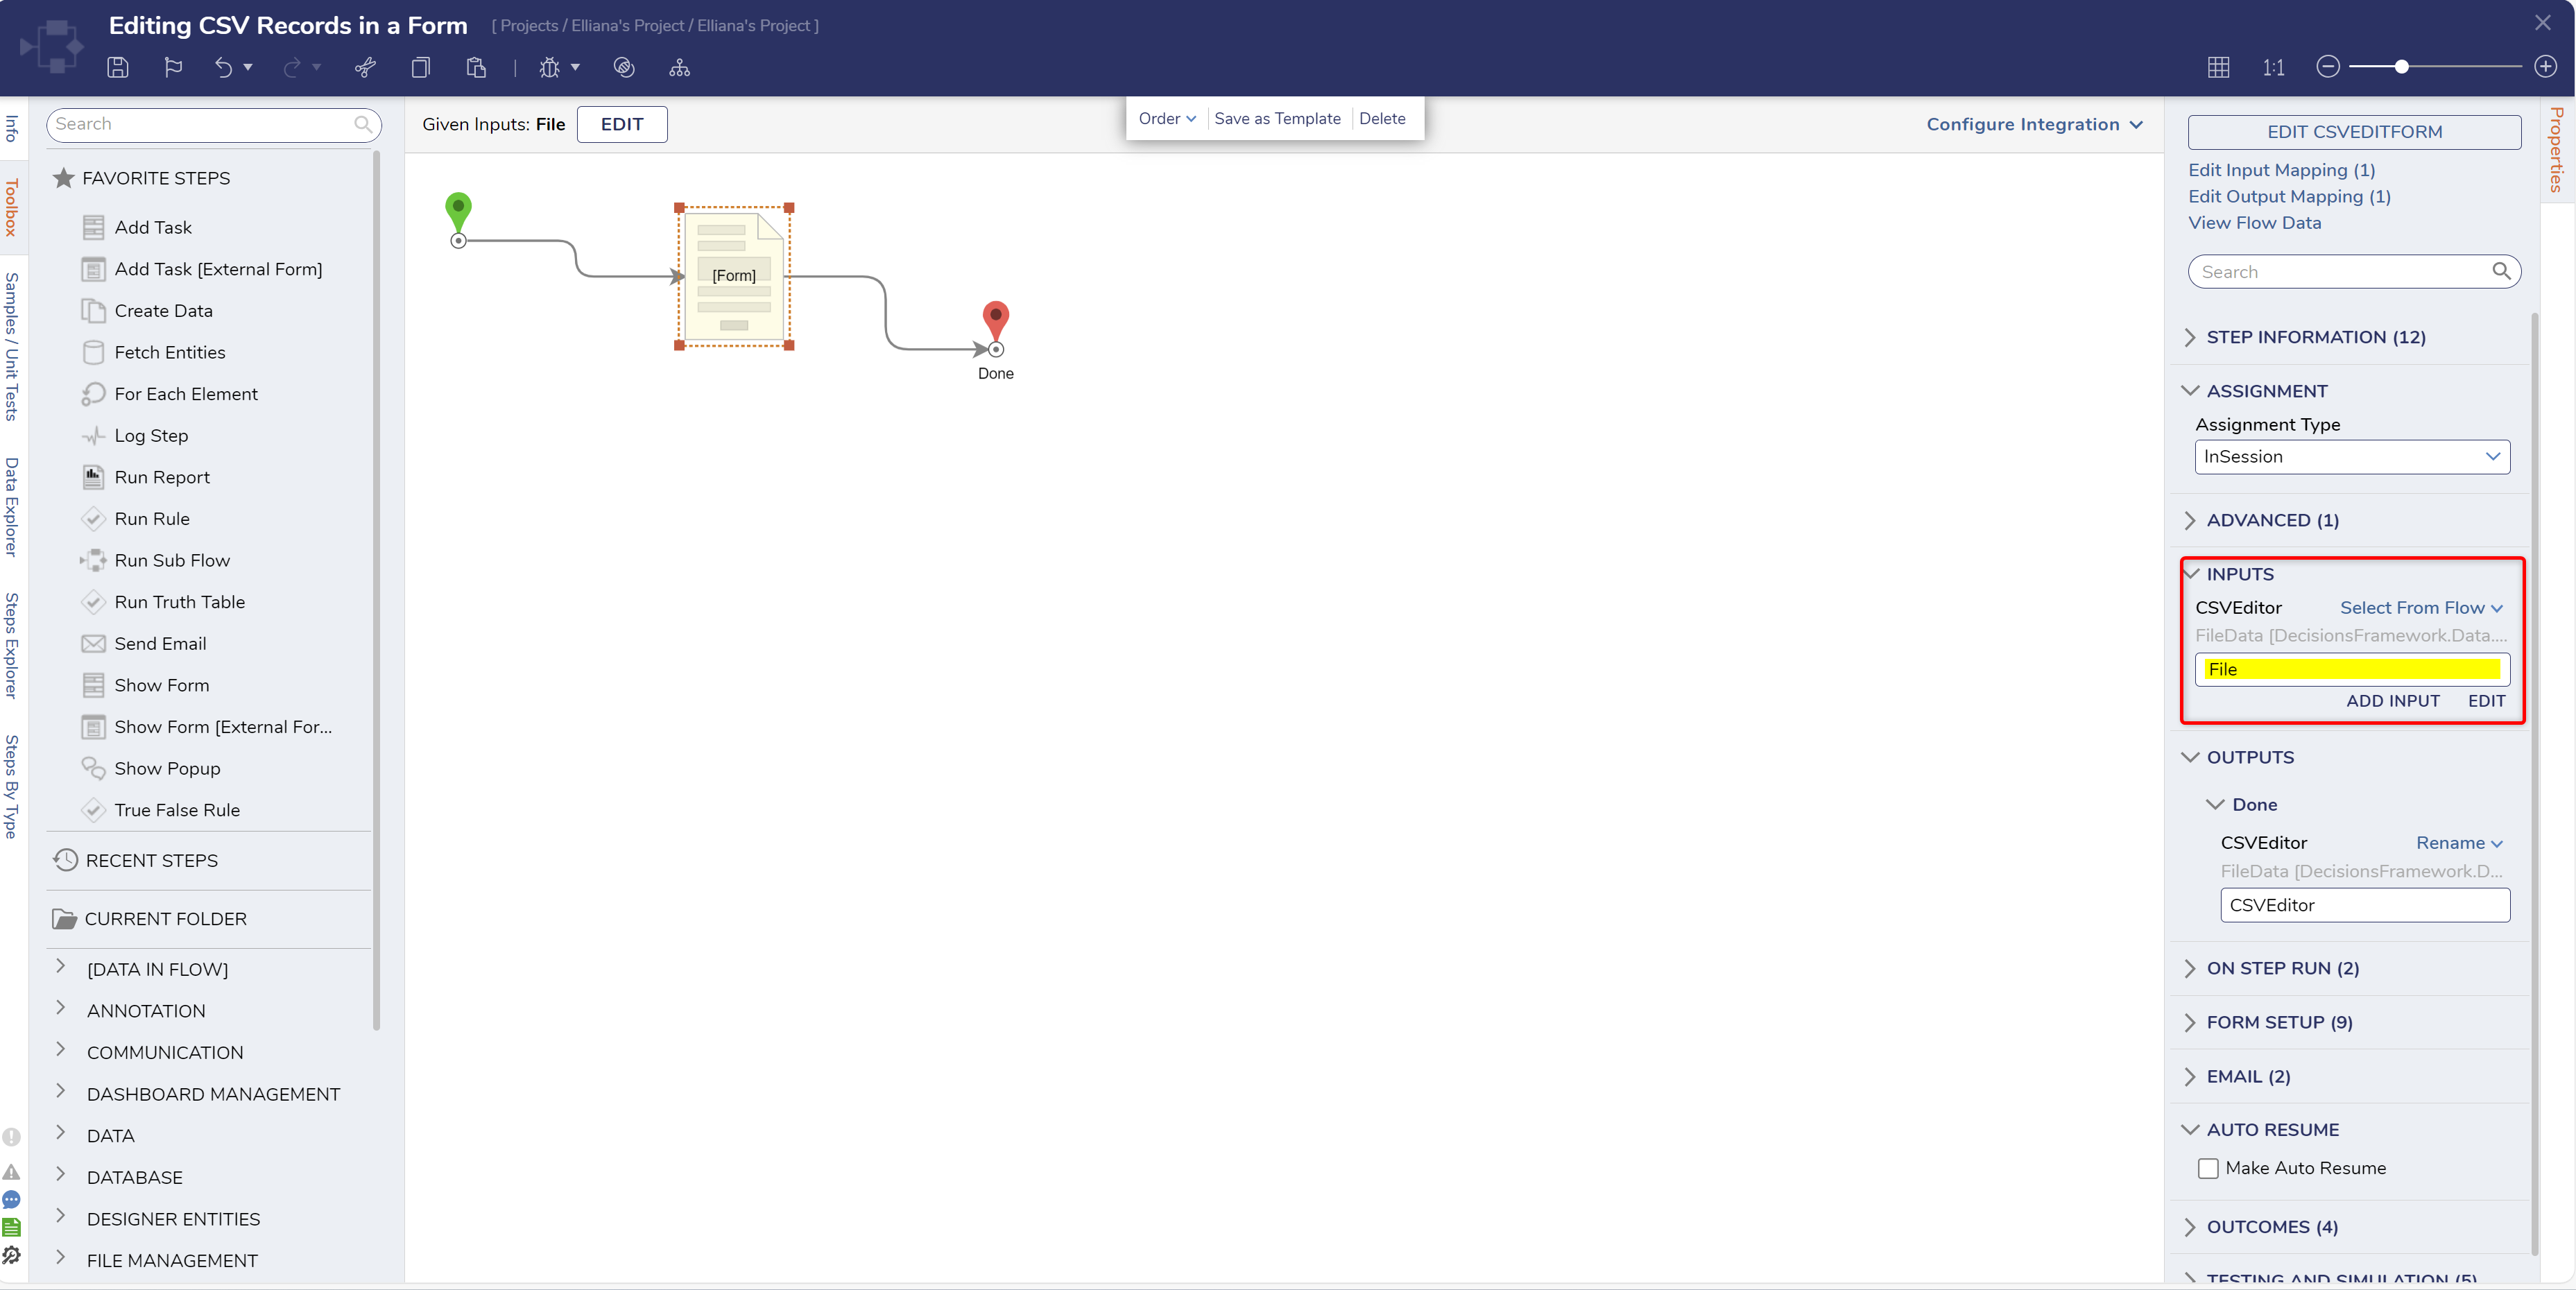
8 Back in the Flow Designer, connect the Done path to the End step, then navigate to the Show Form step's Properties. Under INPUTS, map the File to CSVEditor.
9 Save the Flow, then if desired, close with X.
Debug
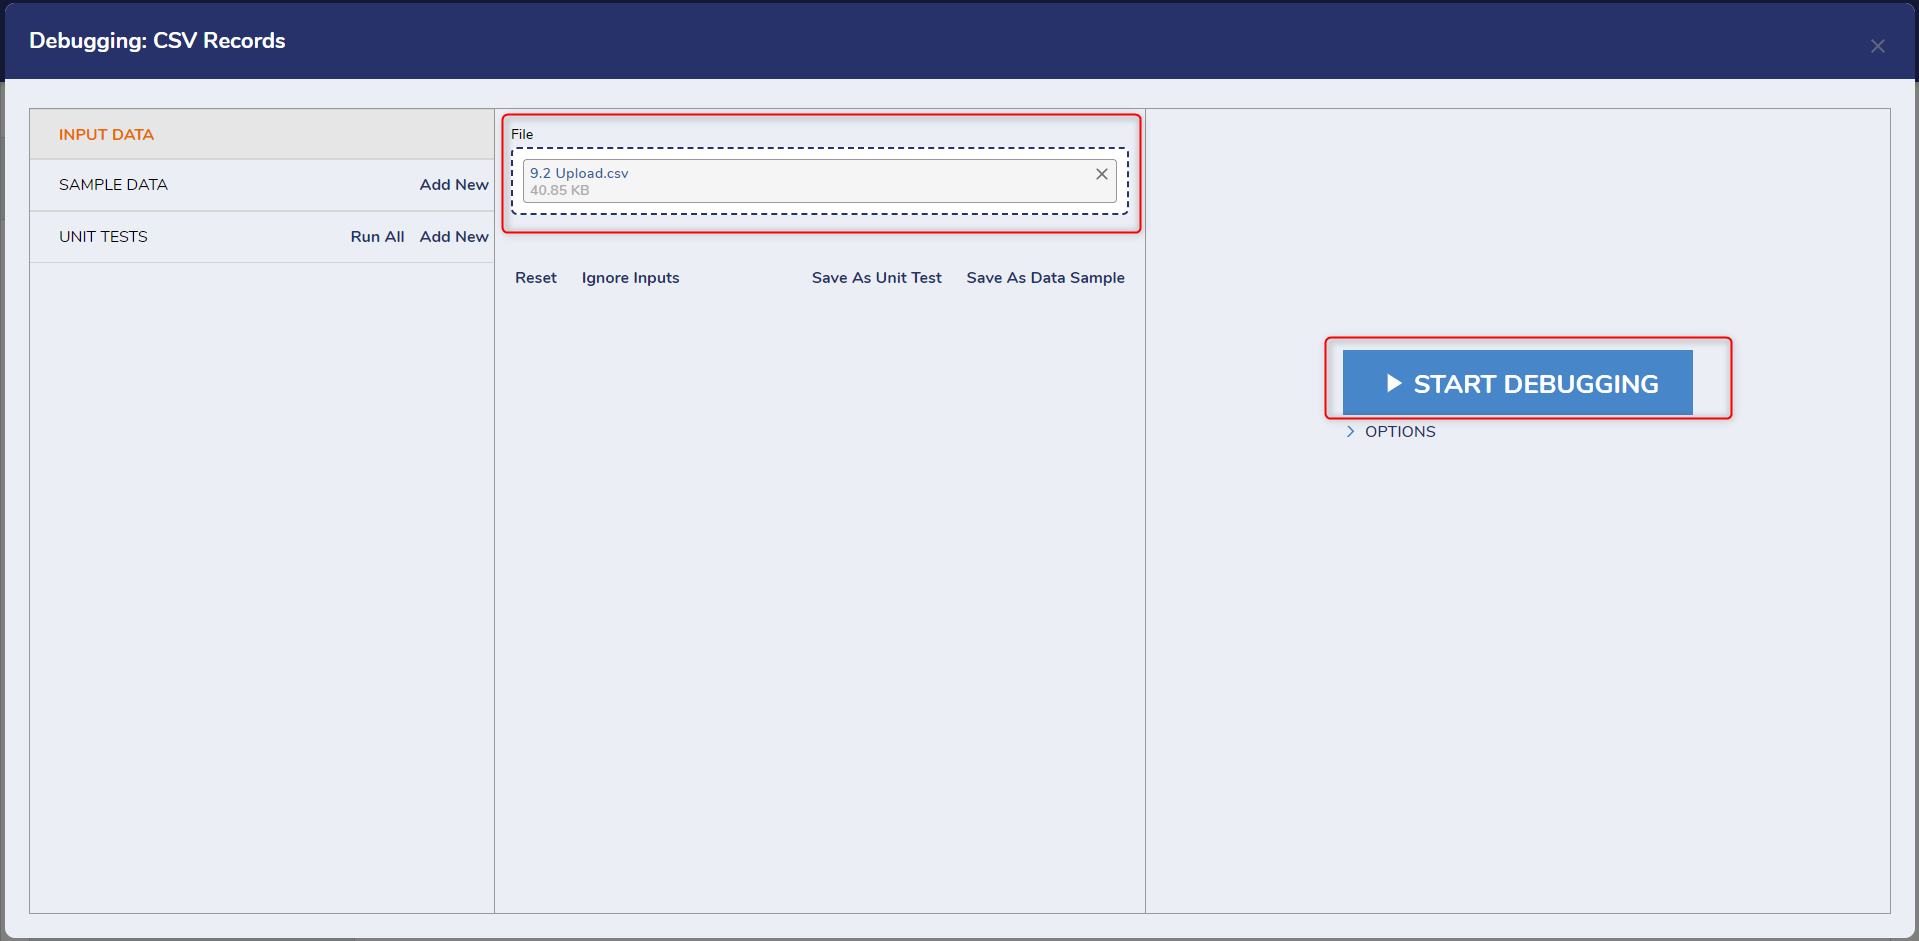
1 From the Flow Designer, select the Debug link from the top action bar.
2 In the Debugger, use the Drag file here field or the CHOOSE FILE button to select the desired CSV file.
3 Click START DEBUGGING.
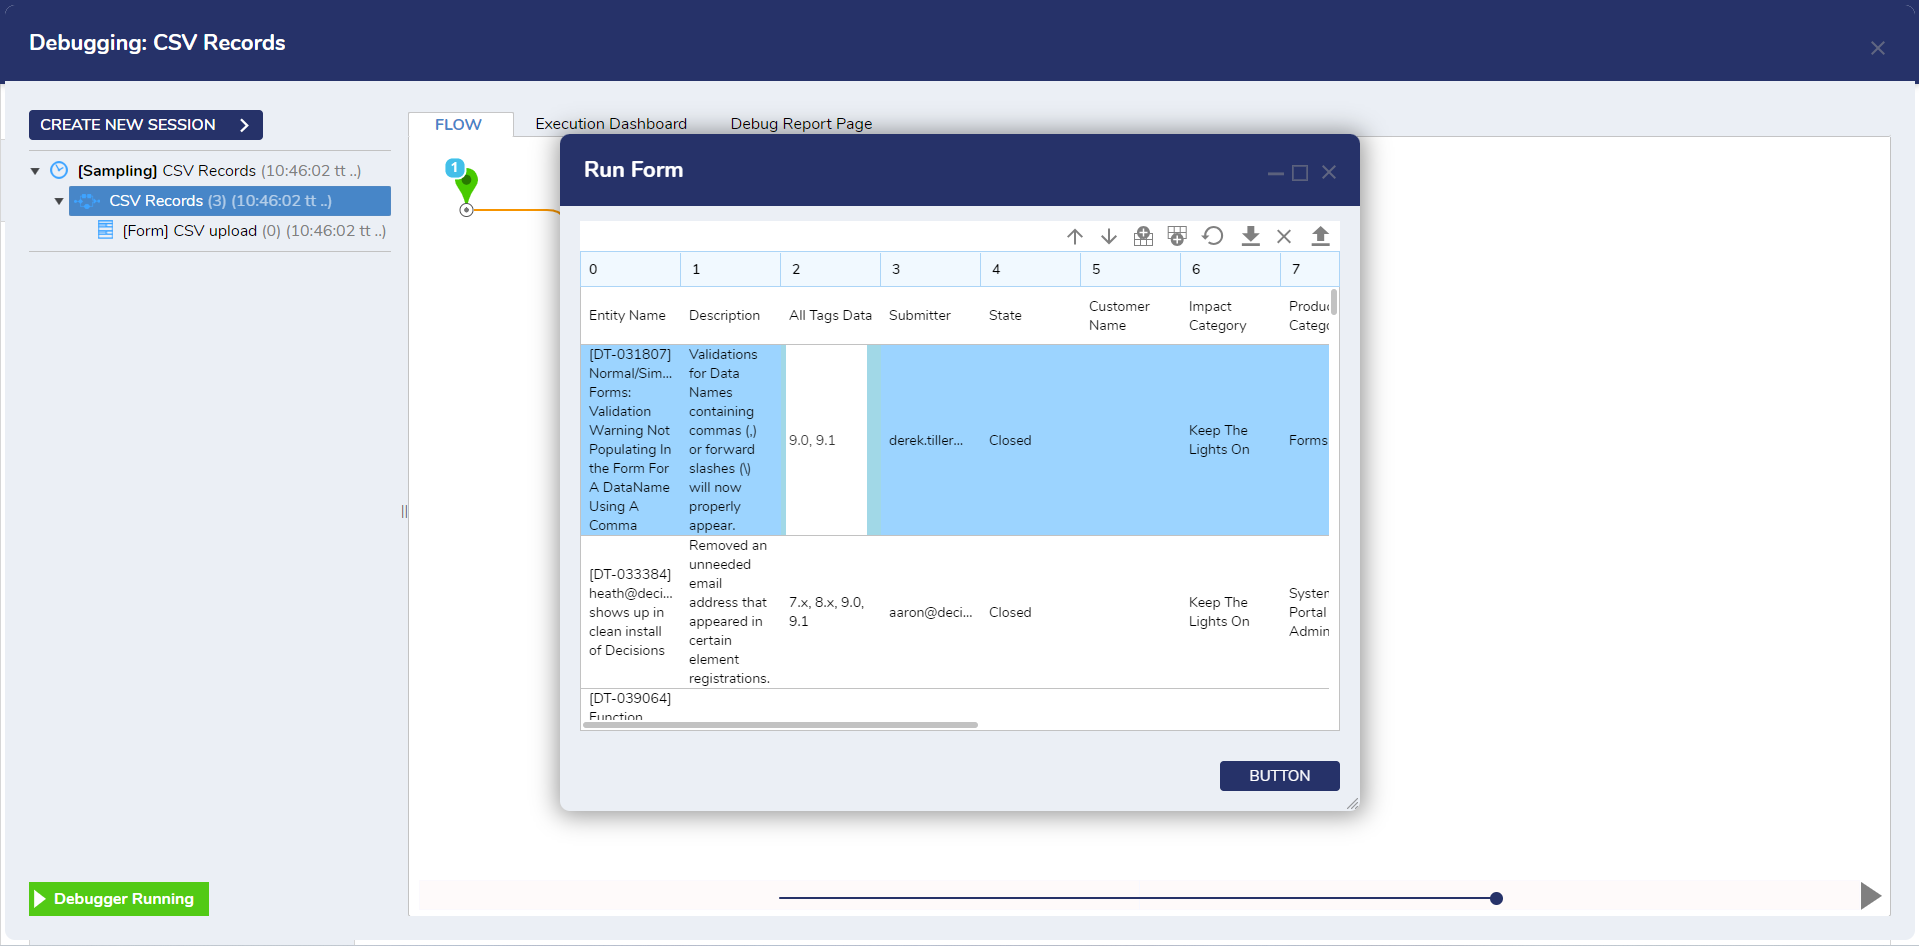
4 Make any desired edits to the CSV file.
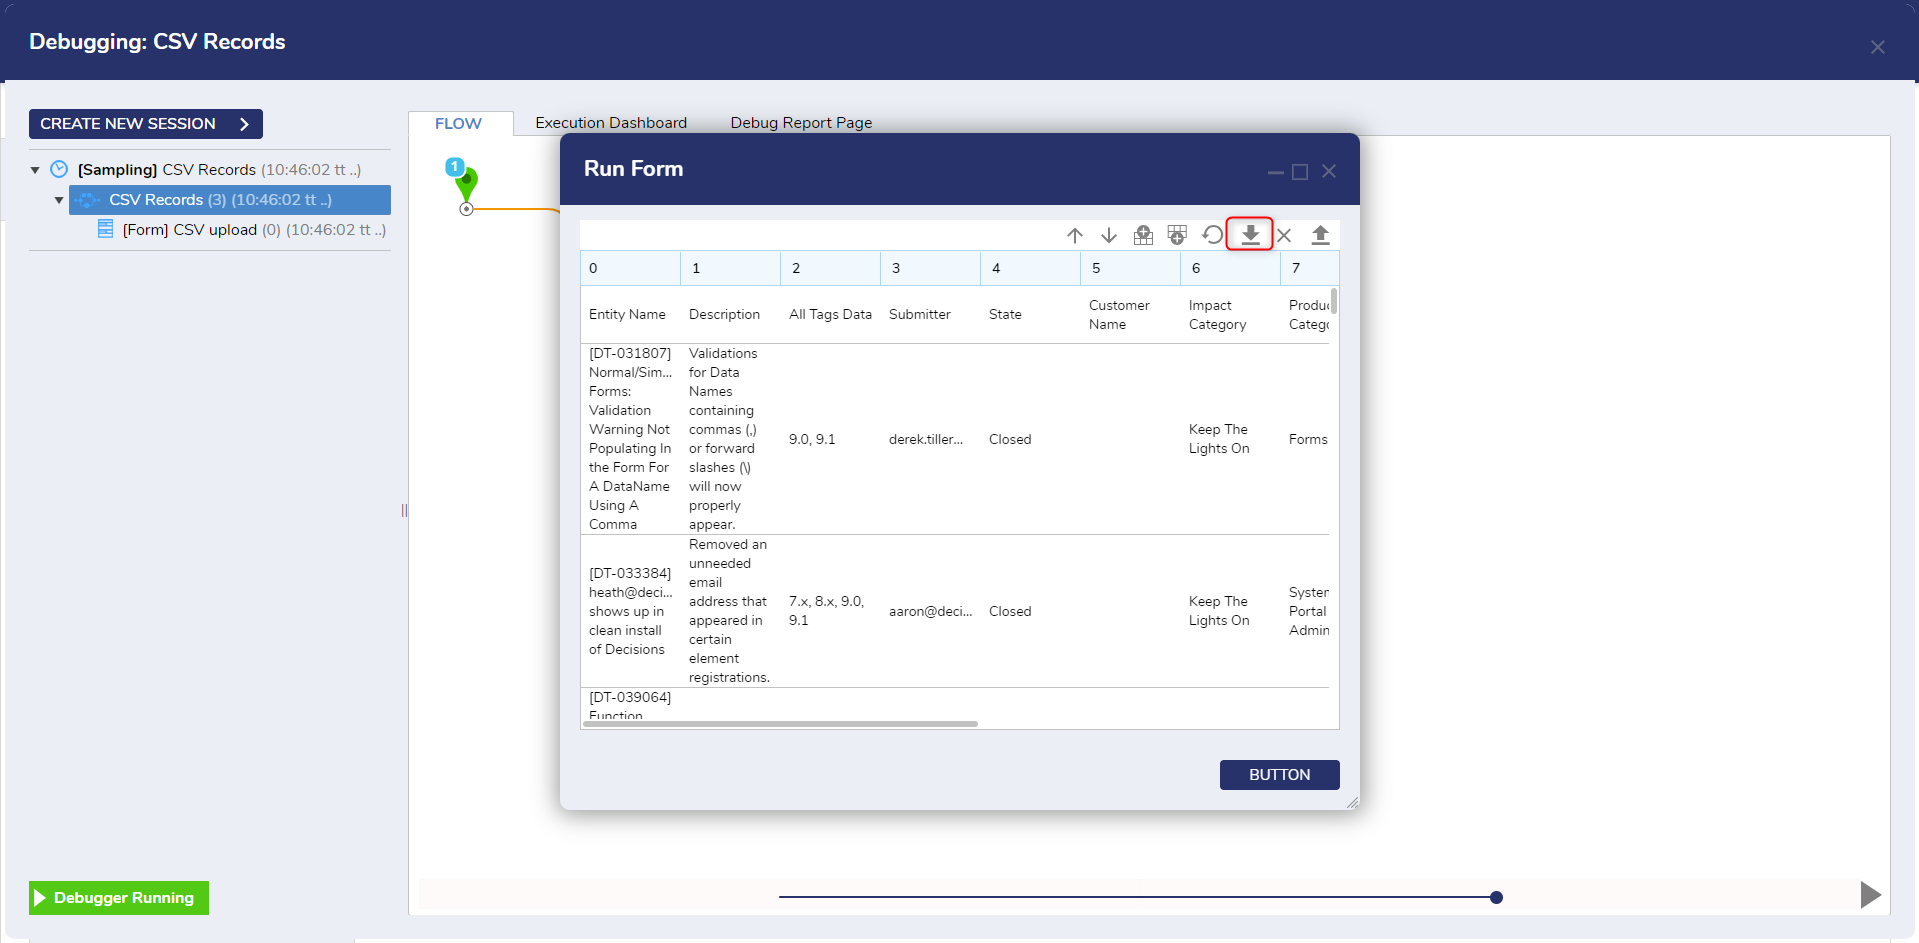
5 Click the Download button and verify the contents of the spreadsheet.
from: https://documentation.decisions.com/v9/docs/editing-csv-records-in-a-form