Form Tiles

1 From a Designer Project, create a new Page.
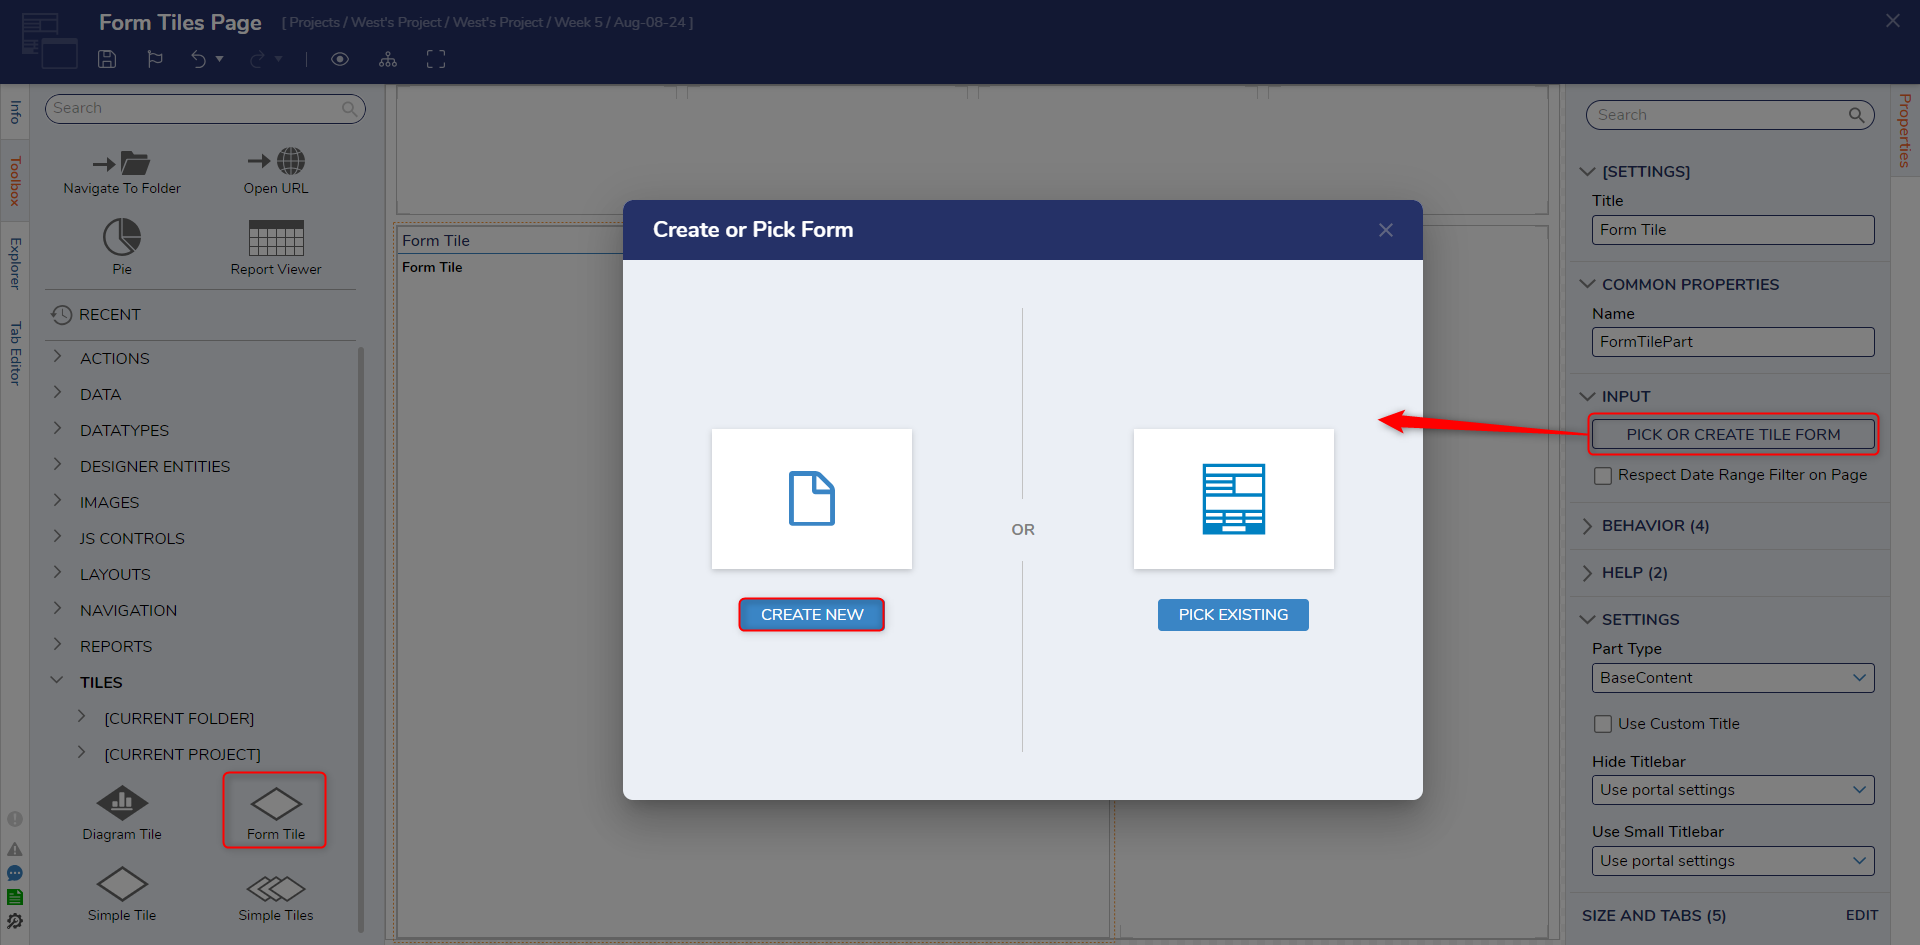
2 In the Page Designer, from Toolbox > TILES, drag a Form Tile component into the workspace.
3 From the Properties of the Form Tile, under INPUT, click PICK TILE FORM. Then, CREATE a new Form Tile.
4 From the Form Designer, design a Form containing two Text Box controls and a Button (labeled "Submit").
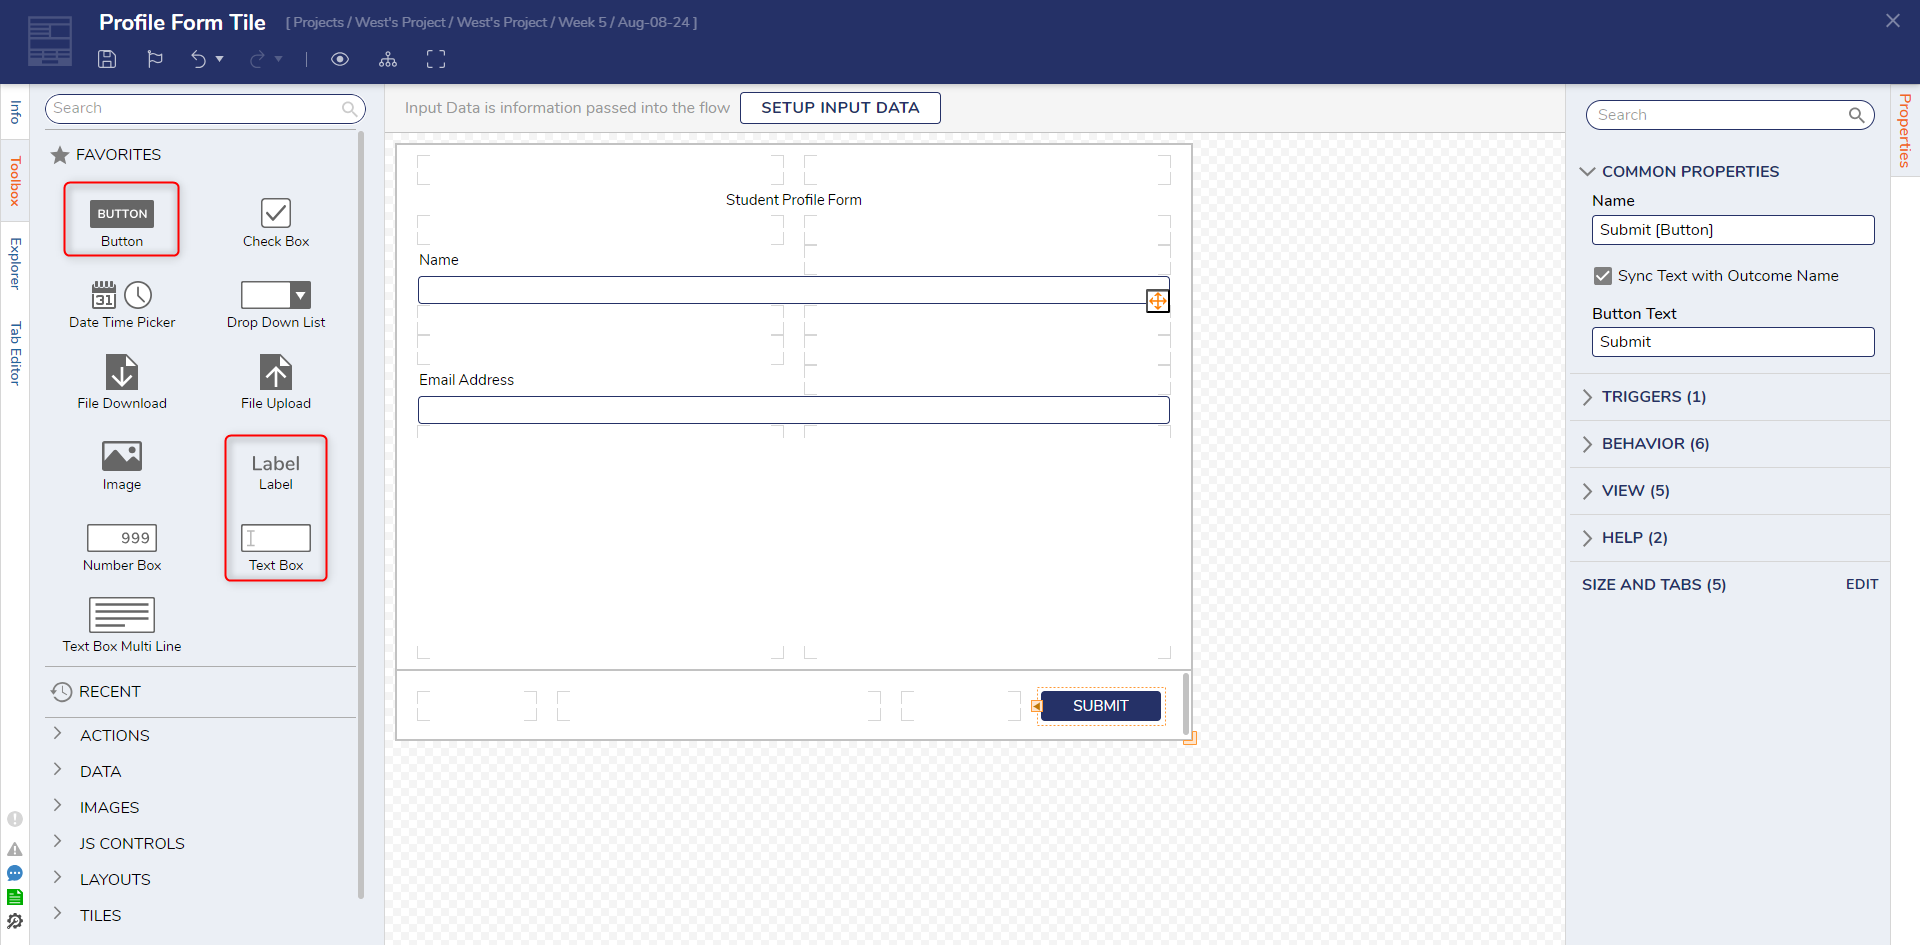
5 Save the Form, then close the Form Designer via X.
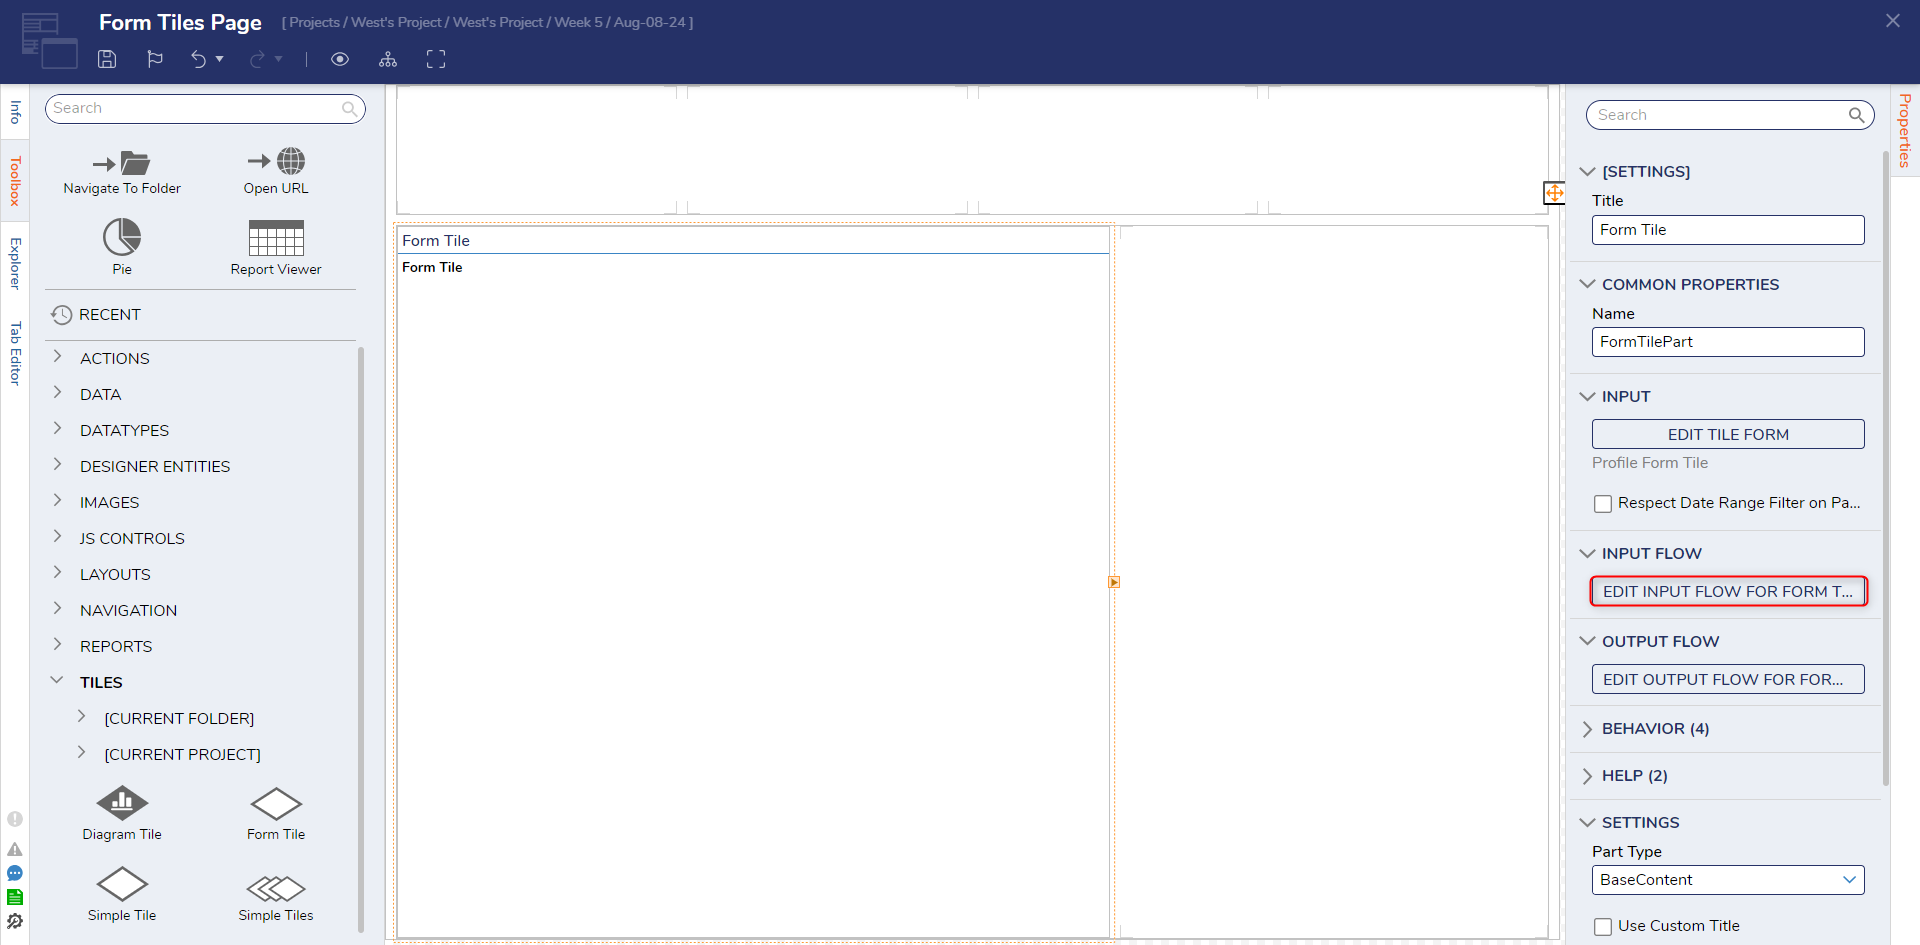
6 In the Page Designer, from the INPUT FLOW category under the Form Tile's Properties tab, select EDIT INPUT FLOW FOR [FORM TITLE NAME}.
7 In the Flow Designer, from the Properties tab of the End step, map Flow Data.PortalEmailAddress to Email Address, and Flow Data.C
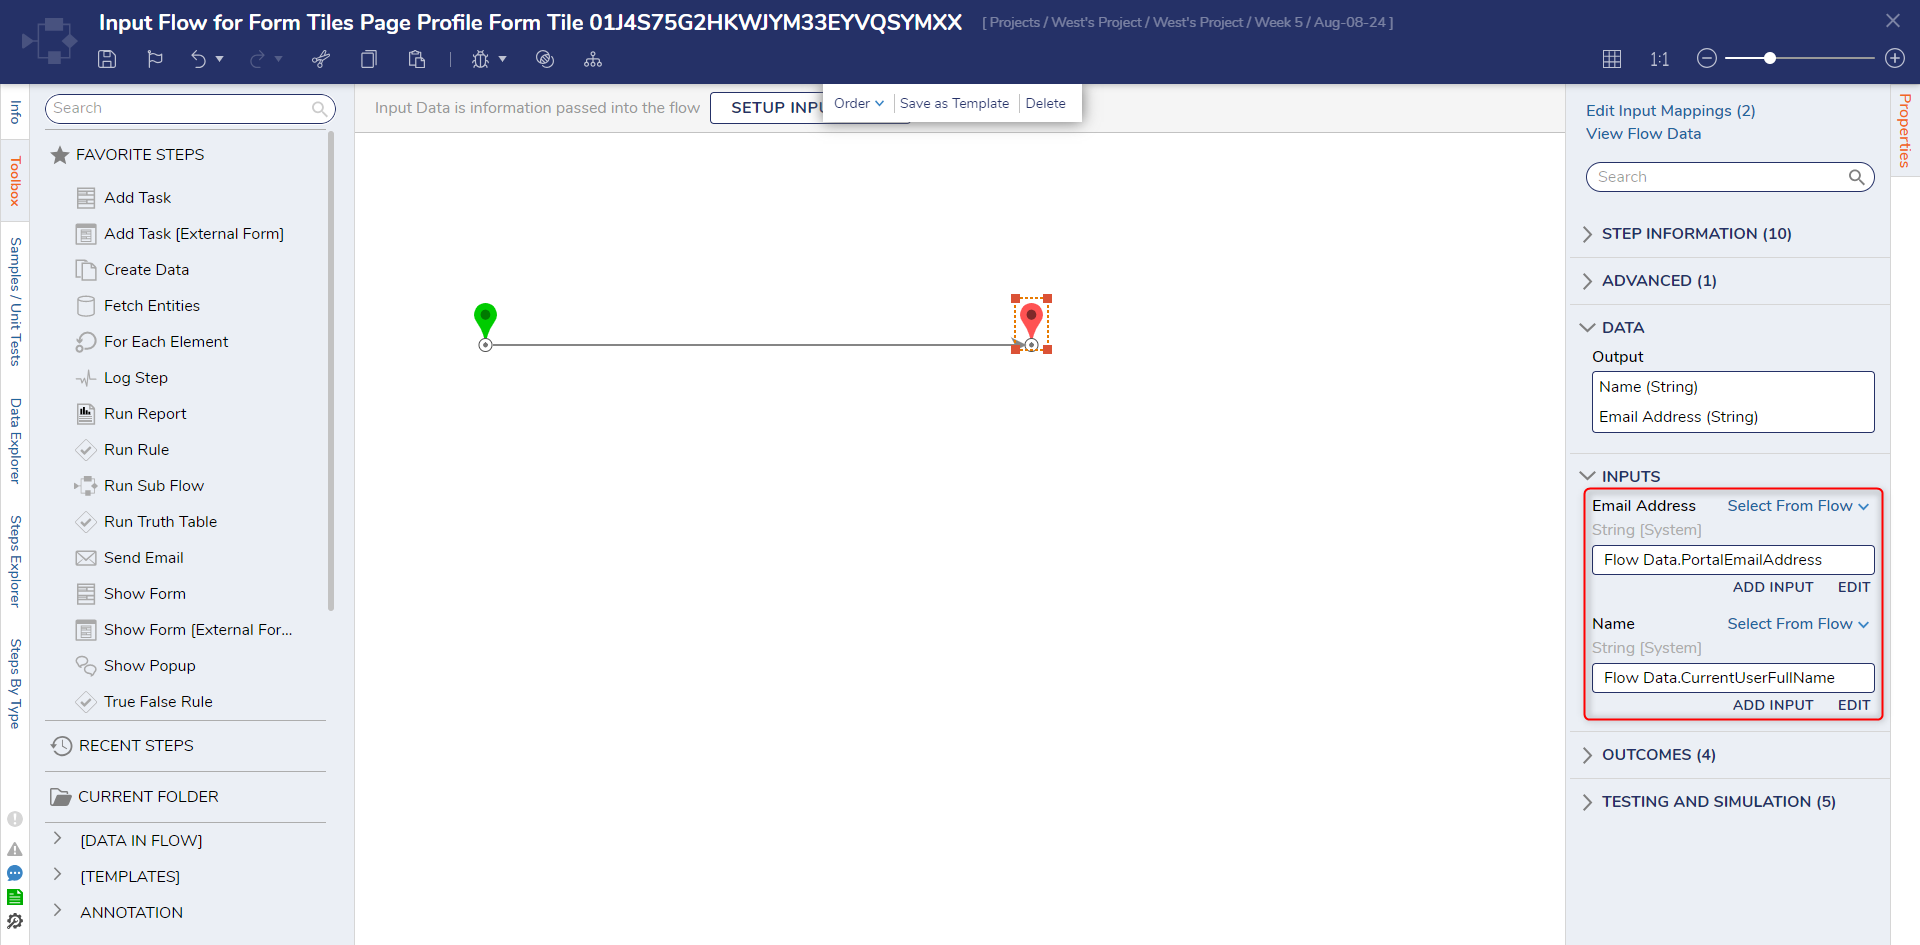
8 Save and close the Flow Designer, then the Page Designer.
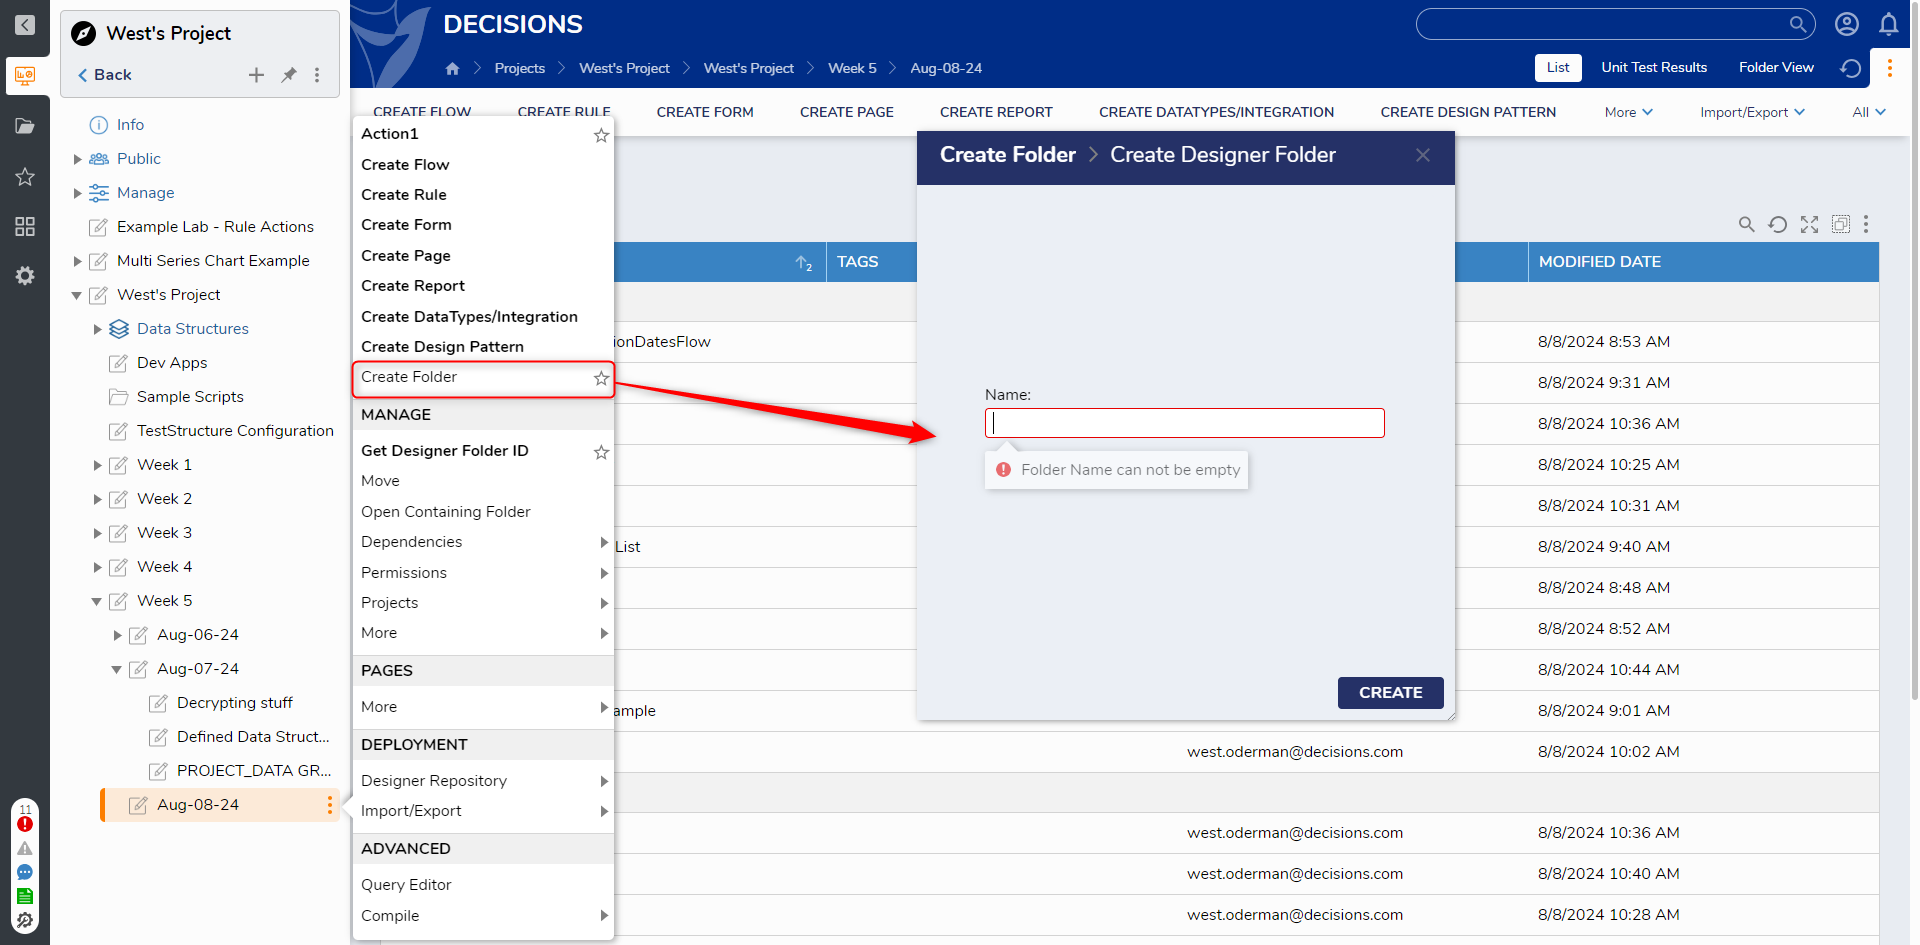
9 From the Studio, right-click a Designer Project, then CREATE a new Folder.
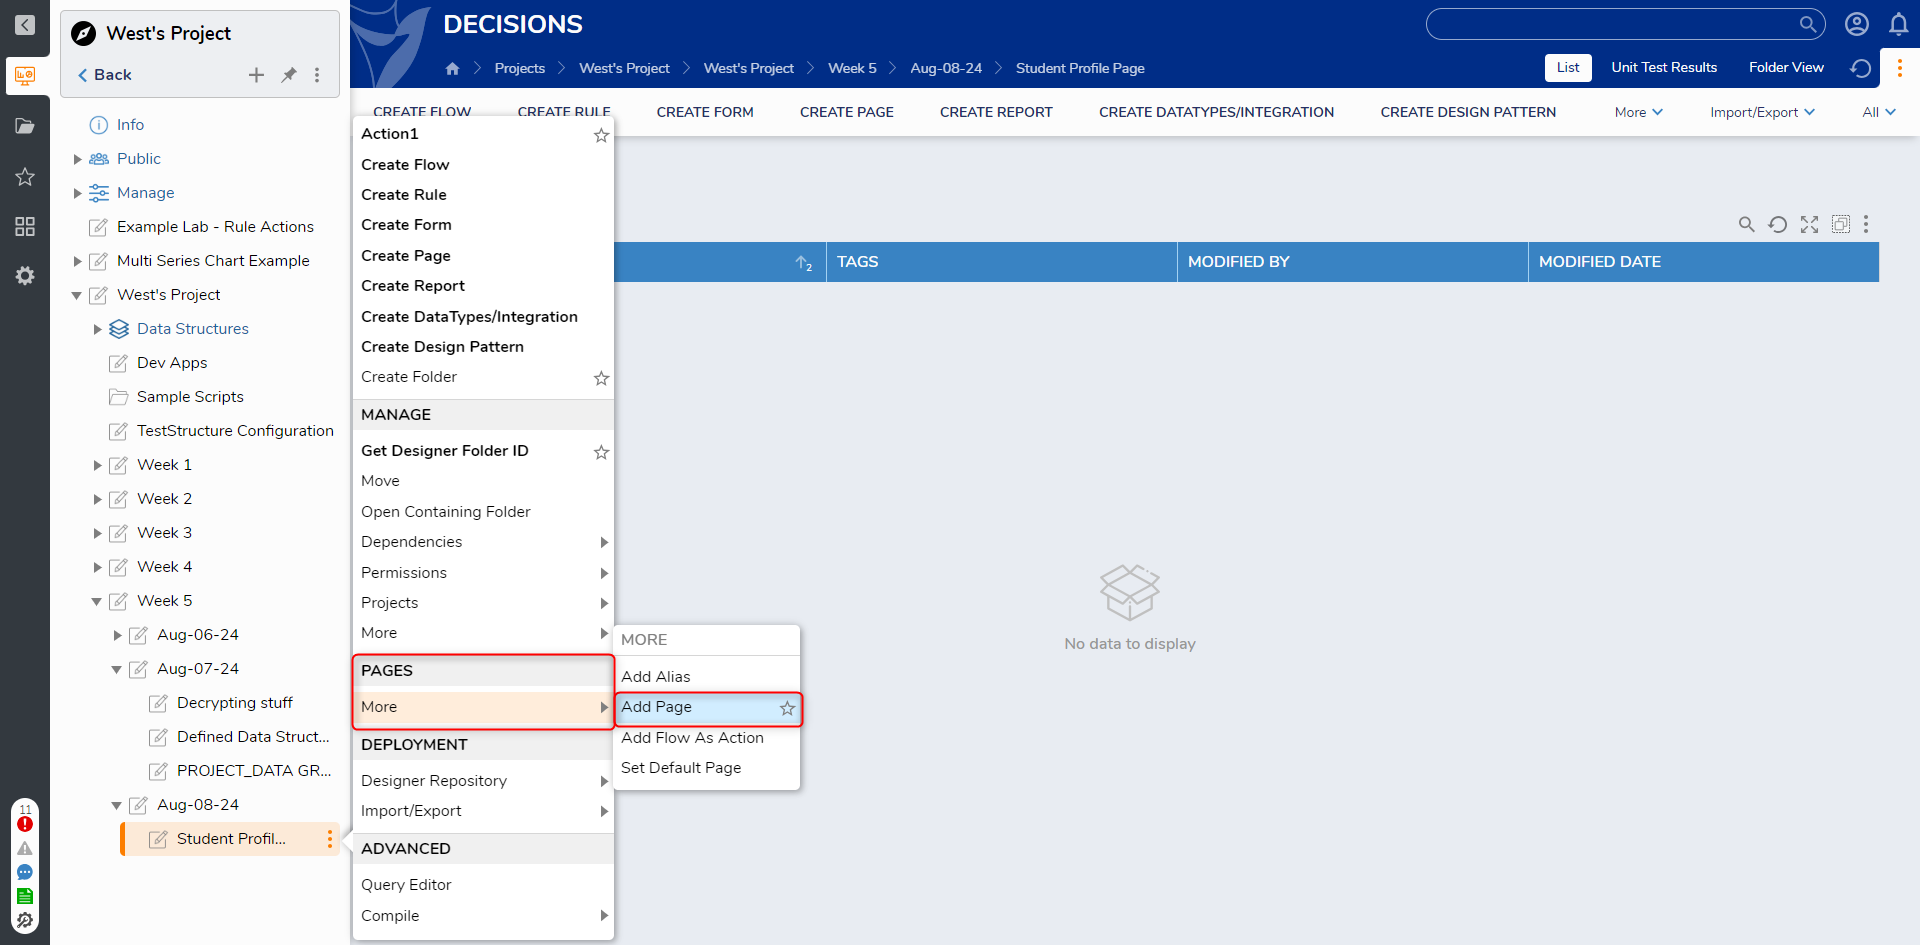
10 Right-click the Folder, then attach the Page via Add Page/Dashboard.
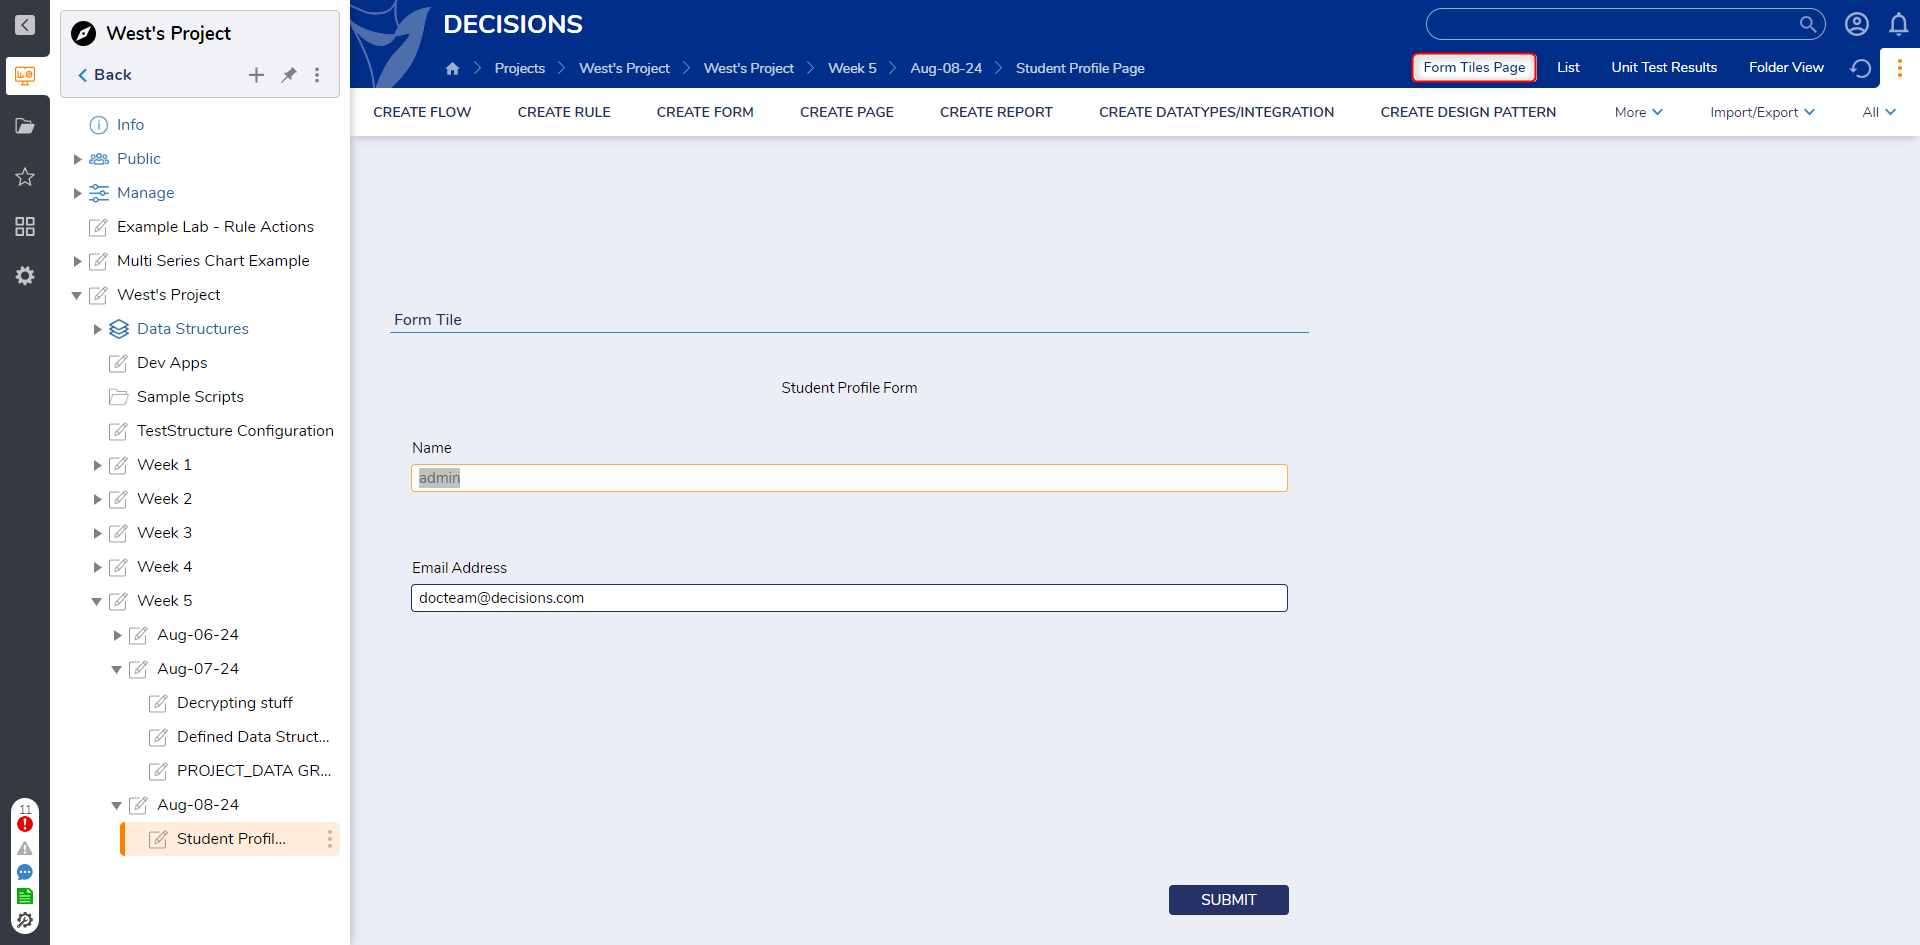
11 Via the tabs at the top of the Folder, navigate to the newly added Page.
from: https://documentation.decisions.com/v9/docs/form-tiles