Rule Filter on a Report

1 From a Designer Project, CREATE a new Report.
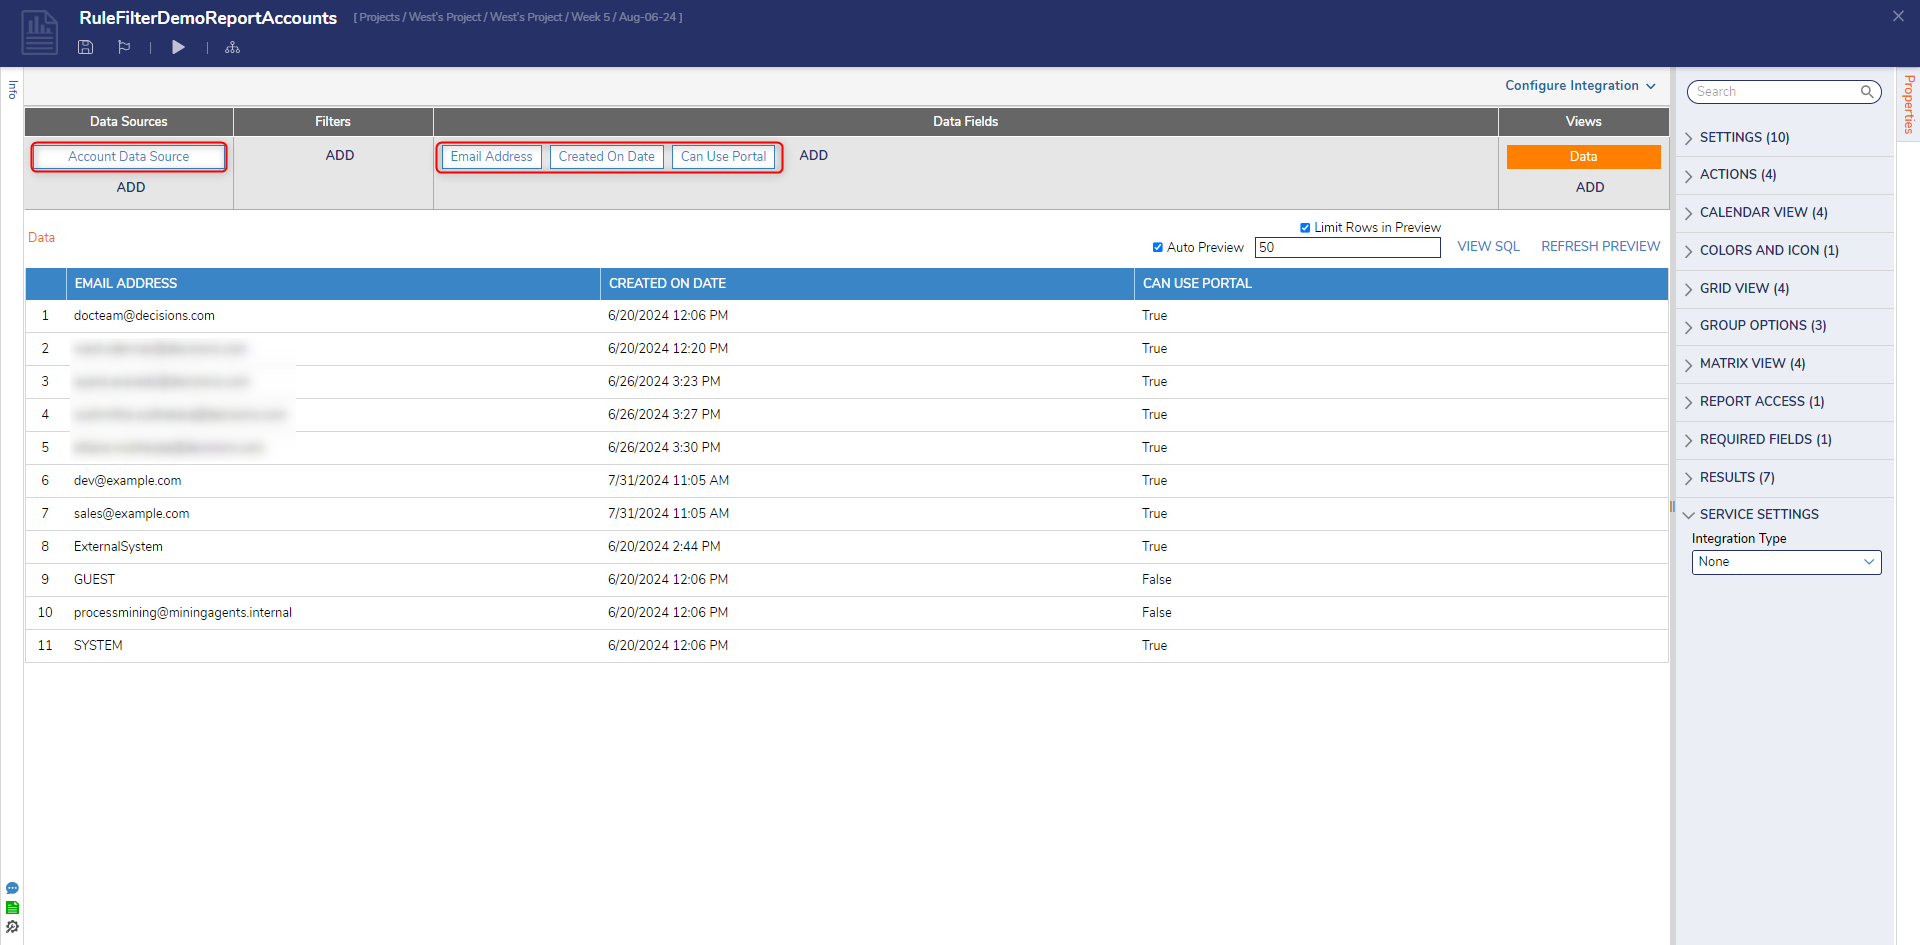
2 From the Report Designer, under Data Sources, Add Account Data Source. Then, under Data Fields, Add Email Address, Created on Date, and Can Use Portal.
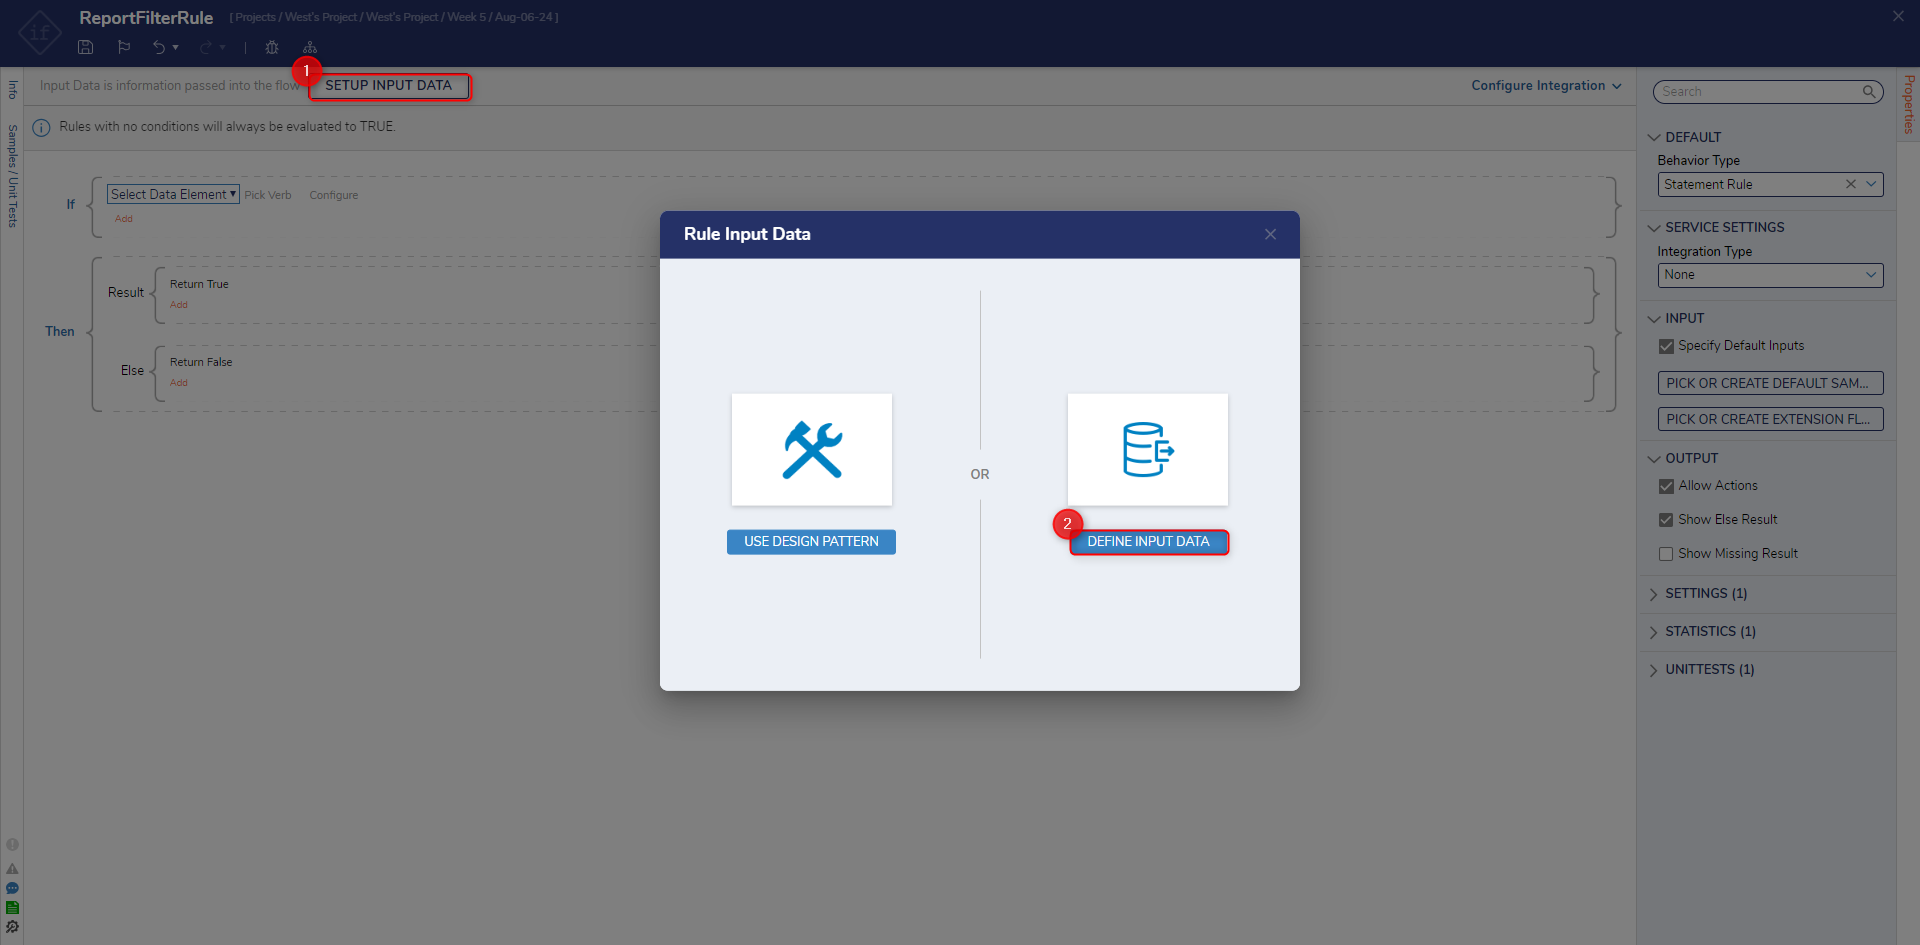
3 Under Filters, click Add, then select Rule Filter. From the Properties of the Rule Filter, select the Edit button (pencil icon); then create a Statement Rule.

4 From the Rule Designer, select SETUP INPUT DATA, then DEFINE new Input Data.
5 From the Input Data window, provide the NAME "CreatedOnDate", and select DateTime from the TYPE dropdown. Then, Save and close the window.

6 Back in the primary Rule Designer, define the rule as "If CreatedOnDate Greater Than. Then, set end Date to InPast, set Start to Current Date Time, Offset to 4 Days, and click DONE.

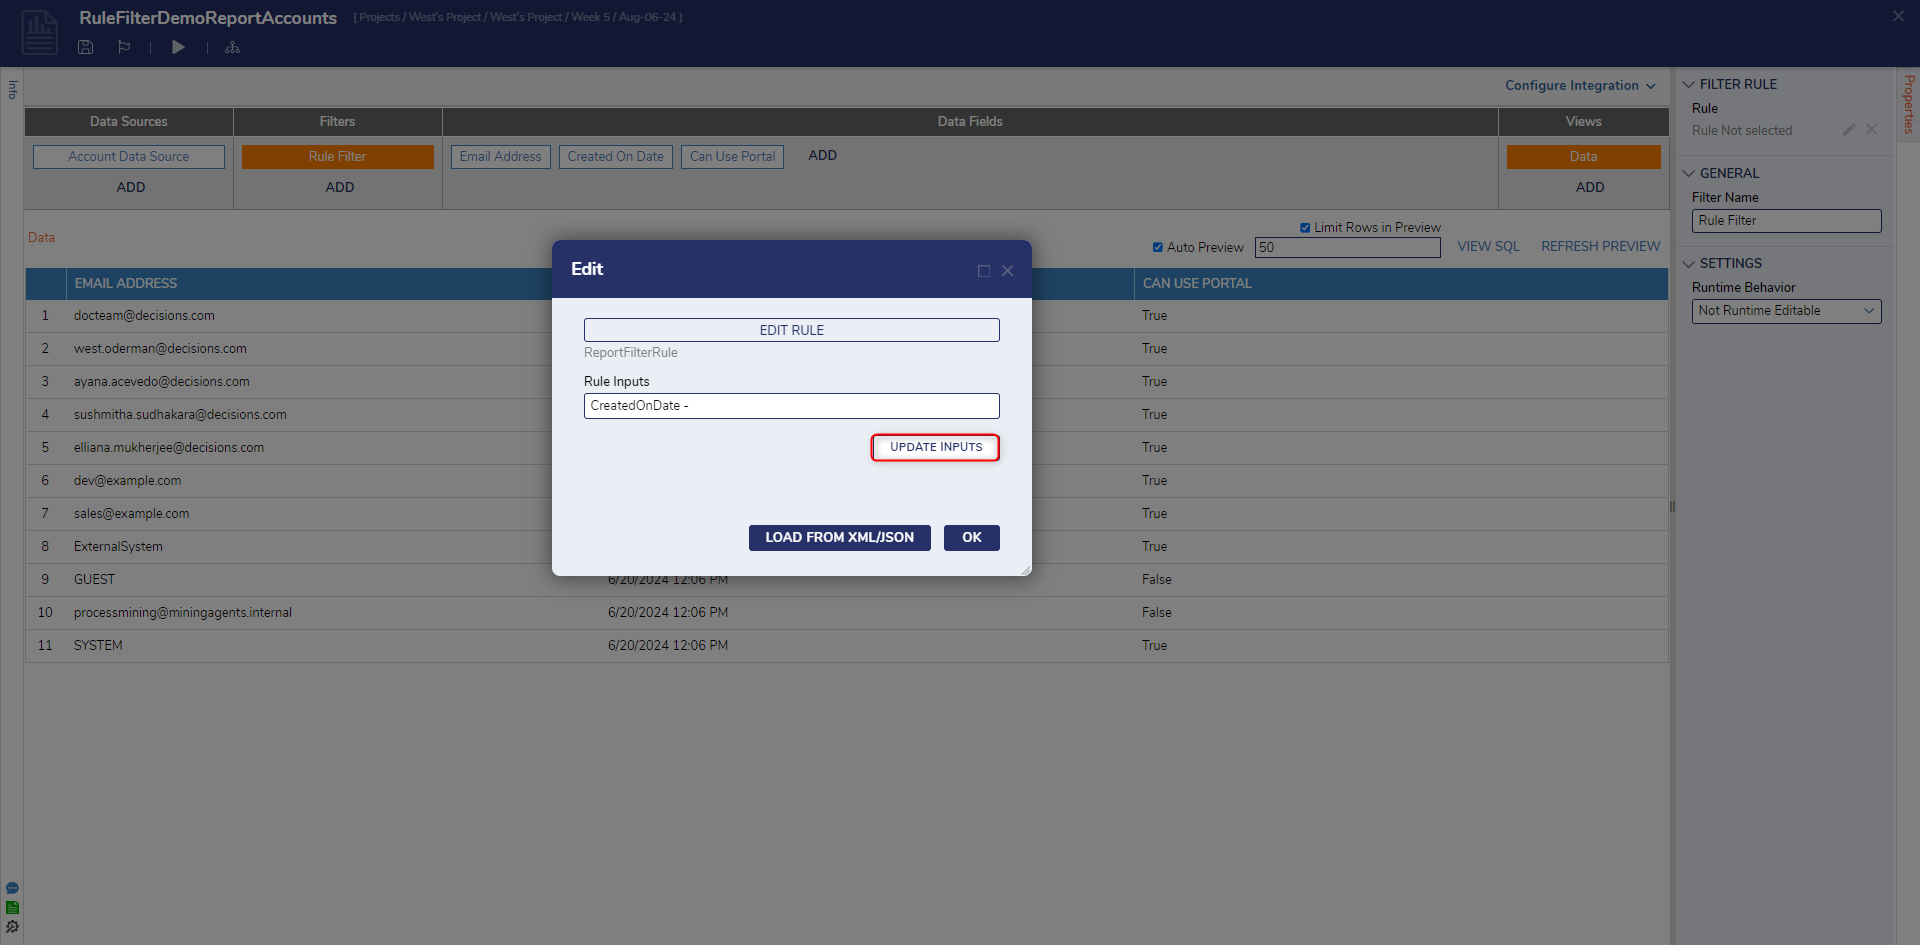
7 Back in the Edit dialog, select Update Inputs button. Then, beside CreatedOnDate, select the Edit button.
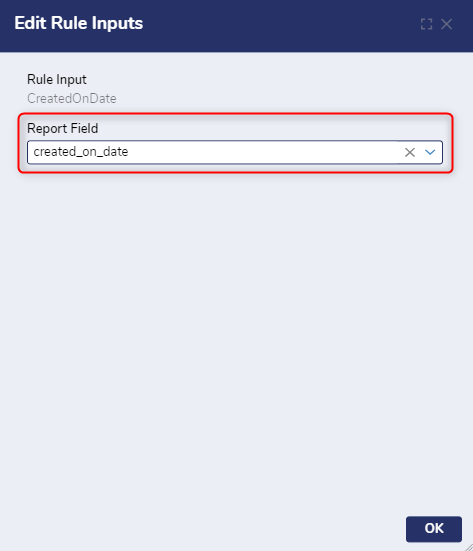
8 In the resulting Edit Rule Inputs window, select the Report Field that the Filter will be applied to; in this case, created_on_date. Then, click OK on the Edit Rule Inputs window, as well as the Edit window.
9 Verify that the Report has properly filtered out values pertaining to the Rule Filter.

from: https://documentation.decisions.com/v9/docs/rule-filter-report