Report Row Selection Using Selection Bus

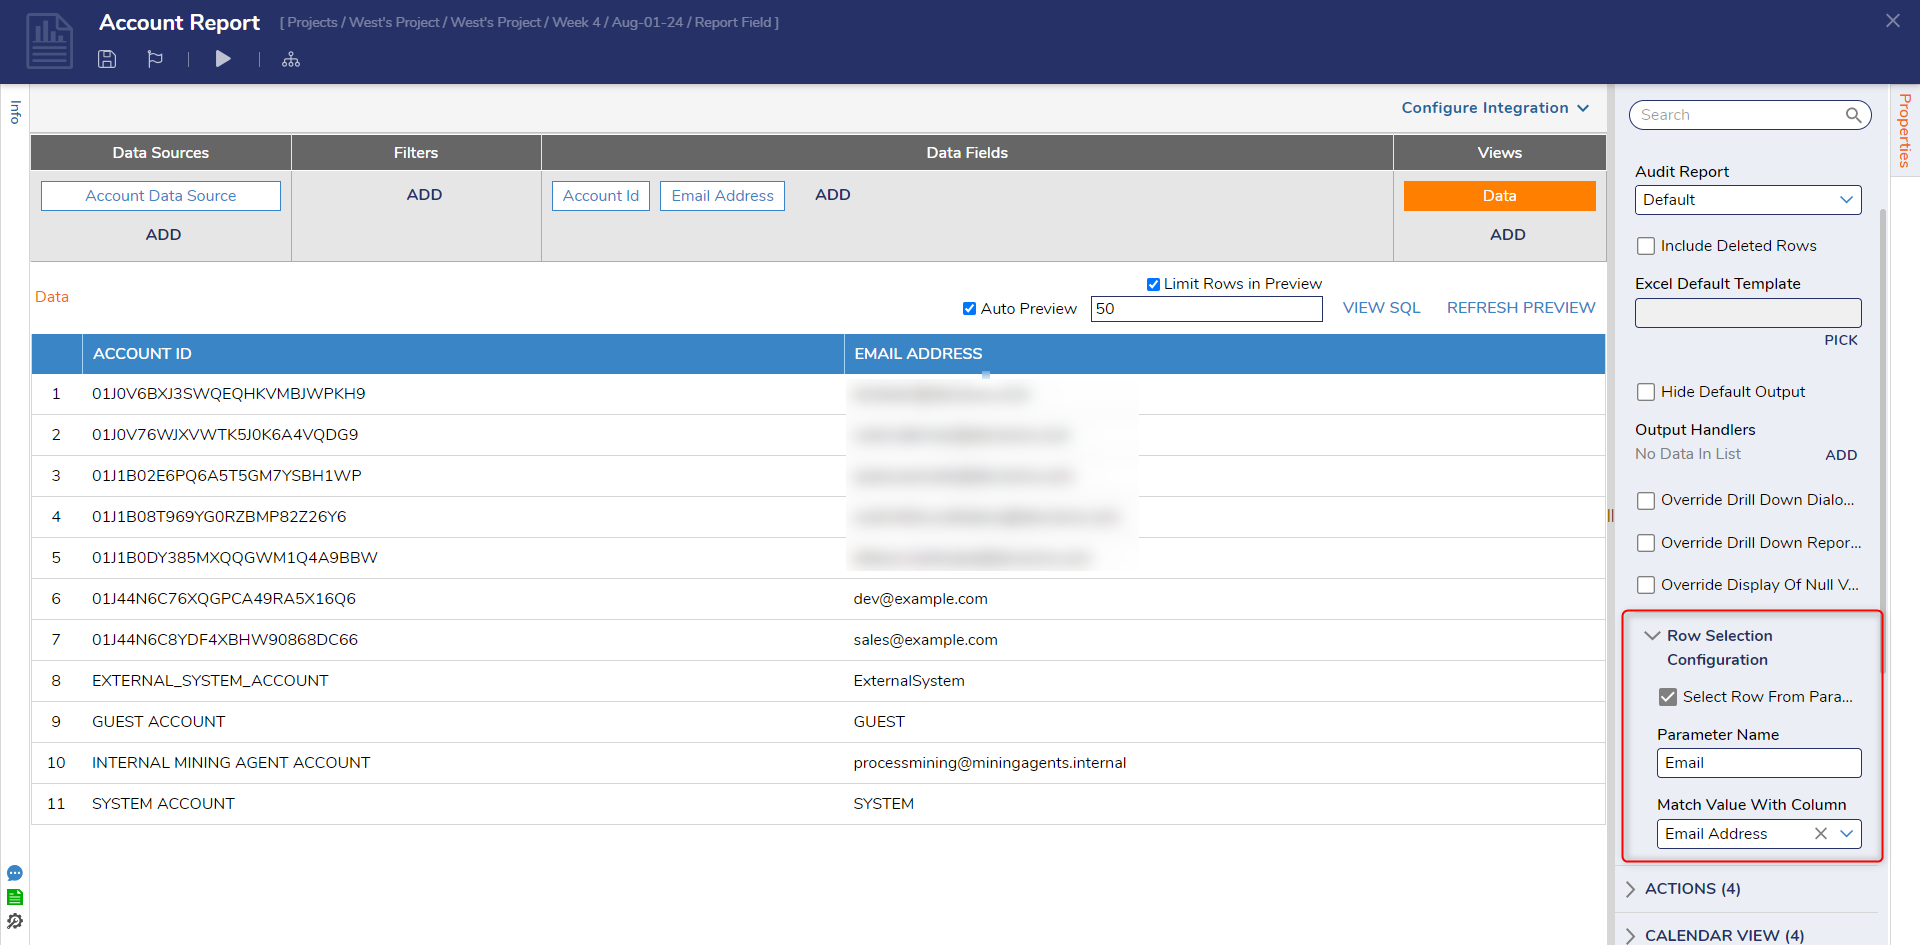
1 Begin in the Report Designer for the Account Report. In the Properties panel of the Report, expand Settings and Row Selection Configuration. Under Row Selection Configuration, set the Select Row From Parameter checkbox to true. This will cause two new configurations to display, Parameter Name and Match Value with Column.
2 Type in a Parameter Name in the corresponding textbox; in this example, type "Email." This will be the parameter displayed in the URL.
3 In the Match Value with Column drop-down, select Email Address.
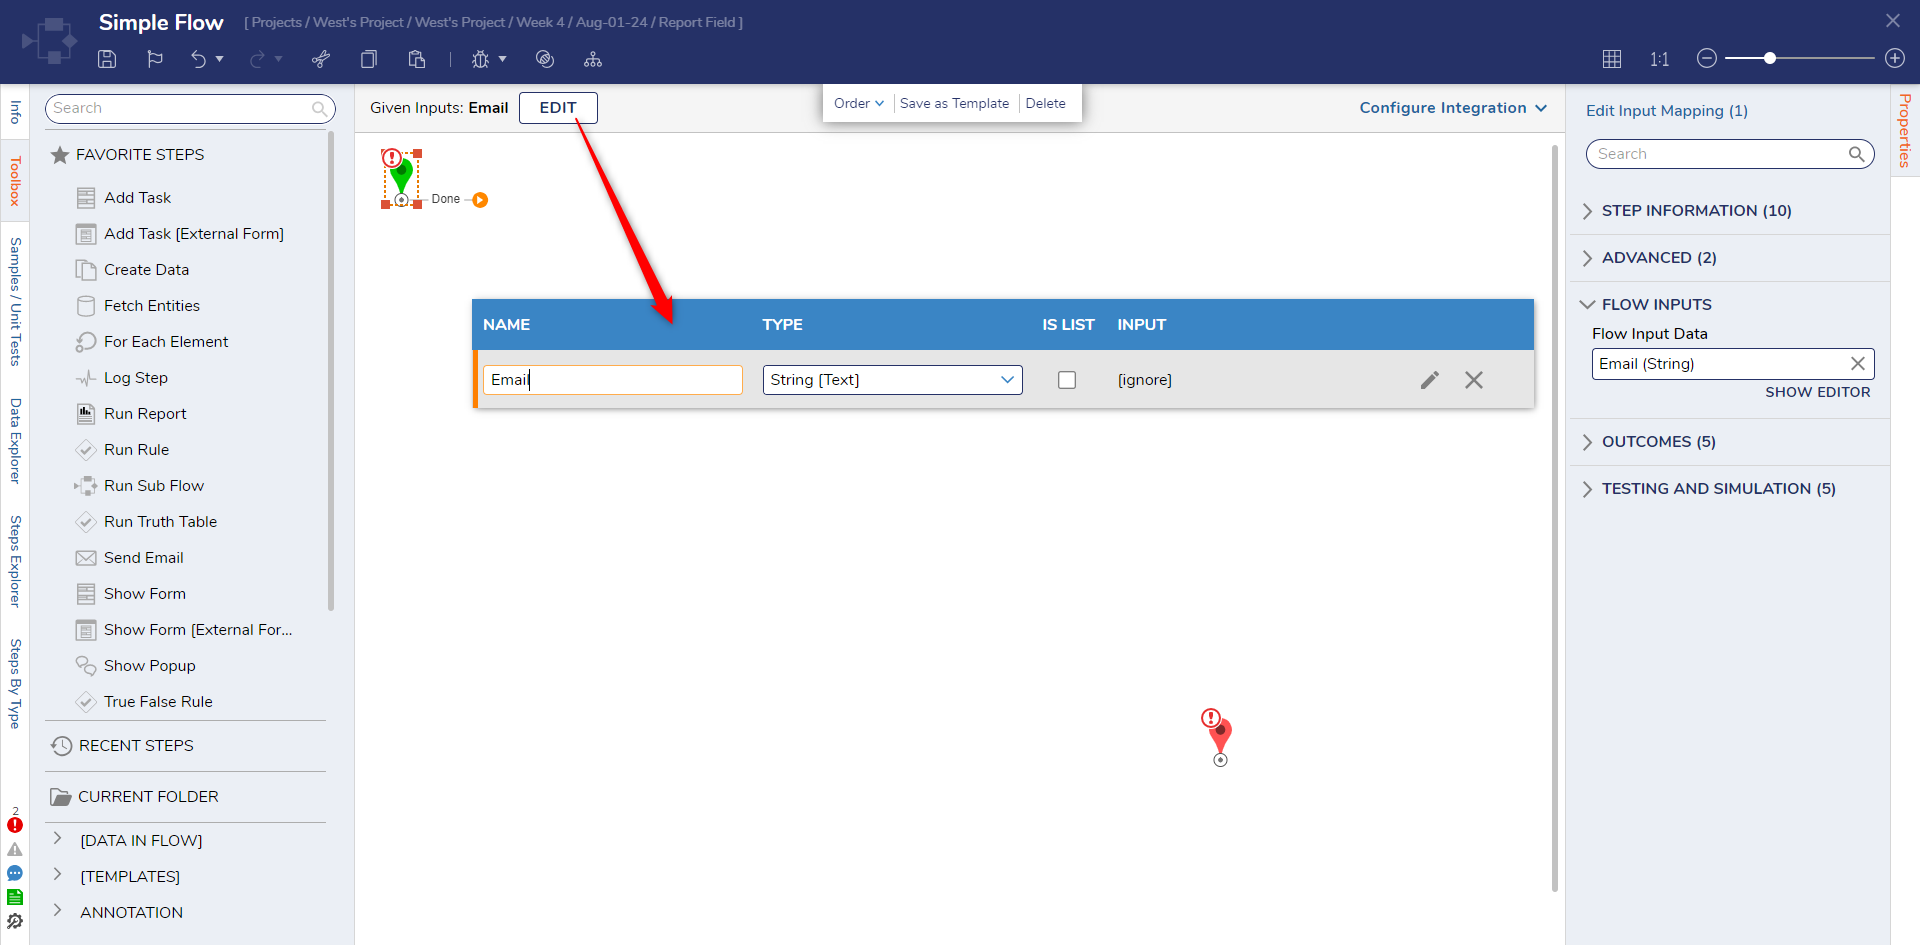
5 In the Flow Designer, select the Start step.
6 In the Properties panel under Flow Data > Flow Input Data, select 'Show Editor' and add an Input named "Email" with the type chosen as String.
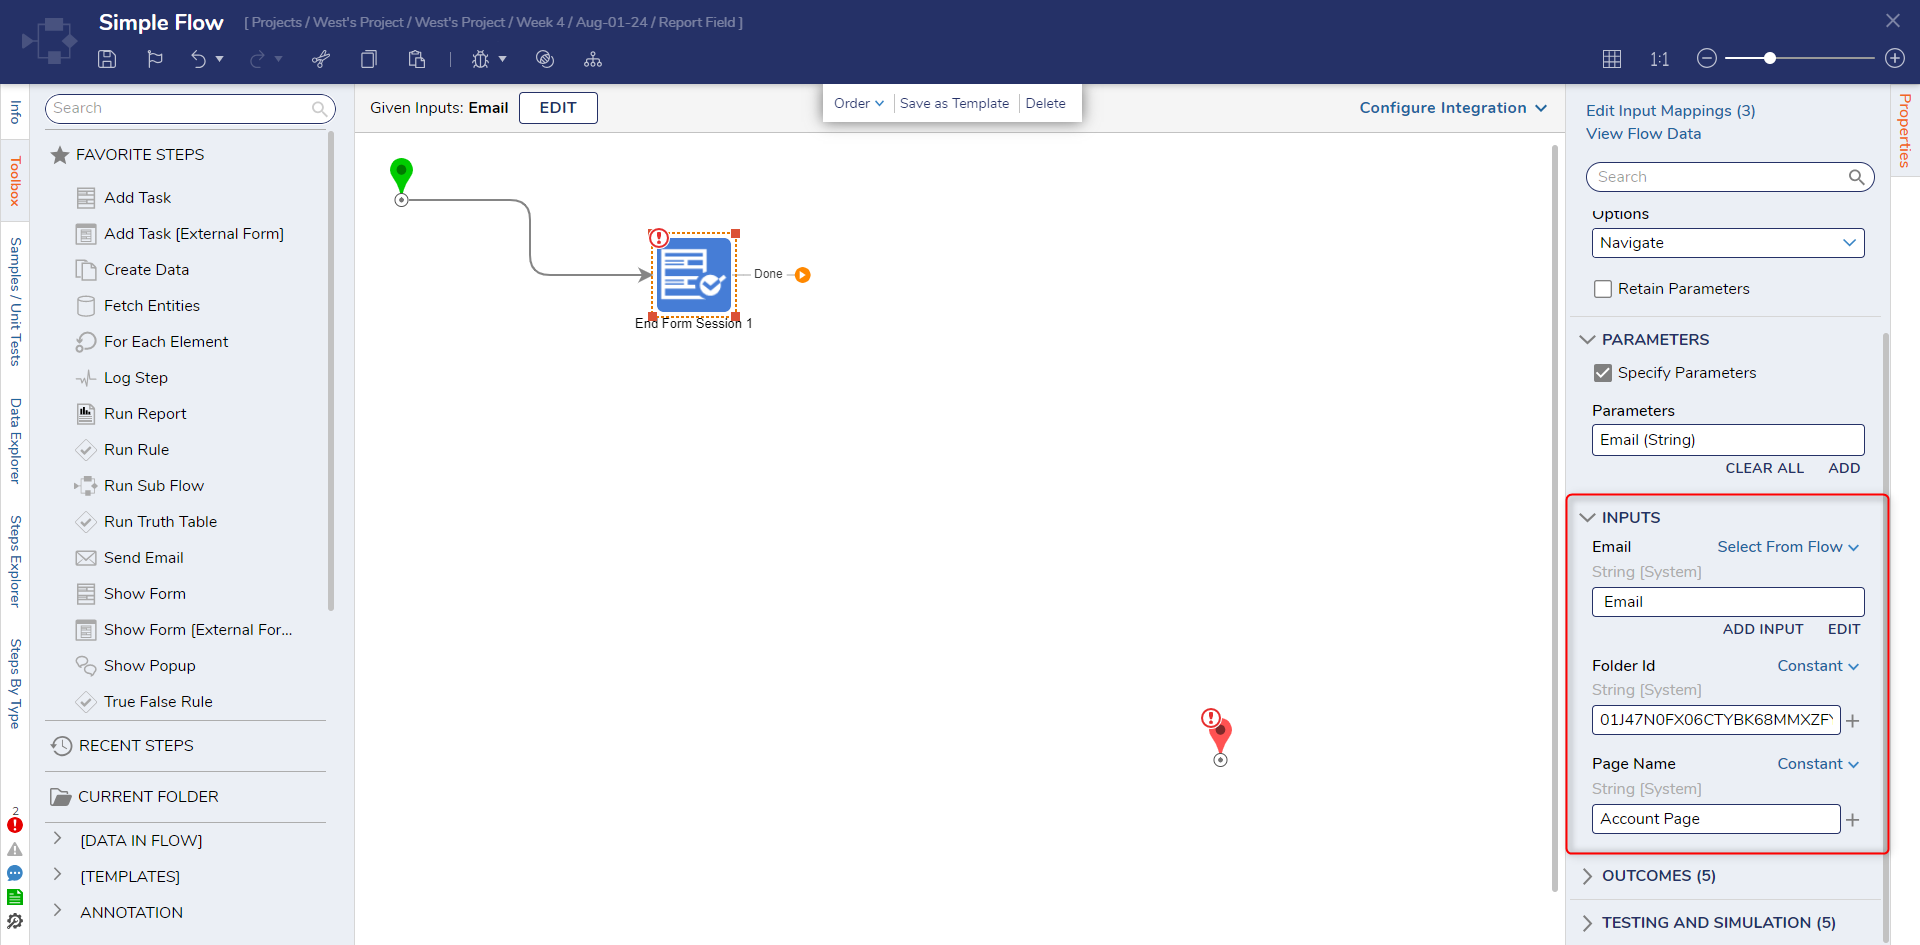
7 Add an End Form Session step to navigate to the page that has the Accounts Report. The End Form Session step is located in the Toolbox under Forms [End].
8 Navigate to the Properties panel; under Behavior > Options, select Navigate from the drop-down menu.
9 Under Parameters, select Specify Parameters, then choose 'Add New.' Type "Email" as the parameter name and choose String as the parameter type.
10 Under Inputs, select the Email output from the Start step to pass into the Email parameter.
11 Under Inputs > Folder Id, paste the Folder Id of the Folder that the Page is displayed on.
12 Under Inputs > Page Name, type the Page Name to navigate; this is case-sensitive.
13 Connect the Done path to the End step. Save and close the Flow Designer.
Debug
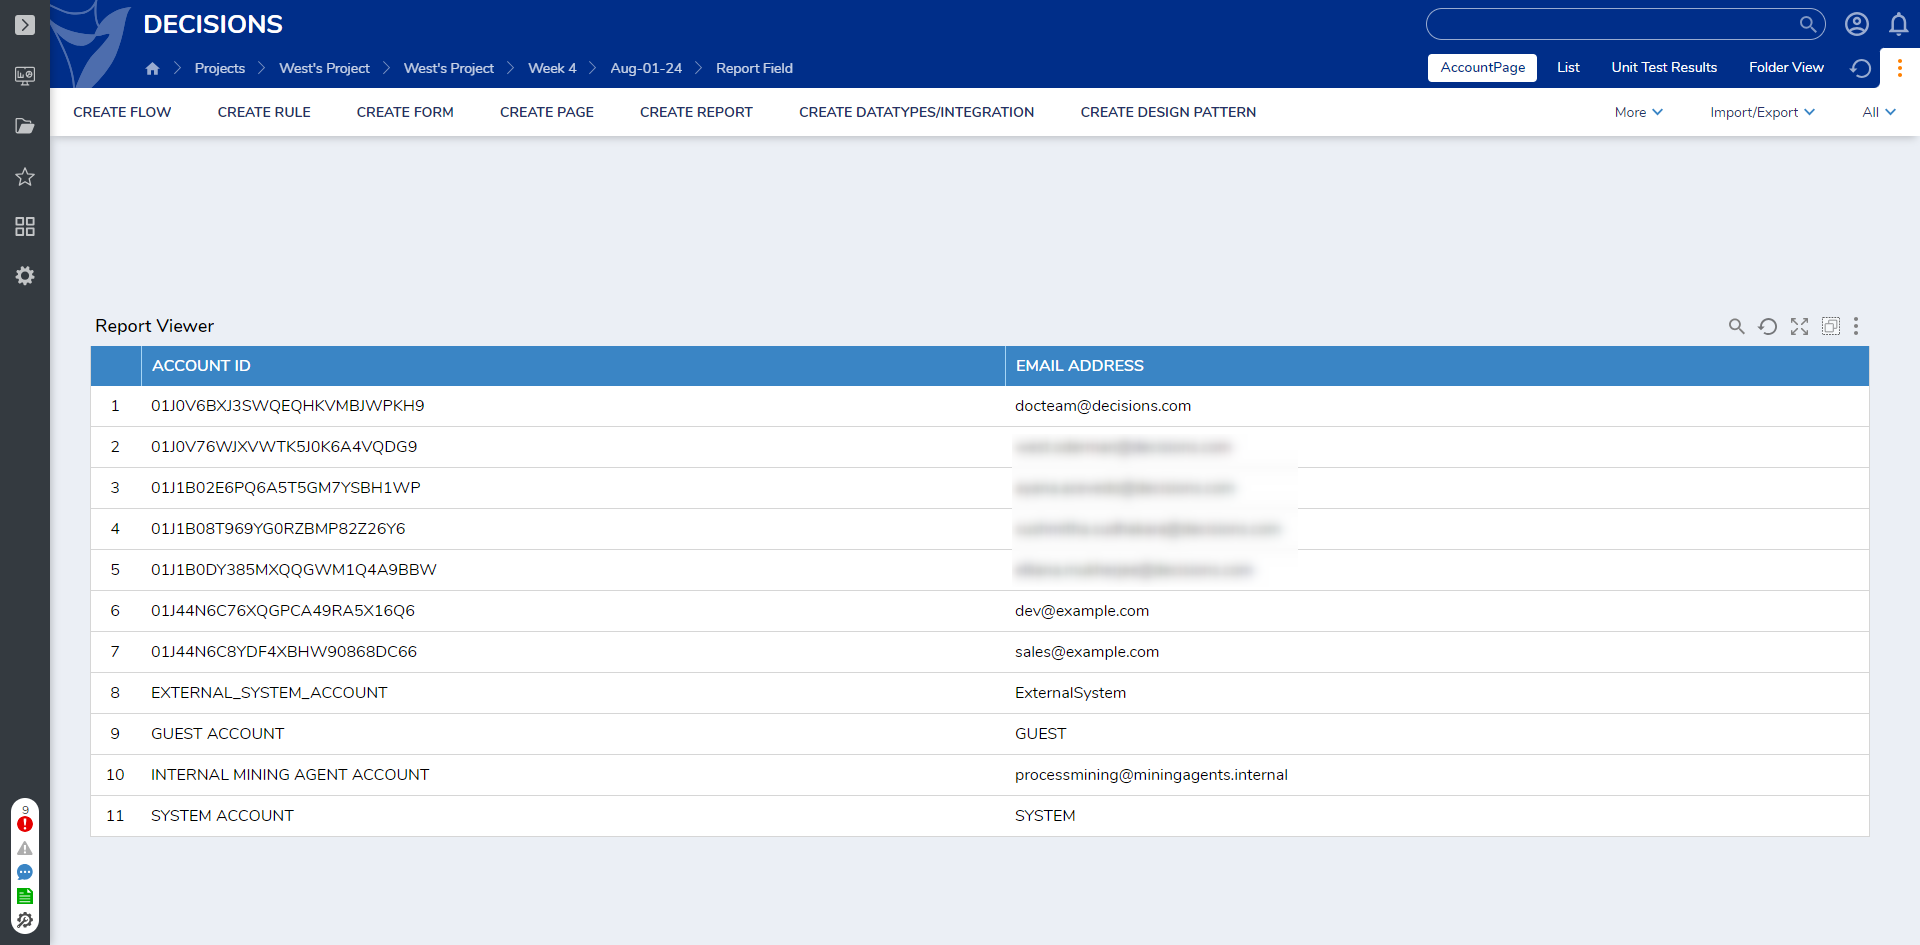
1 In the Designer Folder, run the Flow that was just created.
2 The Flow asks for Input Data; type an Email address.
3 The End Form Session step then navigates to the correct Page with a Row auto-selected.
from: https://documentation.decisions.com/v9/docs/report-row-selection-using-selection-bus