Setting up 2FA (Two Factor Authentication)
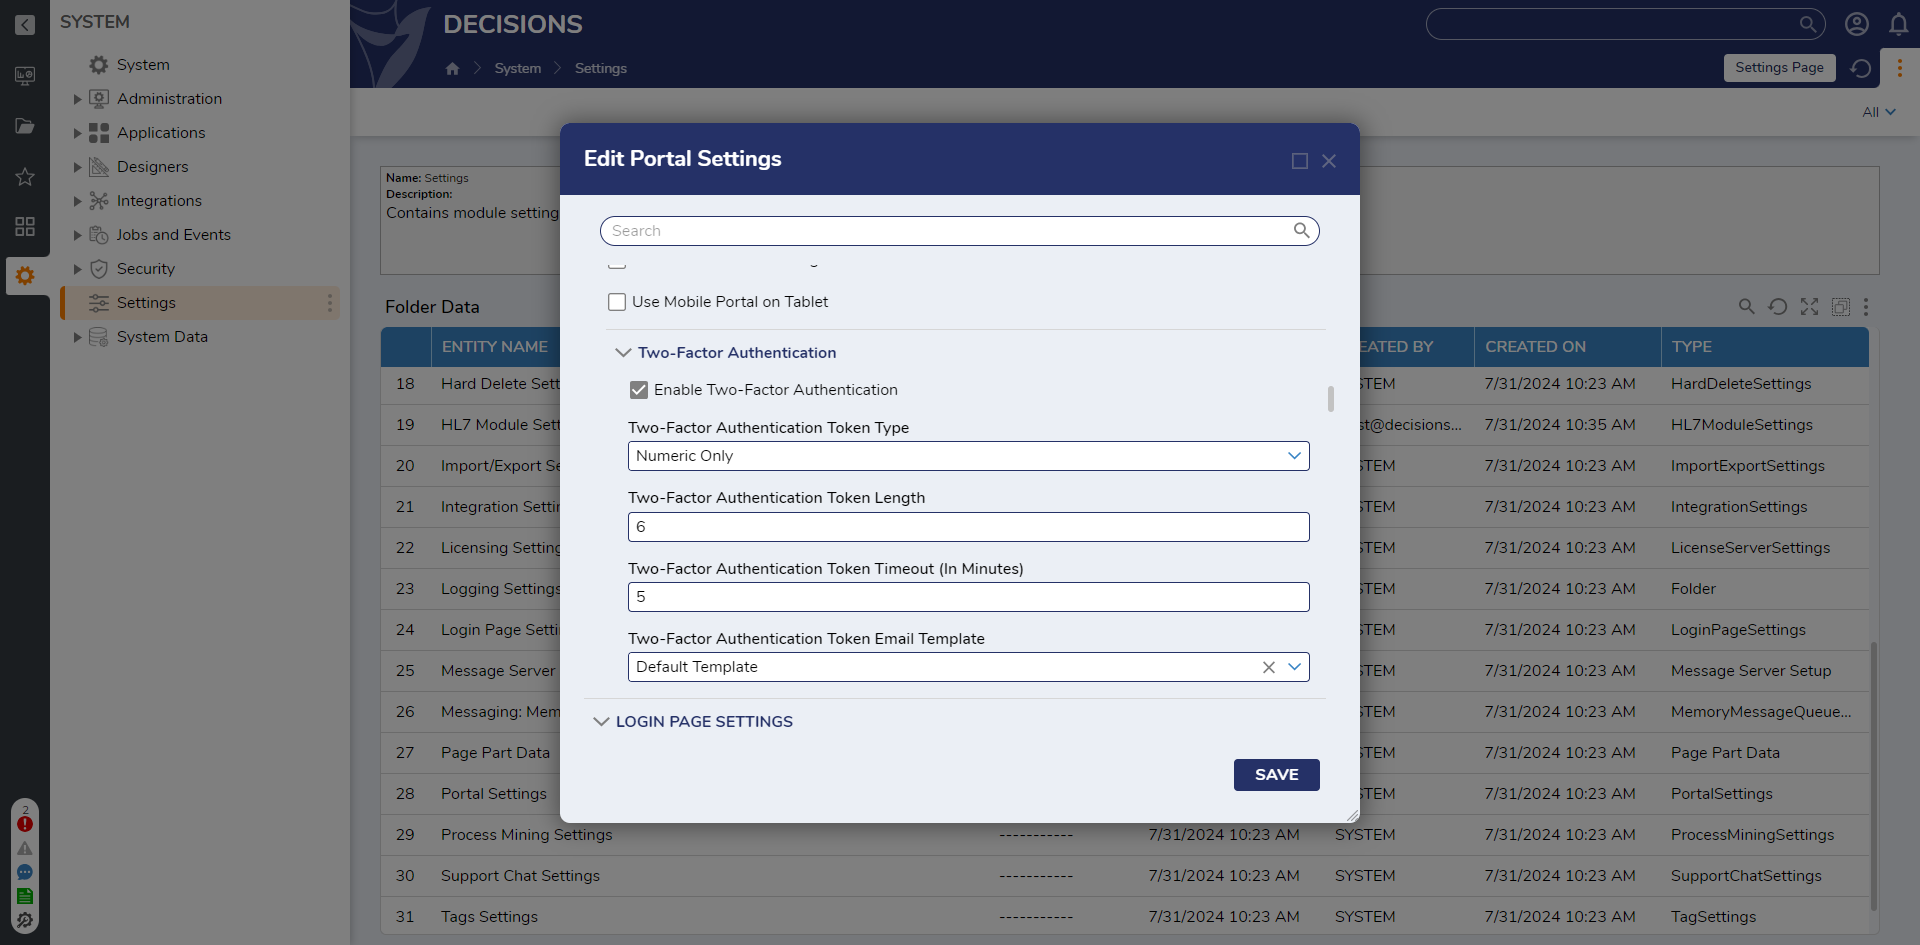
1 From the Studio, navigate to System > Settings, right-click Portal Settings and select Edit.
2 From the Edit Portal Settings window, scroll down to log in and check the Enable Two-Factor Authentication box.
3 Under Two-Factor Authentication Token Type, select the desired option, Numeric Only or Alphanumeric.
4 Under Two-Factor Authentication Token Length, dictate the desired length (number of characters) for the Token.
5 Under Two-Factor Authentication Token Timeout, provide the desired number of Minutes for the Token's expiration.
6 If desired, select an option under the Two-Factor Authentication Token Email Template.
7 Click SAVE to save changes and exit the Portal Settings.
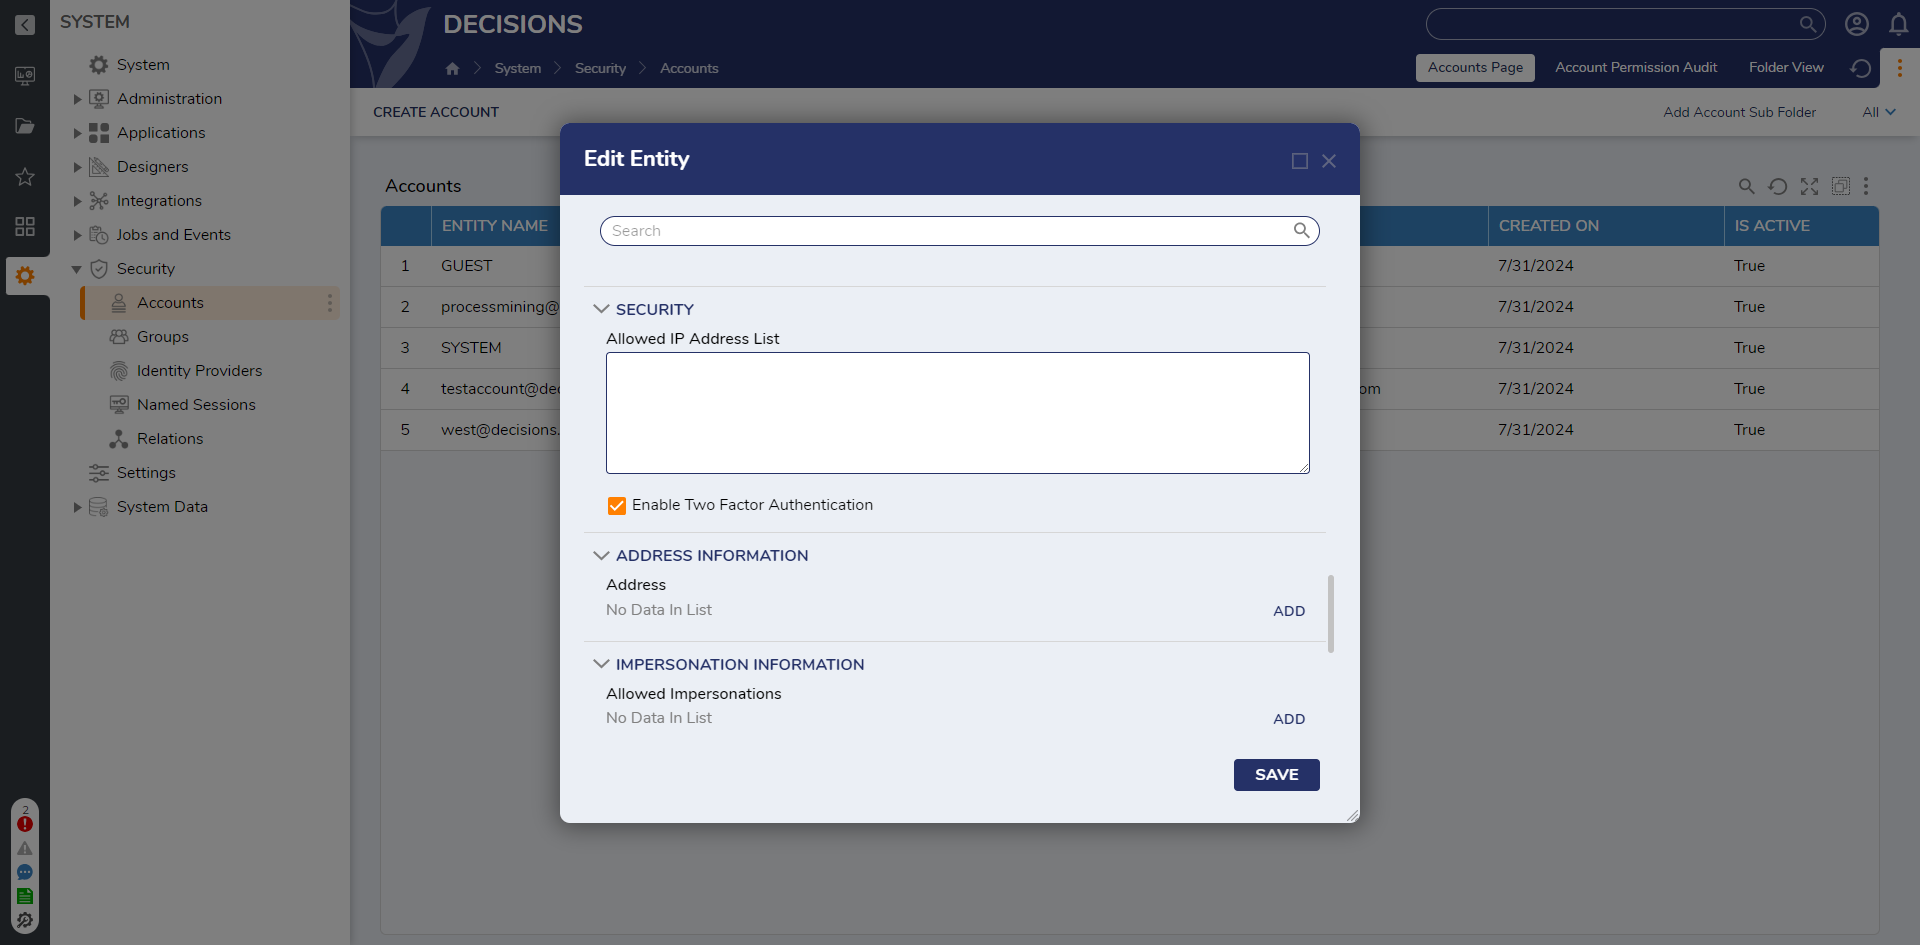
8 Navigate to System > Security > Accounts; locate the desired Account, right-click it, and then select Edit Account.
9 Under the Edit Entity screen, check Enable Two-Factor Authentication under the SECURITY category. Then, click SAVE.
10 Attempt to log into the Account, navigate to the Account's Email inbox, and copy the received authentication token. Then, navigate back to the Login screen.
11 SUBMIT the copied AUTHENTICATION TOKEN; if the Token has expired, click Re-send Authentication Token.
from: https://documentation.decisions.com/v9/docs/2fa-two-factor-authentication-in-decisions


