Using Linked Groups

1 Create an account named "dev@example.com" and add it to a group called Developer Team and Designers.
2 Create another account named "sales@example.com" and add it to the Designers group.
3 Create a new Designer Project at the Root and name it "Dev Apps".
4 Once the Designer Project is created, right-click on the name and navigate to Manage > Manage Permissions.

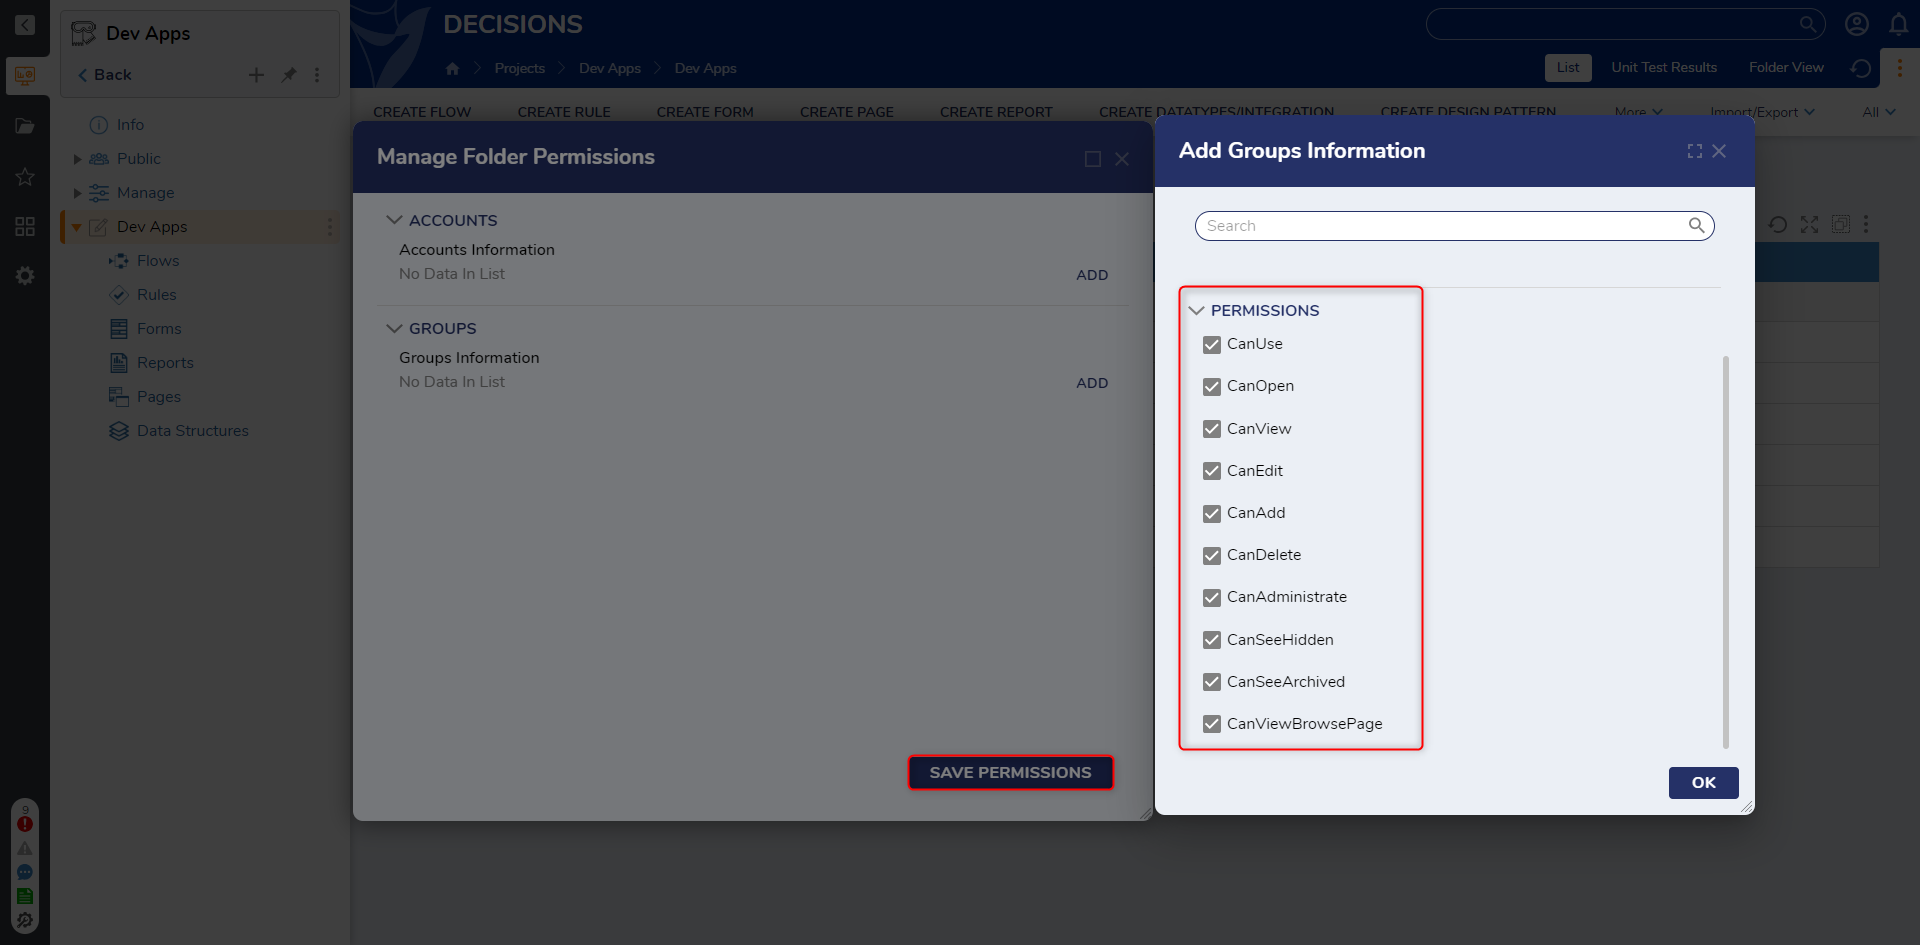
5 In the Manage Folder Permissions window under the GROUPS category, click ADD. Click PICK to select the Developer Team group. Under PERMISSIONS, select all the permissions for the Developer Team to have access to. Select OK and then SAVE PERMISSIONS.
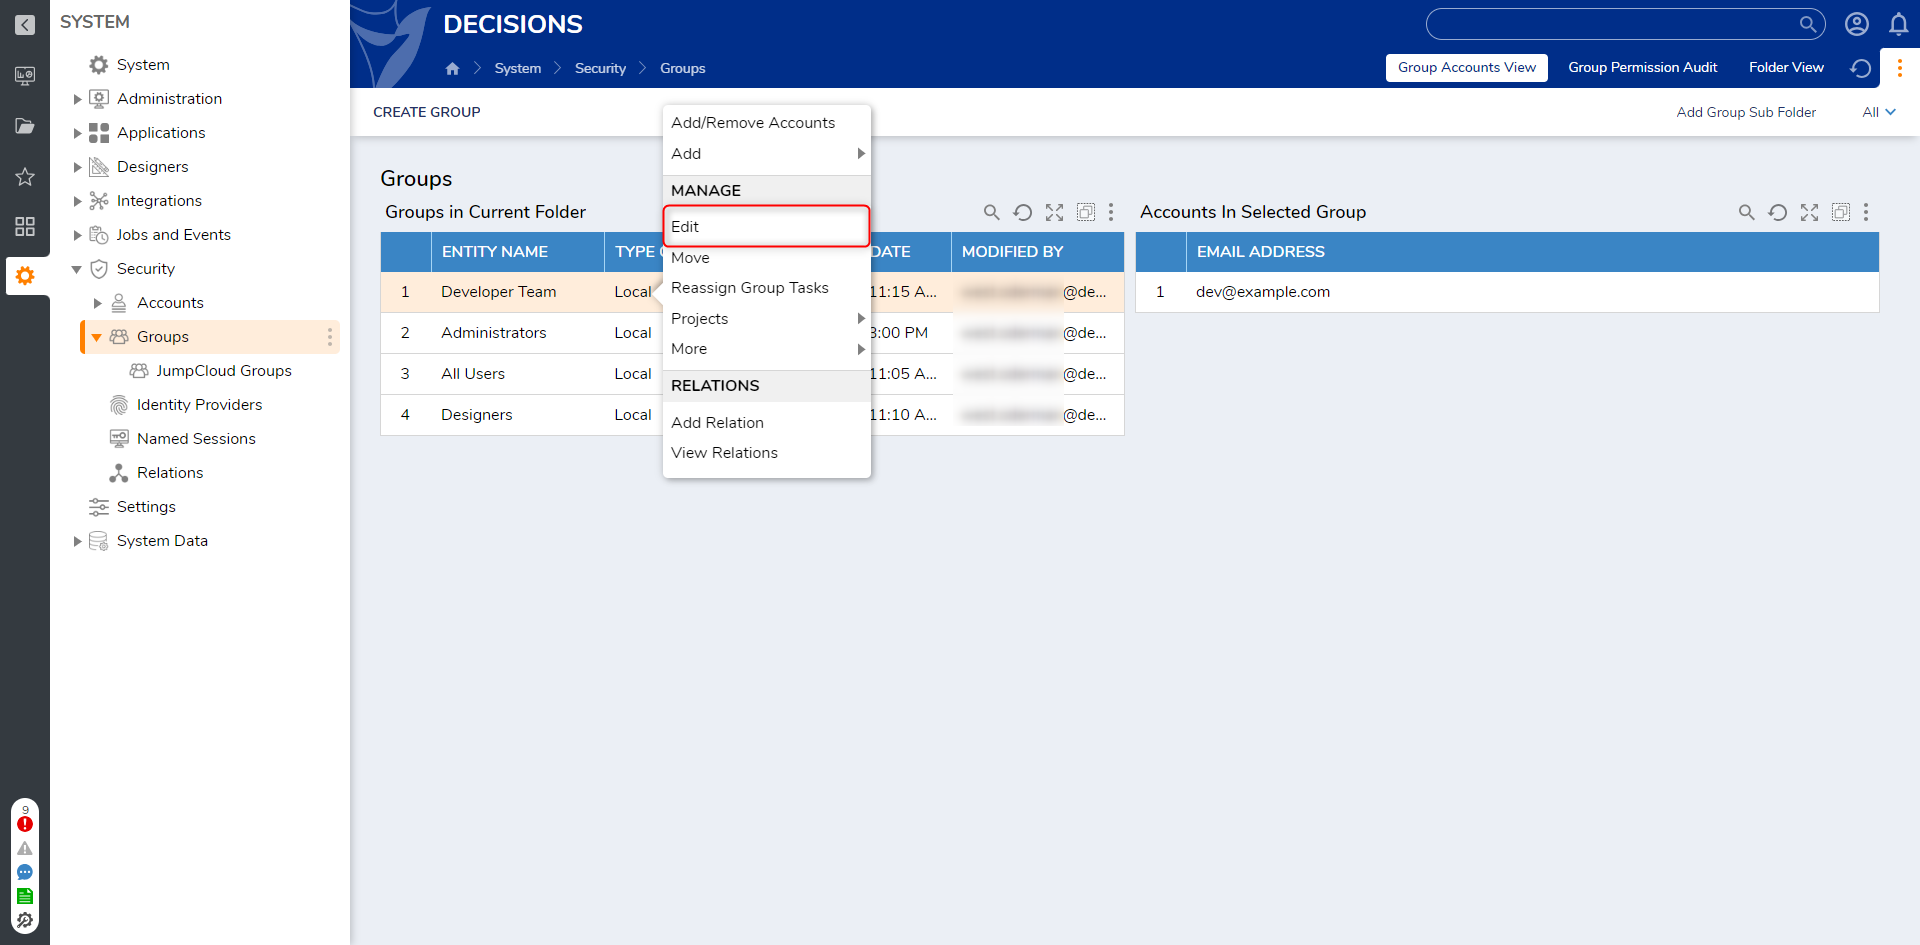
6 In Decisions Studio, navigate to System > Security > Groups. Right-click on the Developer Team group and select Edit Group.
7 Select the Specify Linked Groups checkbox. Under the LINKED GROUPS category, click ADD.
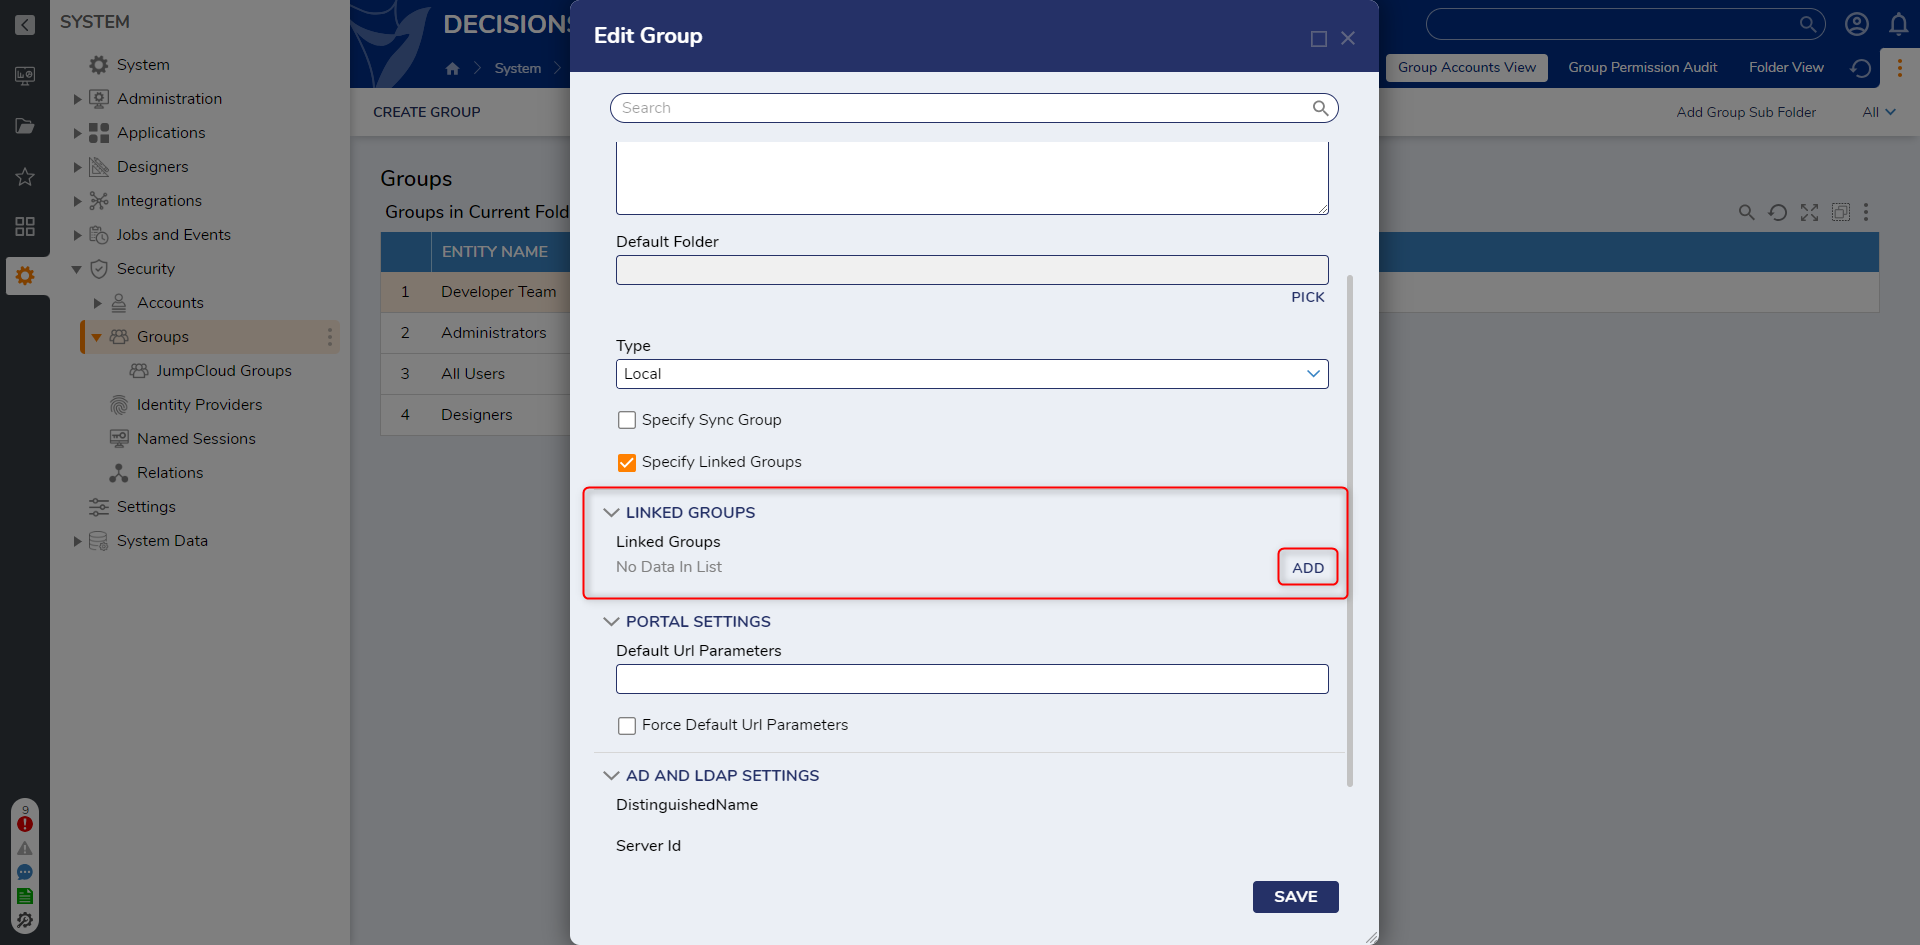
8 Click PICK and select Designers. Click PICK and click OK. Click SAVE.
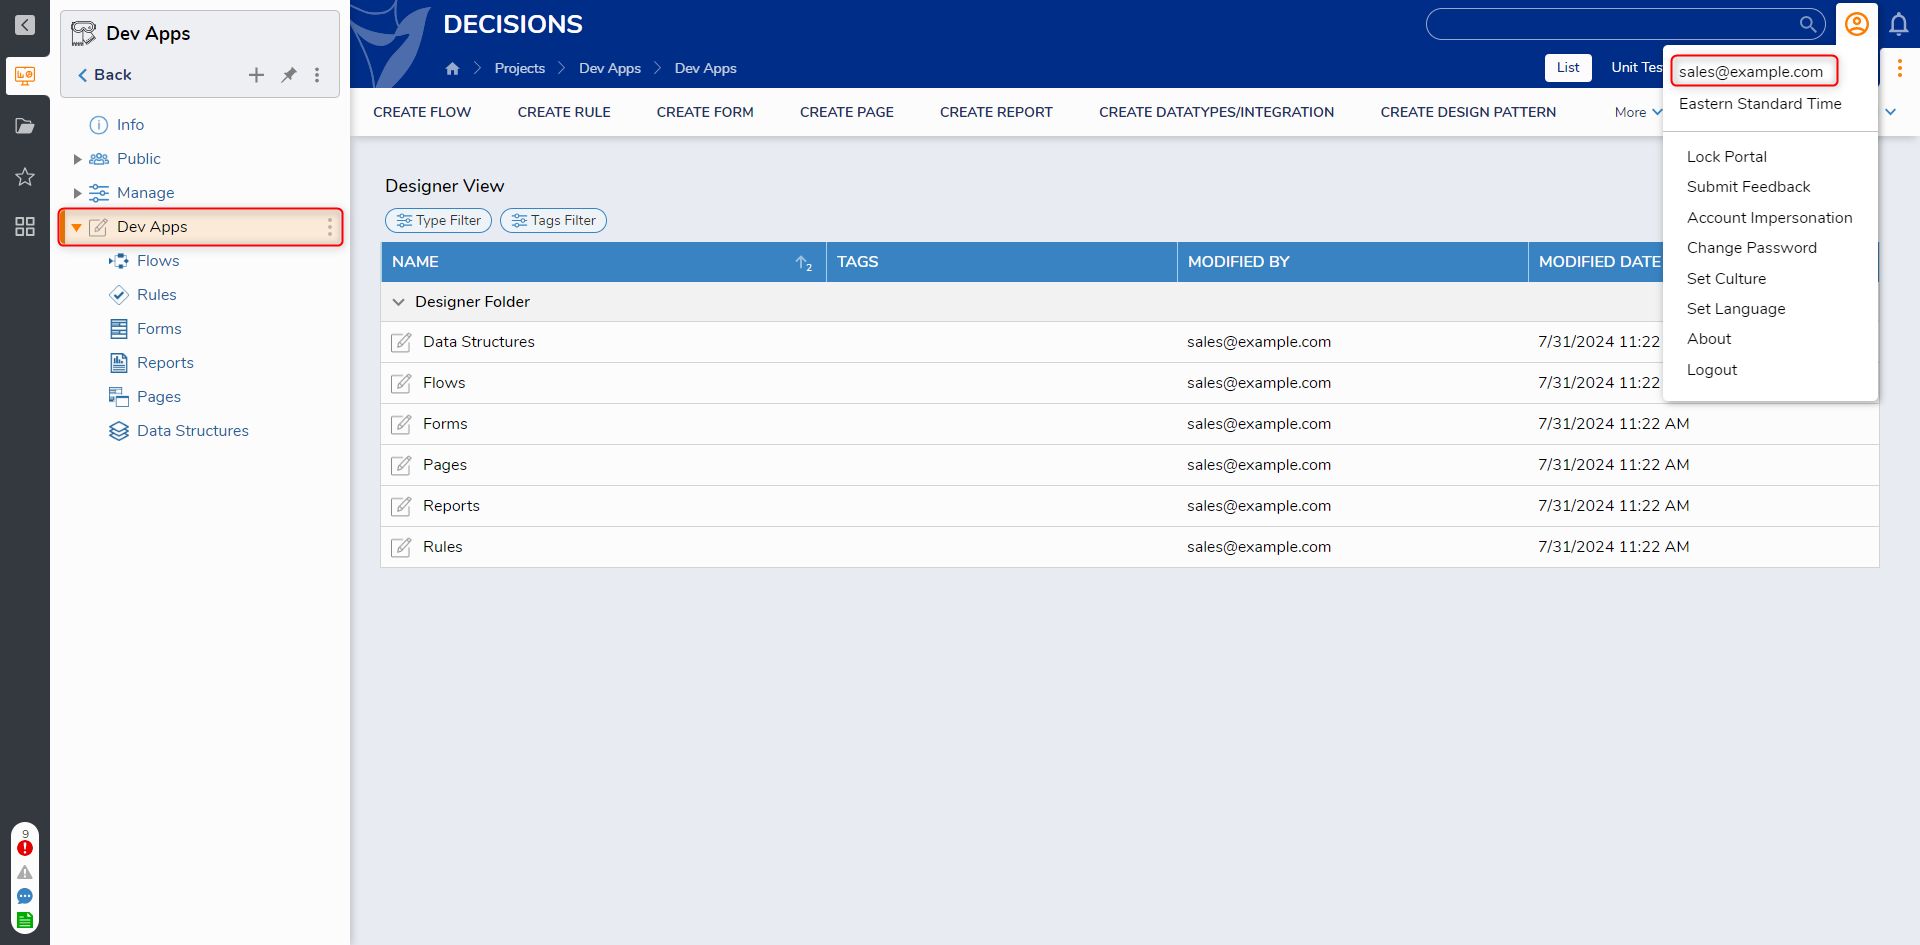
9 When the sales@example.com account logs into the Decisions environment, it is now able to access the Dev Apps Folder as well.
from: https://documentation.decisions.com/v9/docs/using-base-groups