Creating a Simple Form
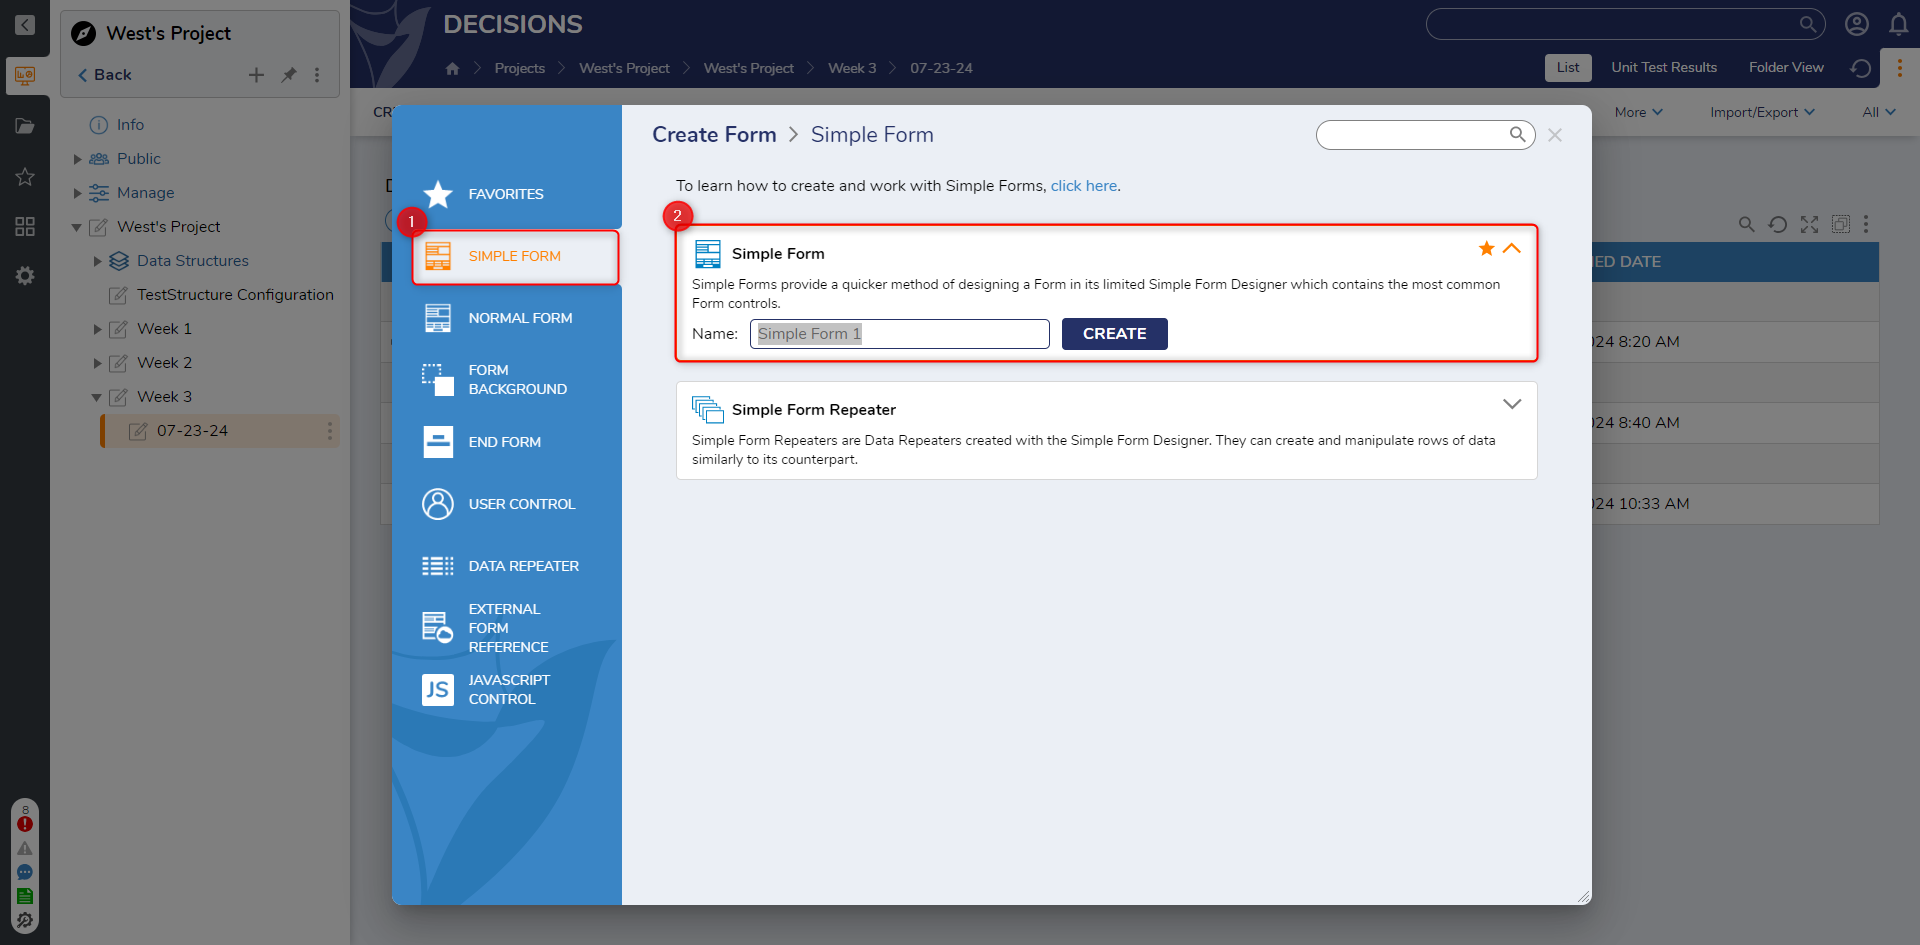
1 In a Designer Folder, select CREATE FORM.
2 Navigate to and select Simple Form, name the Form. Select CREATE.
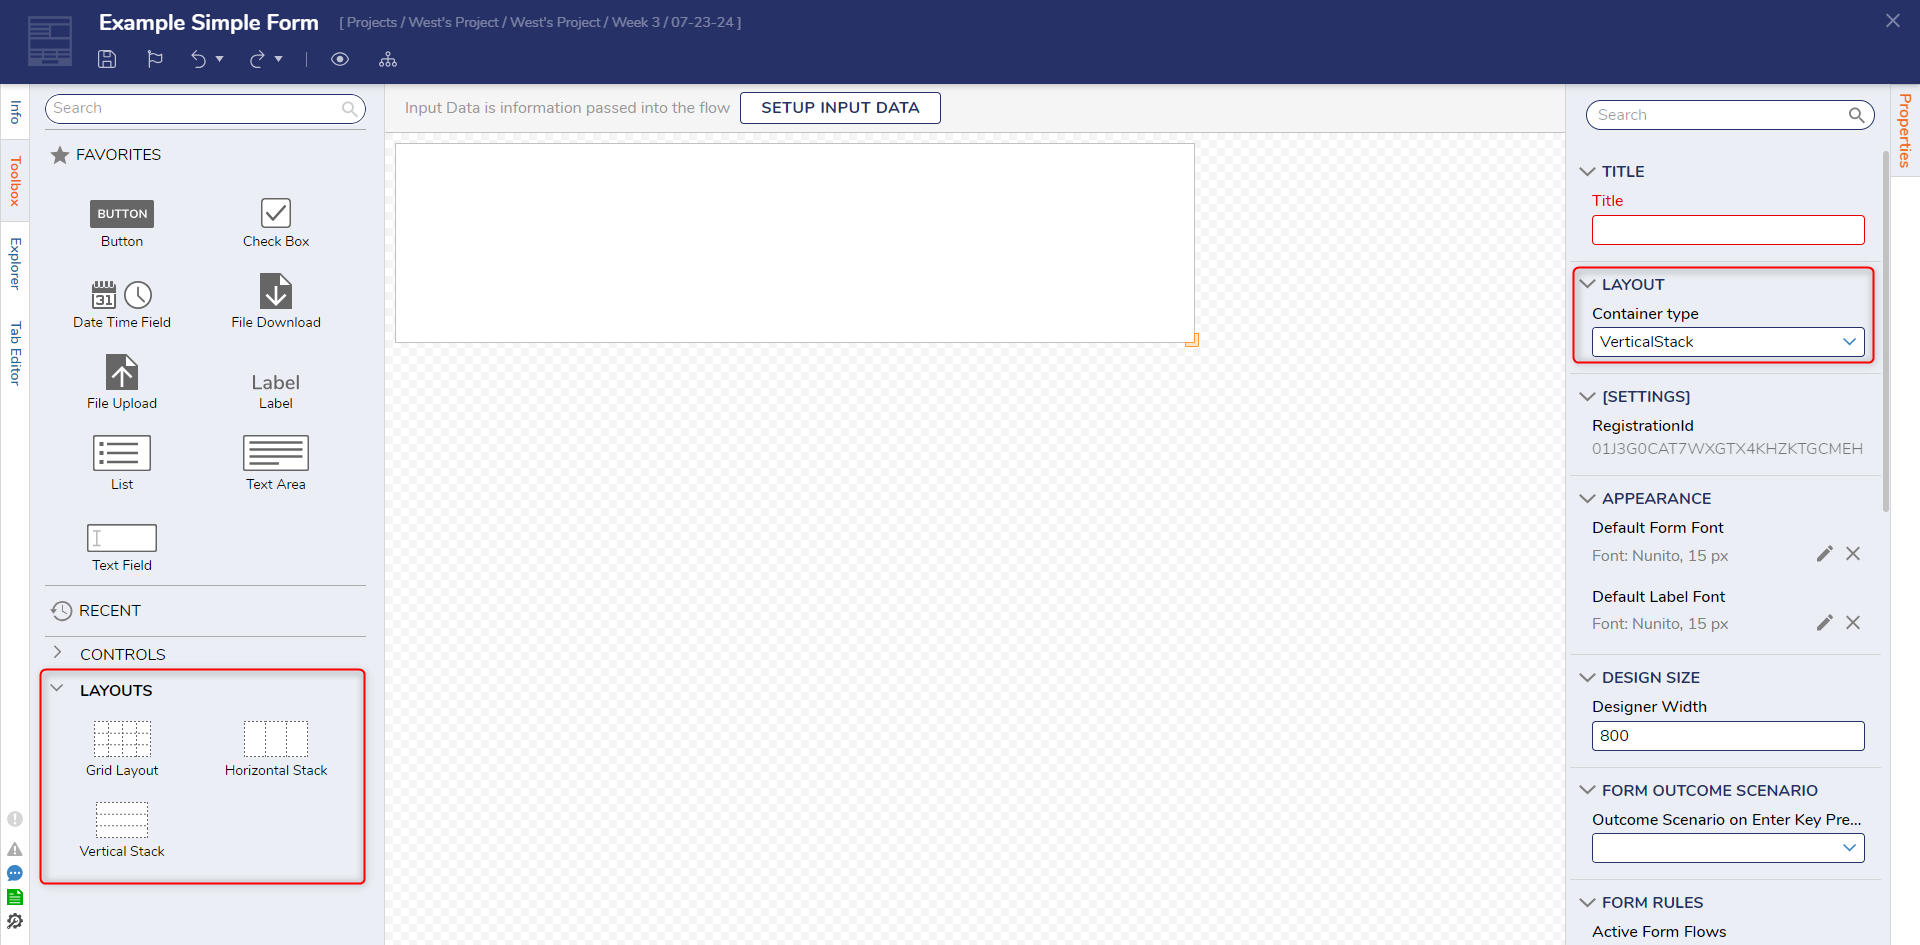
3 In the Simple Form Designer, notice there are two options for the Layout, Grid Layout and Vertical Stack. Leave the Layout as Vertical Stack for this example.
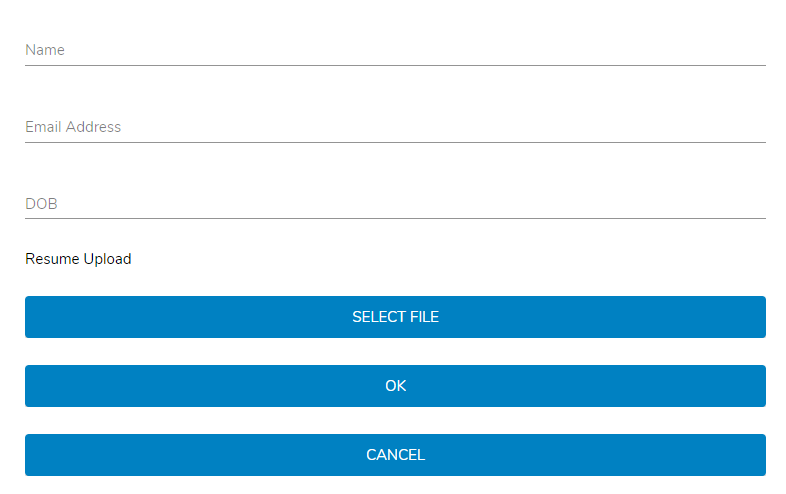
4 Drag and drop different controls onto the Form. The Form in this example has two TextBoxes (Name and Email Address), a Date Time Field (DOB), a File Upload (Resume Upload) control and two Button control with one labeled OK and the other labeled CANCEL.
5 Save and Close the Form.
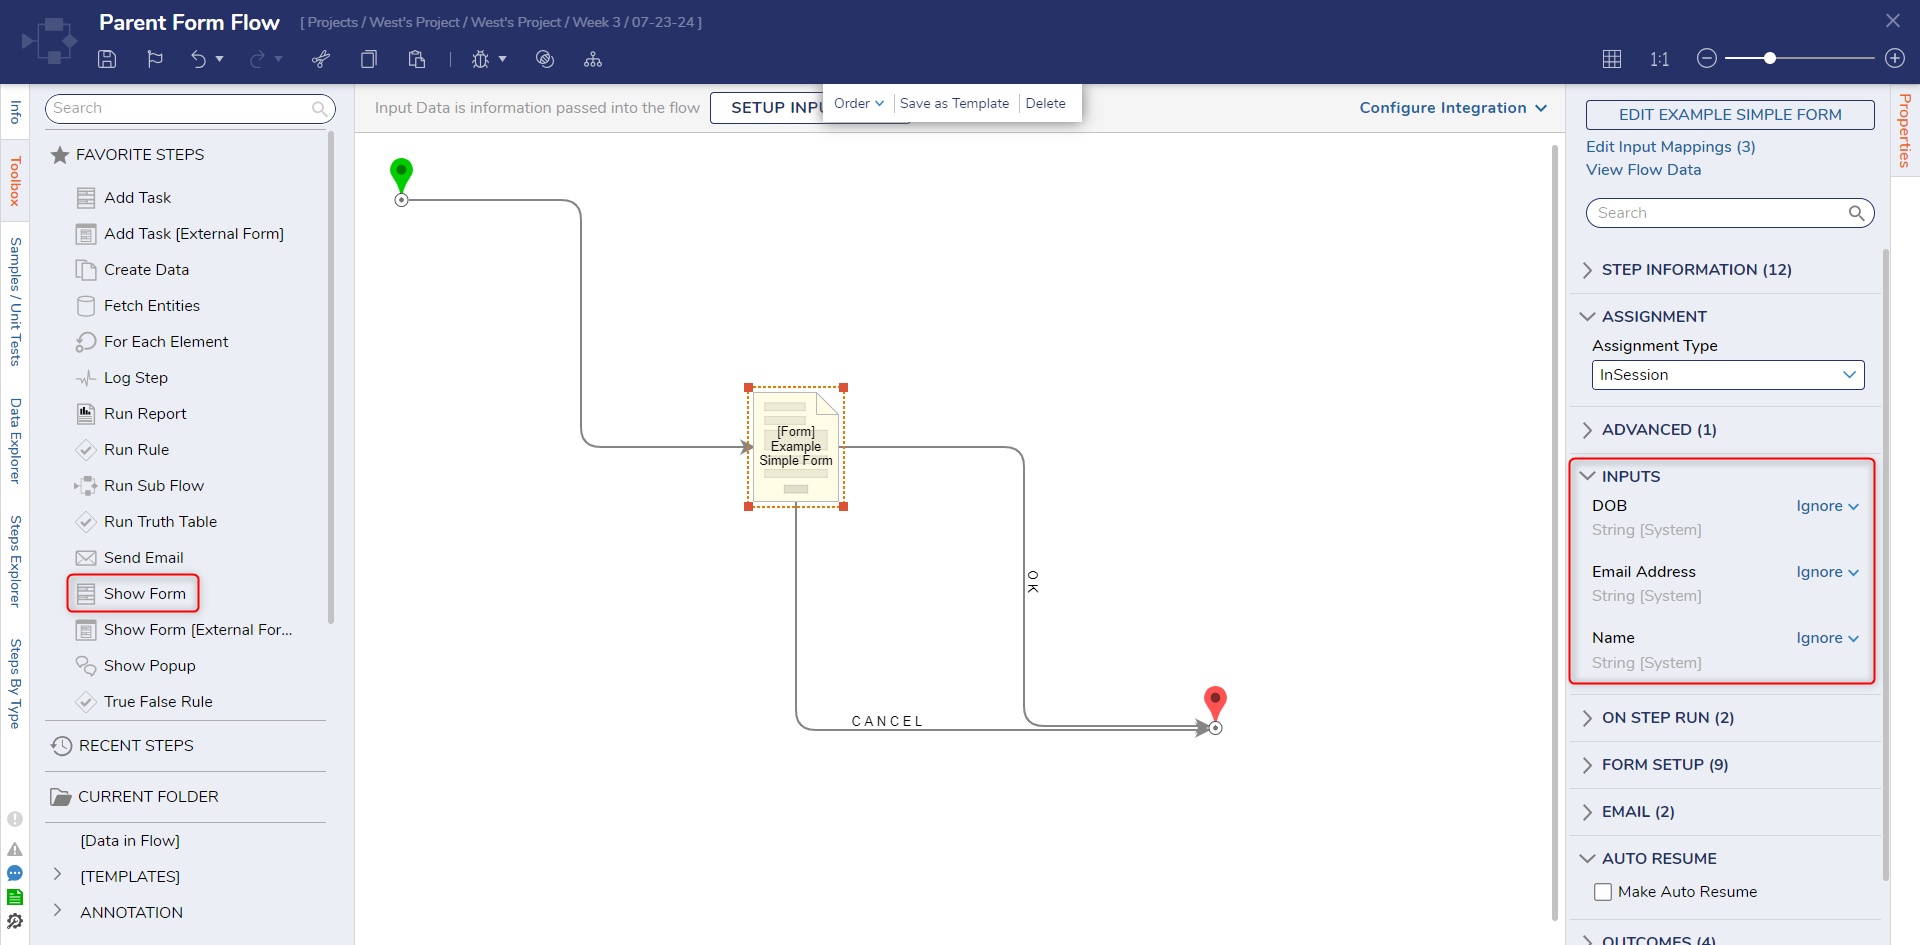
6 Add the Form in a Flow via a Show Form step. Connect it to the Start and End steps.
7 Select the Form and navigate to Properties panel > INPUTS. Change all inputs's mapping type to Ignore to allow user submitted data.
from: https://documentation.decisions.com/v9/docs/about-simple-forms


