Creating a Truth Table
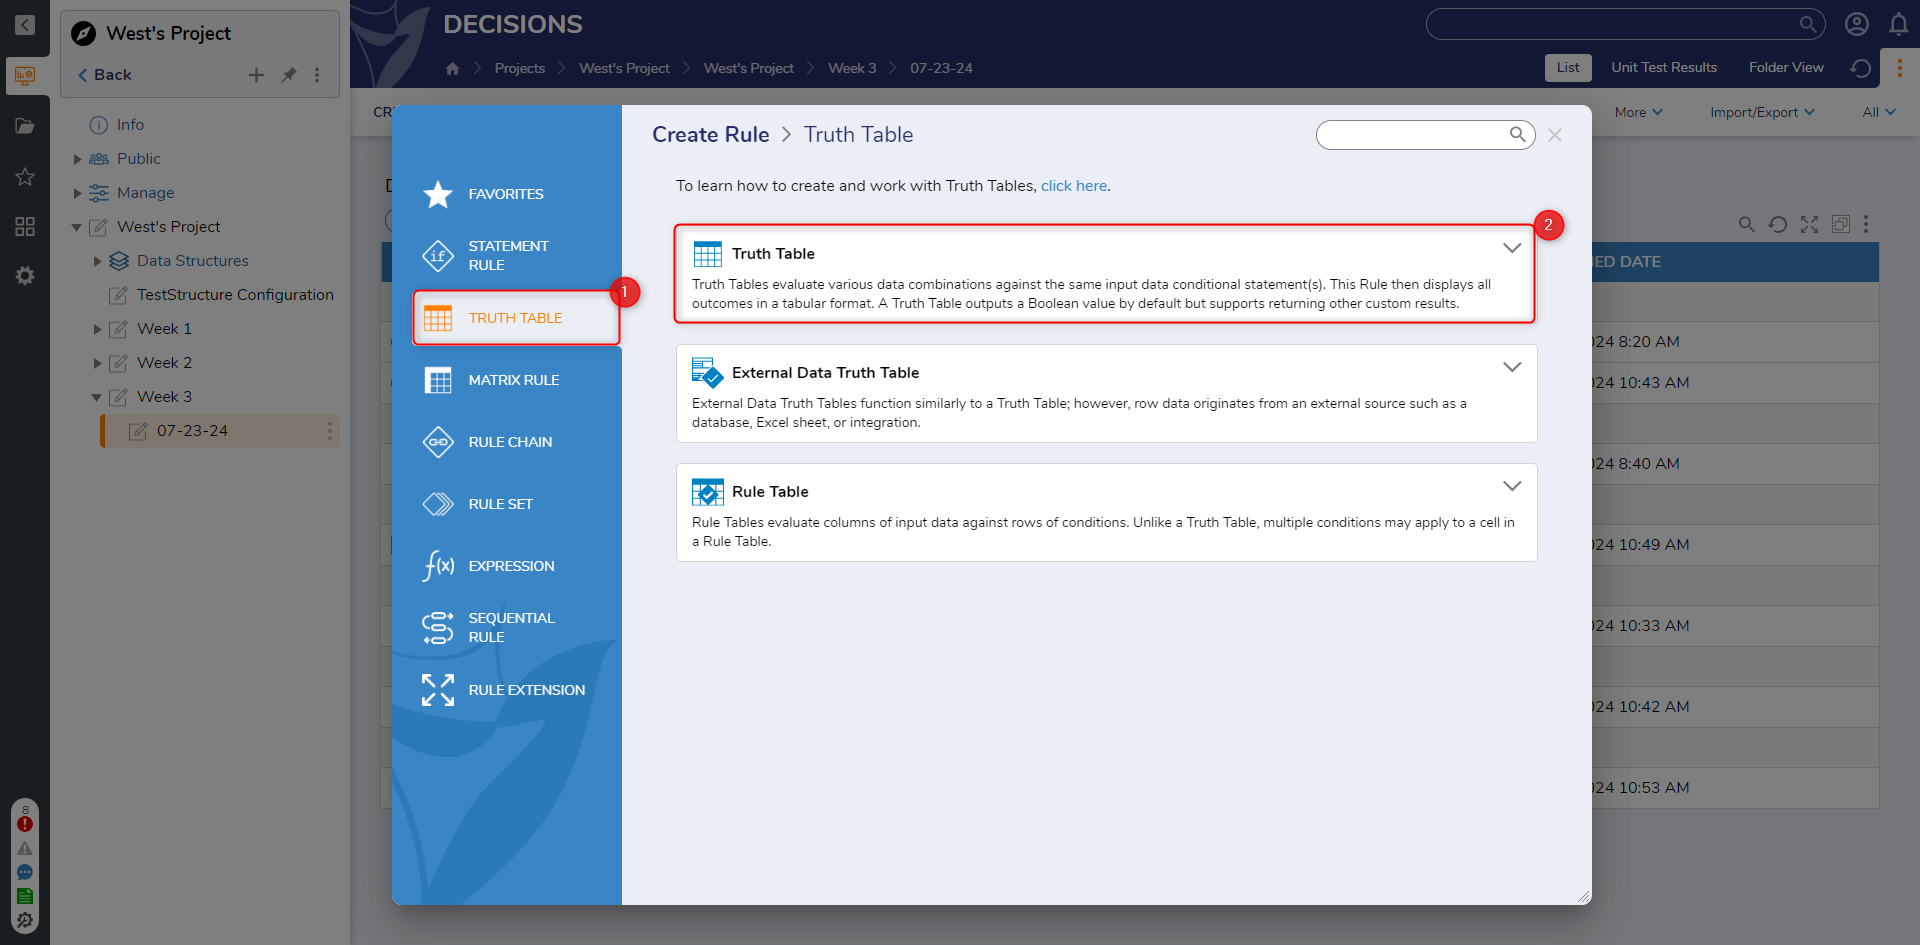
1 In a Designer Project, Select CREATE RULE
2 In the Gallery, select Truth Table from either the Favorites or Truth Table sections. Name the Truth Table, then hit CREATE.
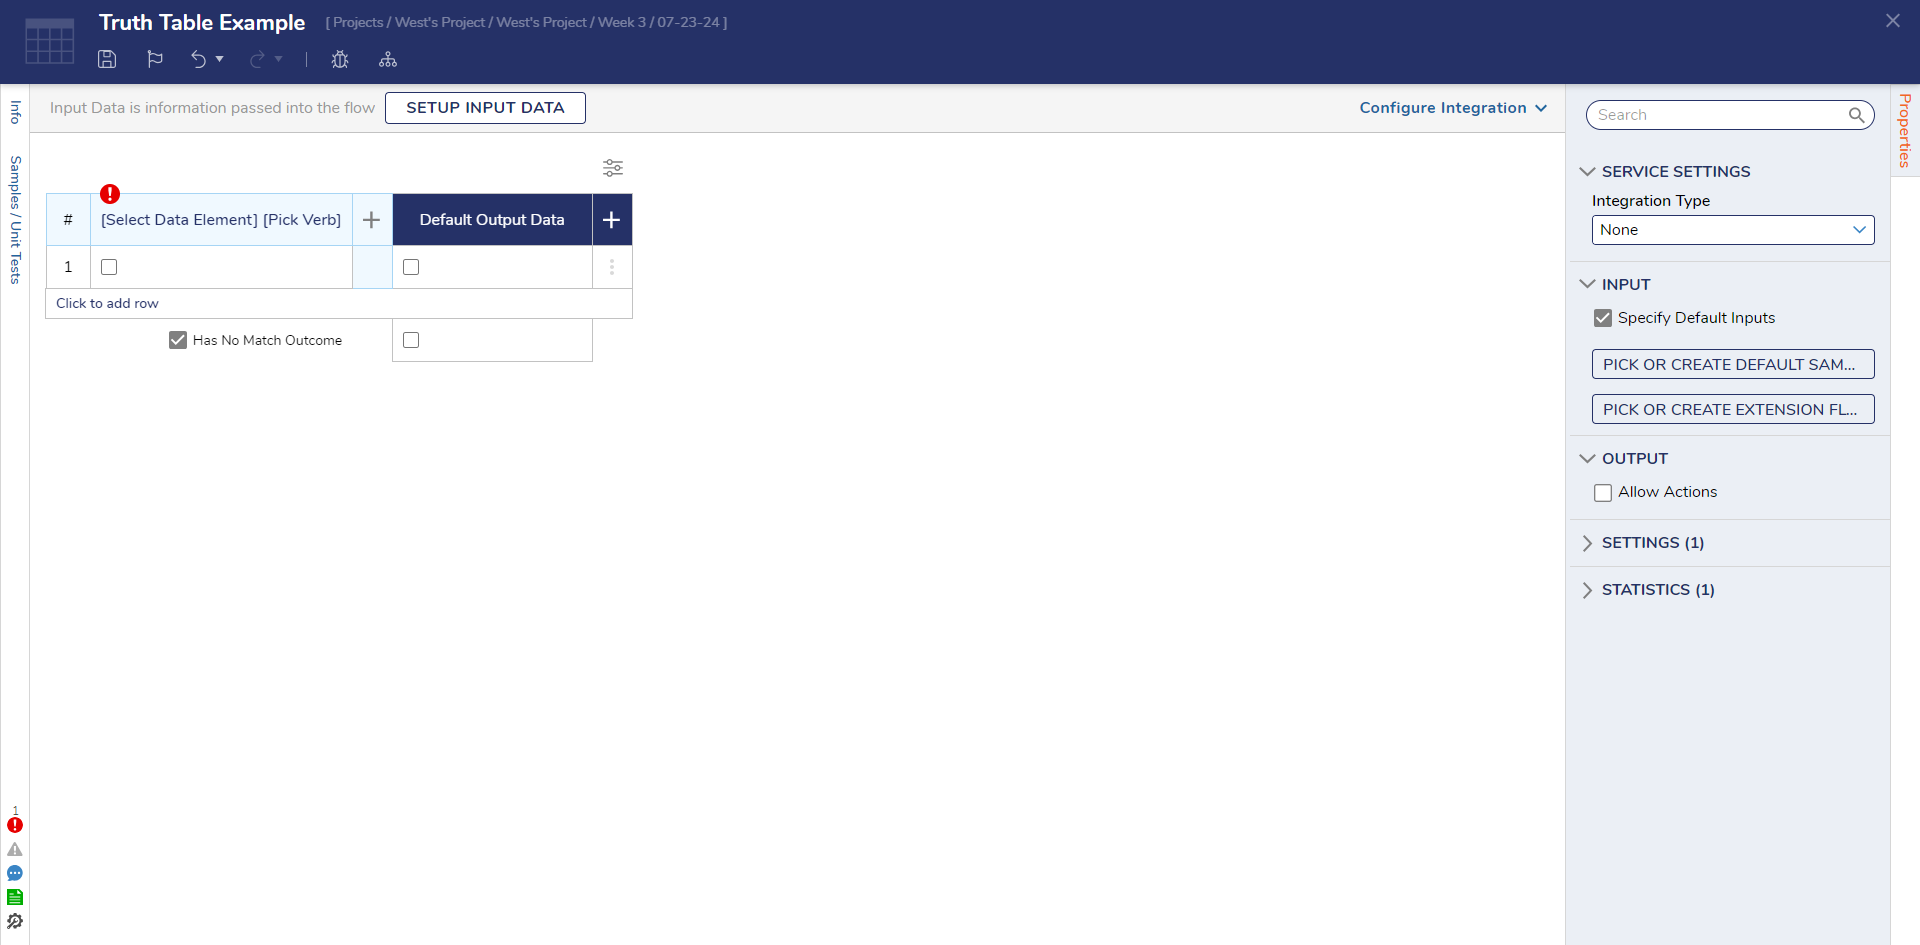
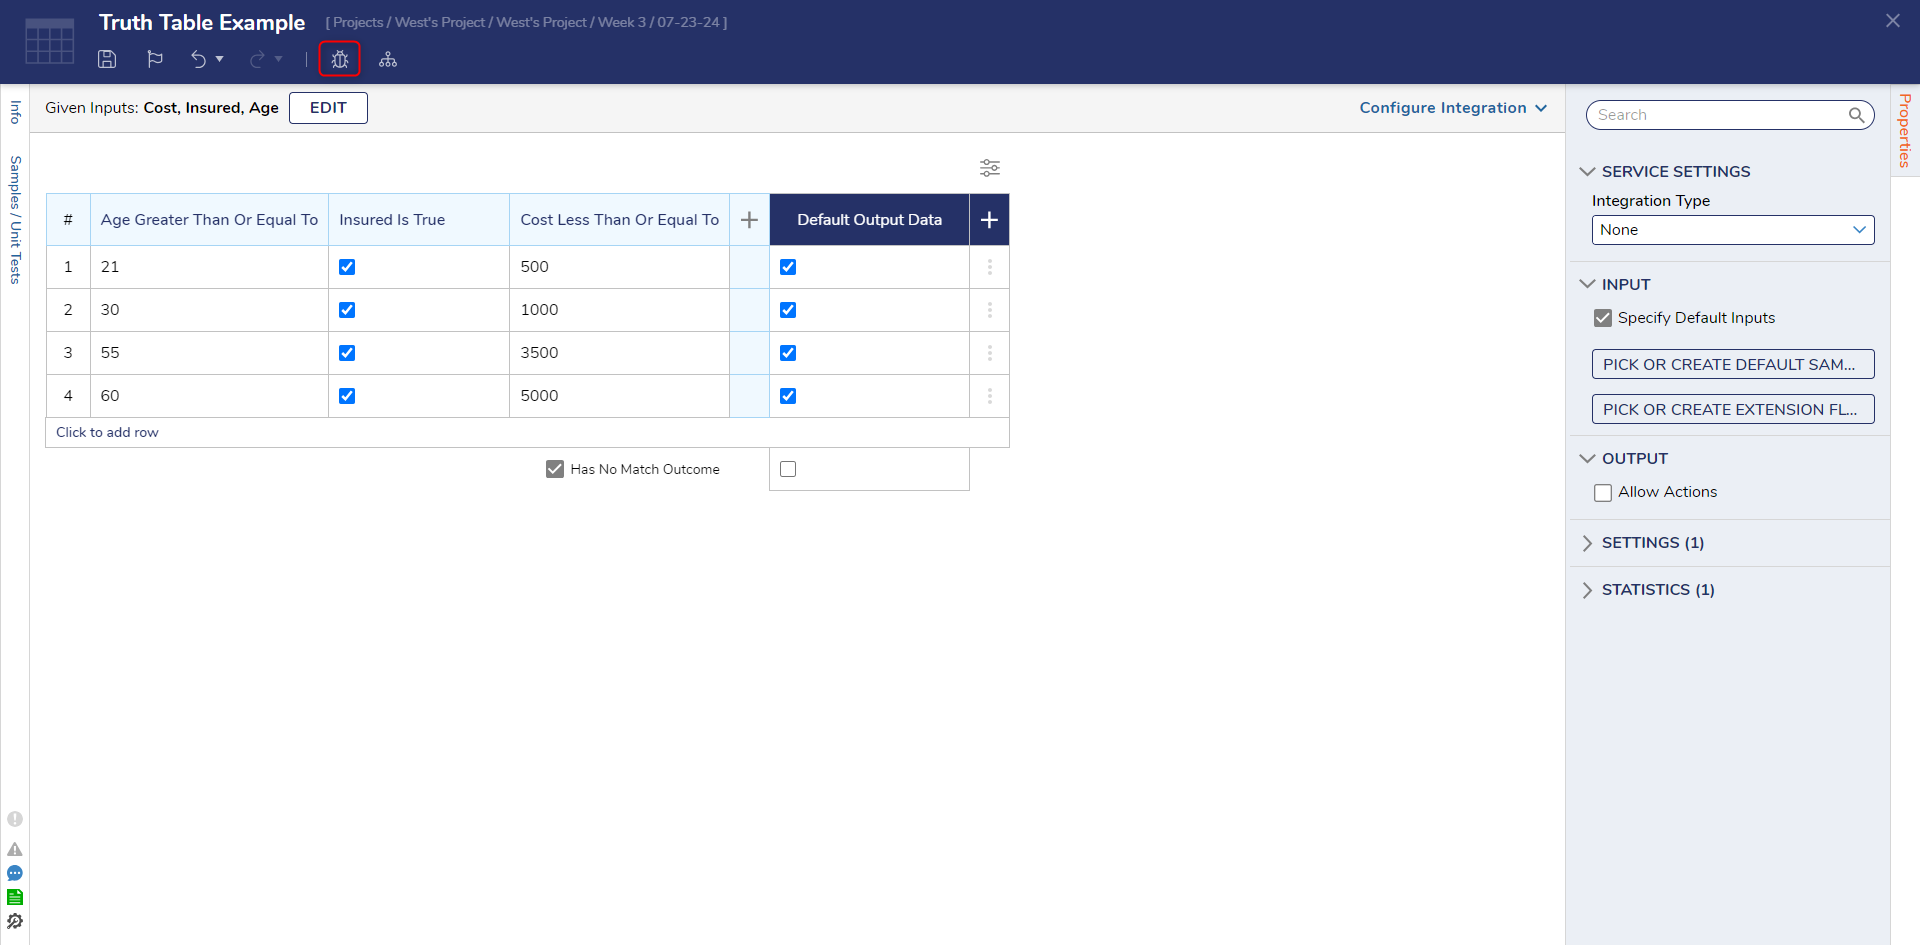
3 The Truth Table Designer automatically opens.
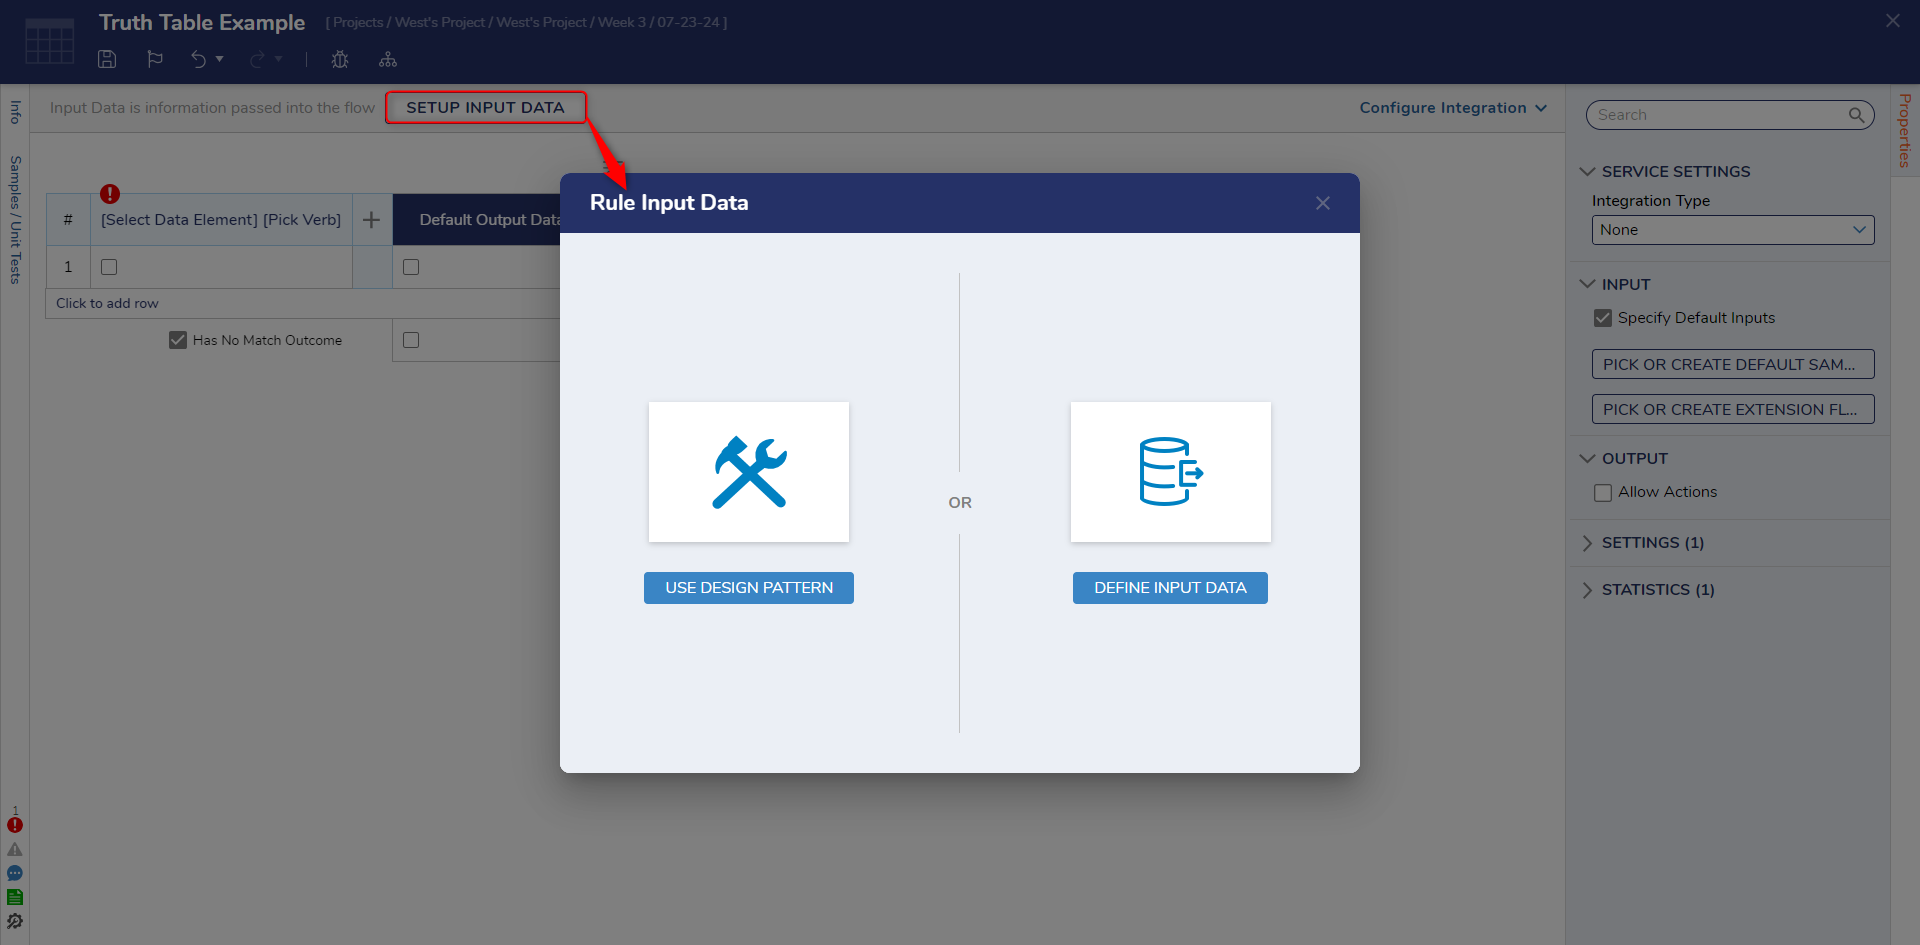
4 Select SETUP INPUT DATA, then under Define Input Data, click DEFINE.
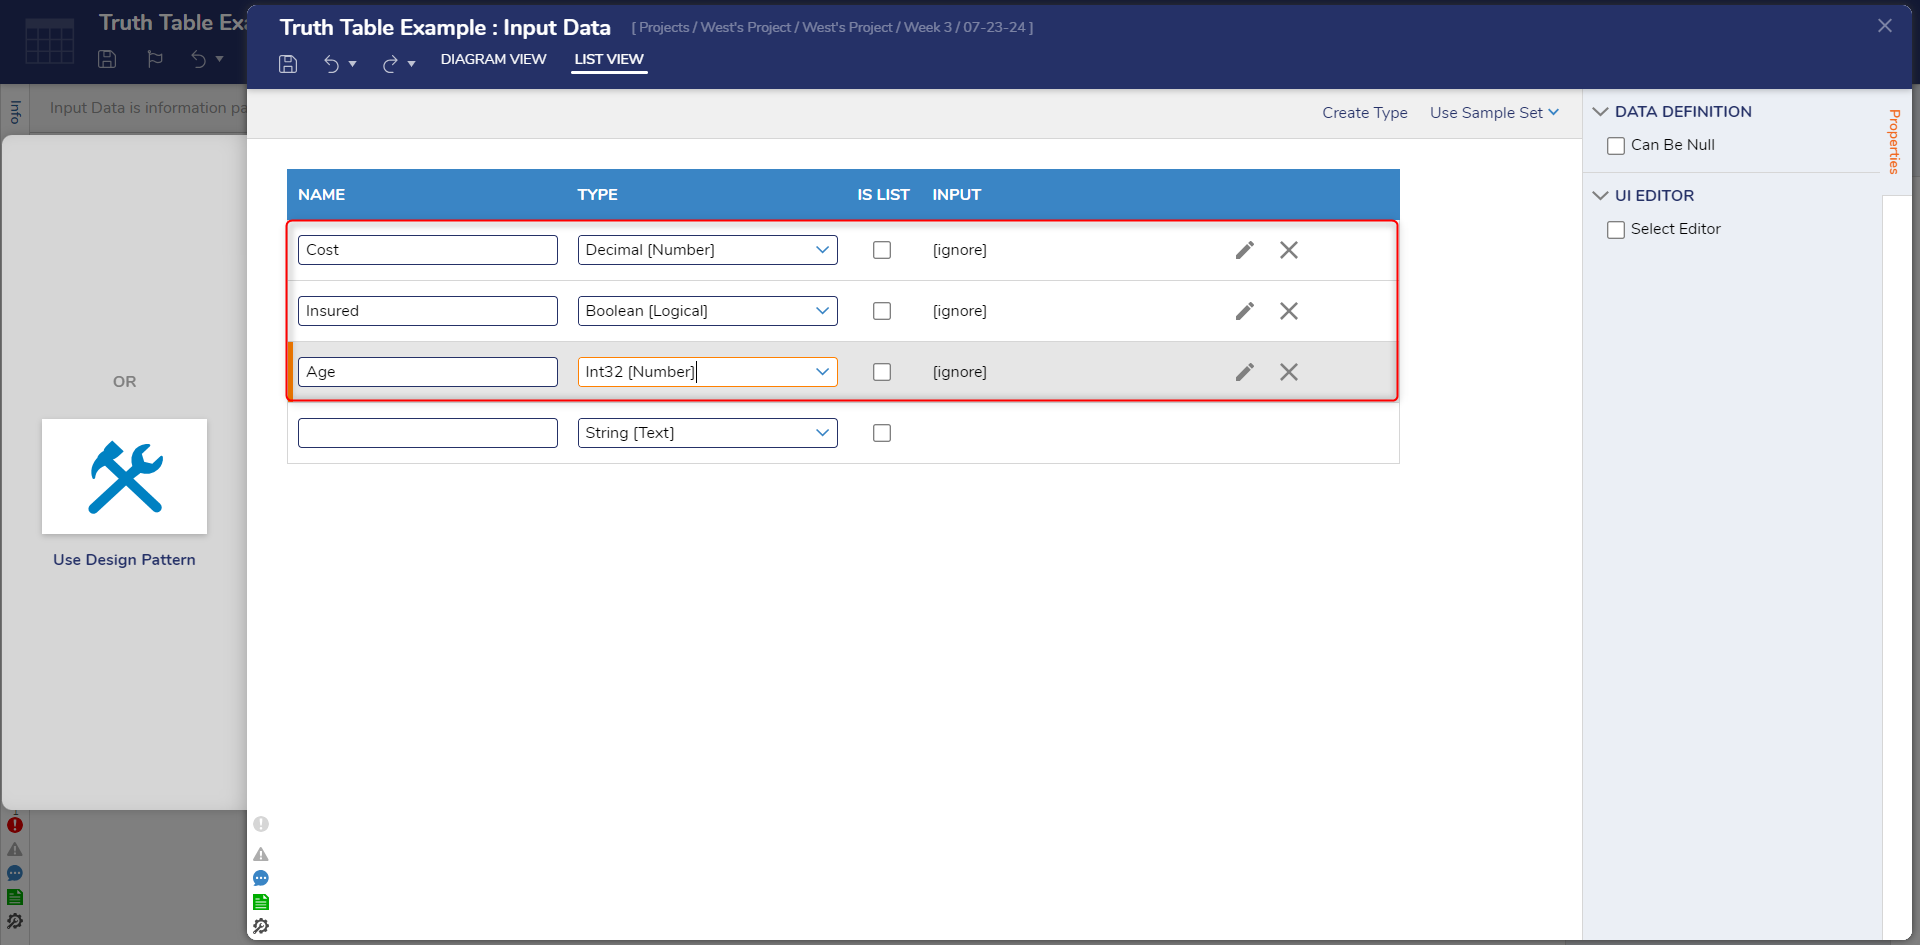
5 A window will open, and enter variables that the Truth Table will use. Click Save once finished.
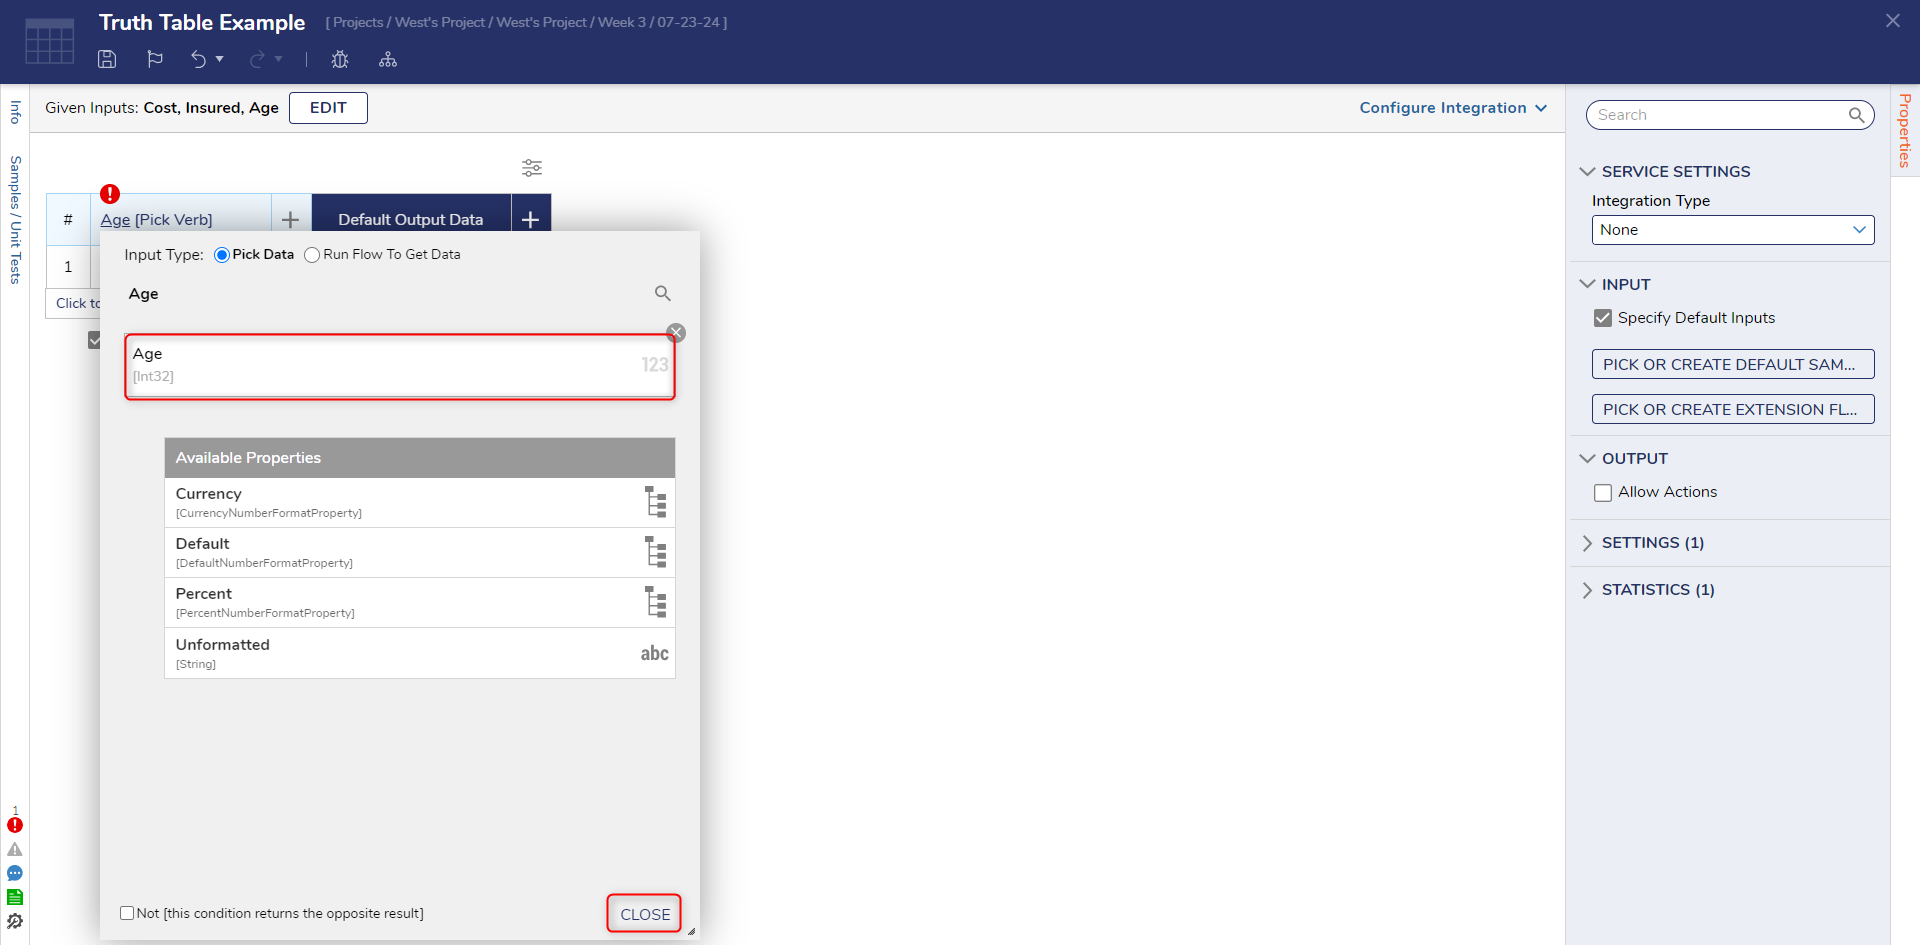
6 Click Select Data Element for a column. A menu will appear listing configured input values. Select an input value, then CLOSE.
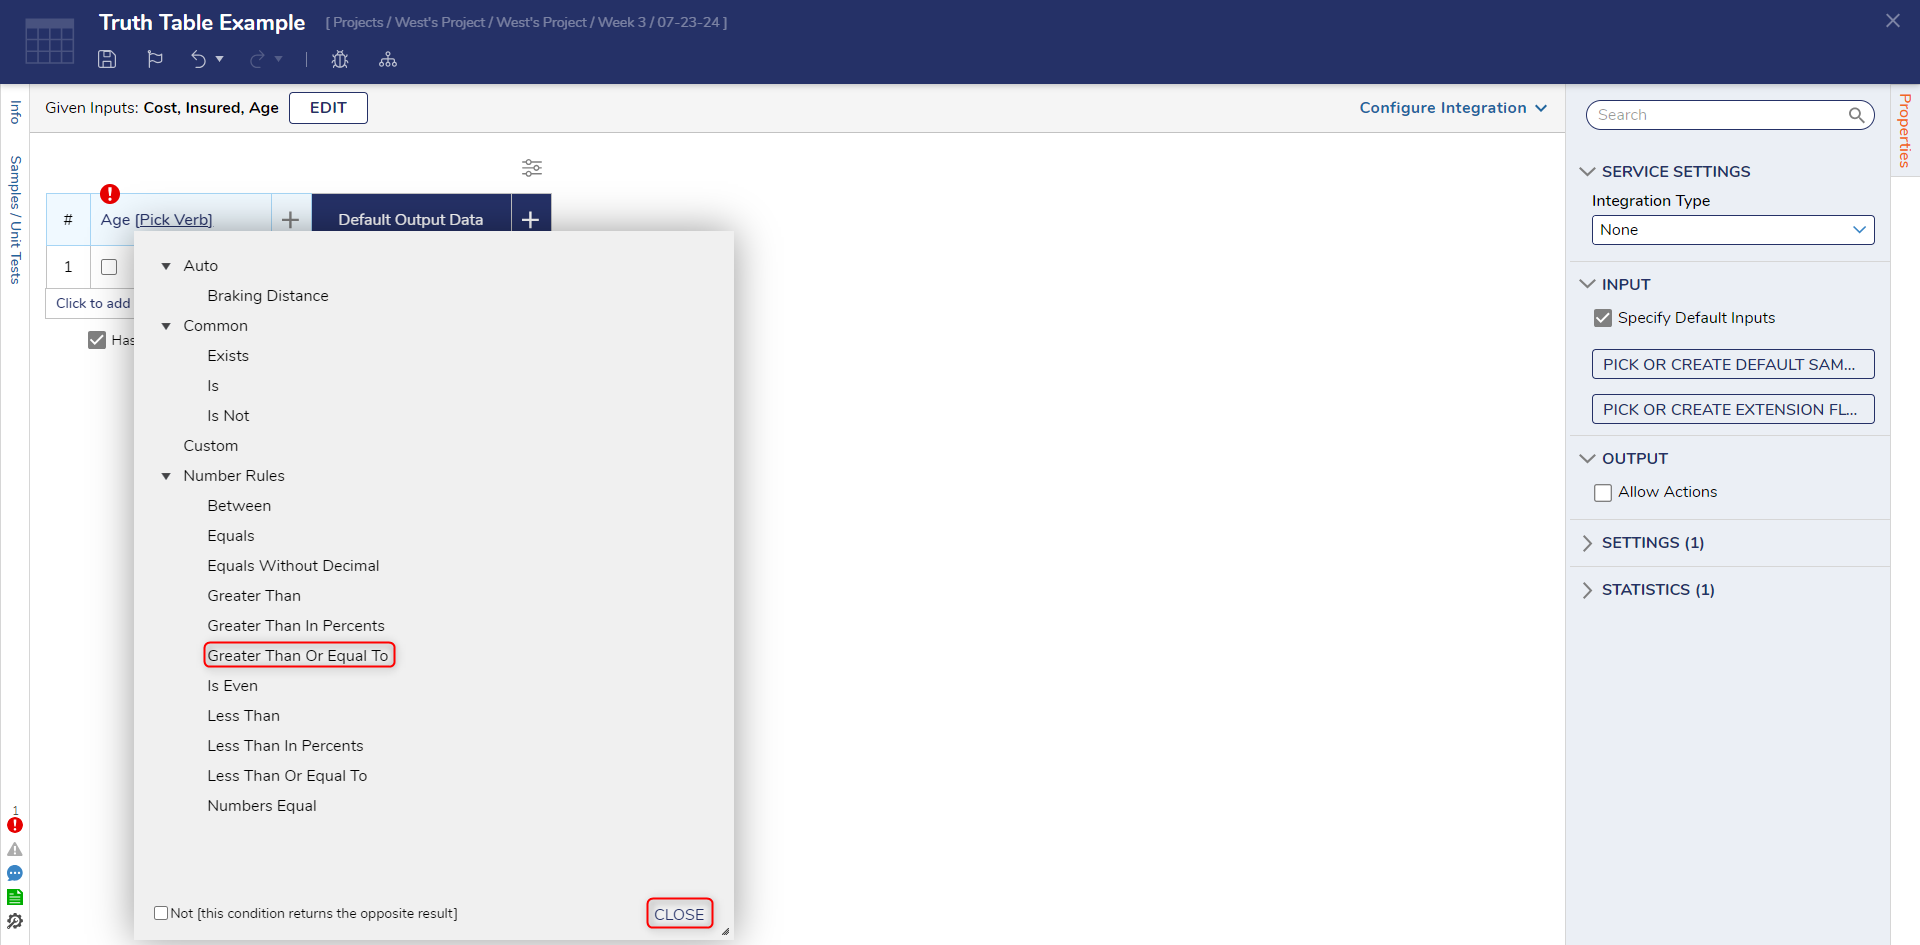
7 Another menu will appear, defining the condition verb for the column. These conditions will vary depending on the data type of the input. Select a condition, then click on Close.
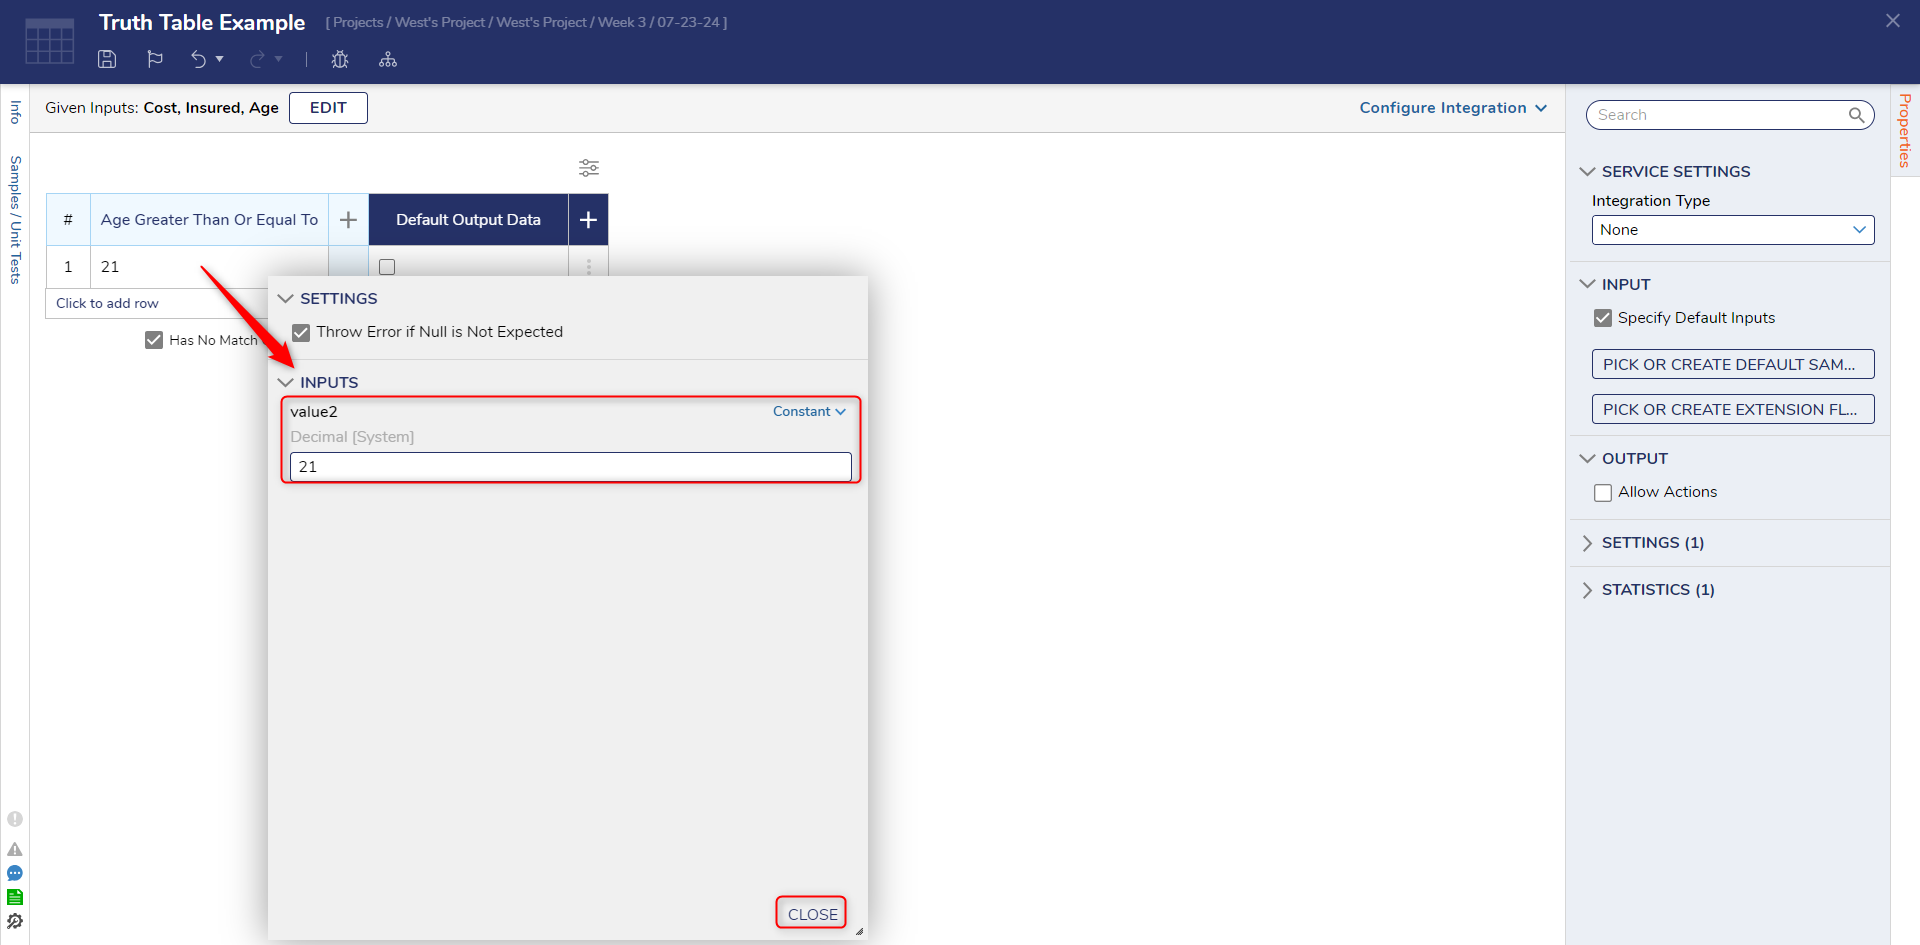
8 The cells for the column will be updated to reflect the datatype of the input data. Select the pencil icon to define a comparison value for a cell in the column. Then CLOSE.
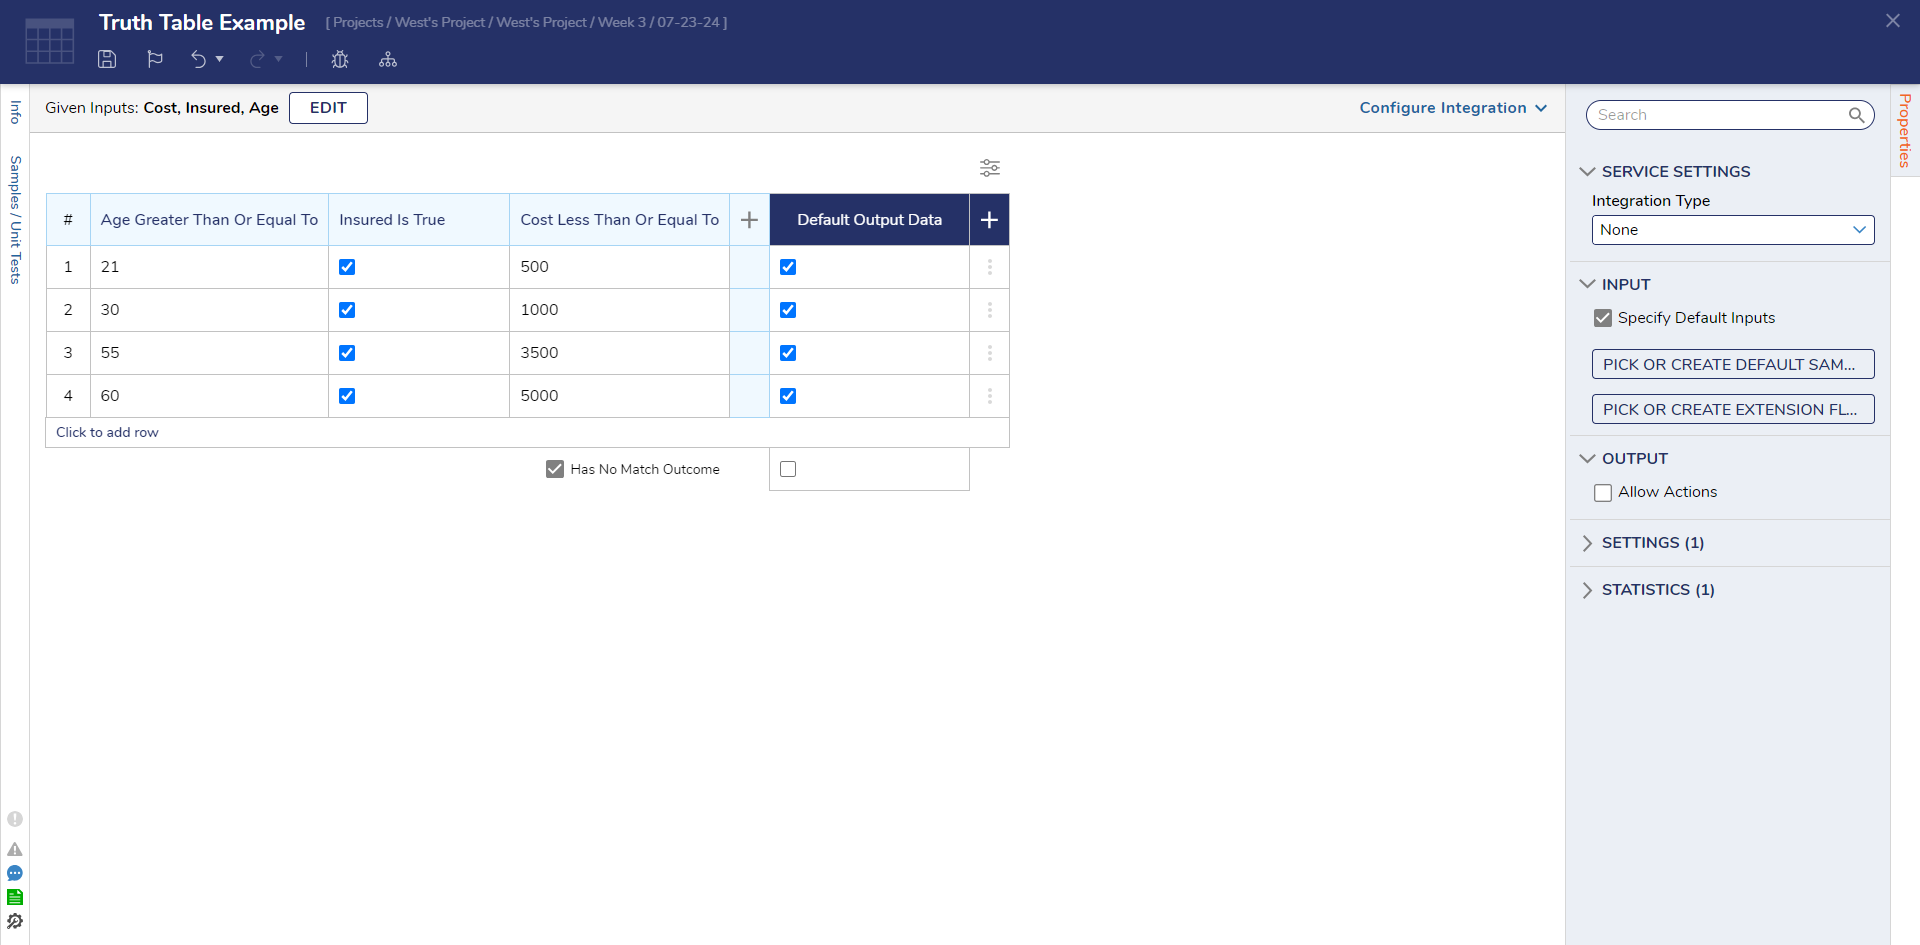
9 Repeat the process for the remaining row. Additional rows and columns can be added using Truth Table Actions.
10 Edit the output data for the Truth Table, if needed.
11 Select Debug in the Global Action Bar to begin debugging the Truth Table.
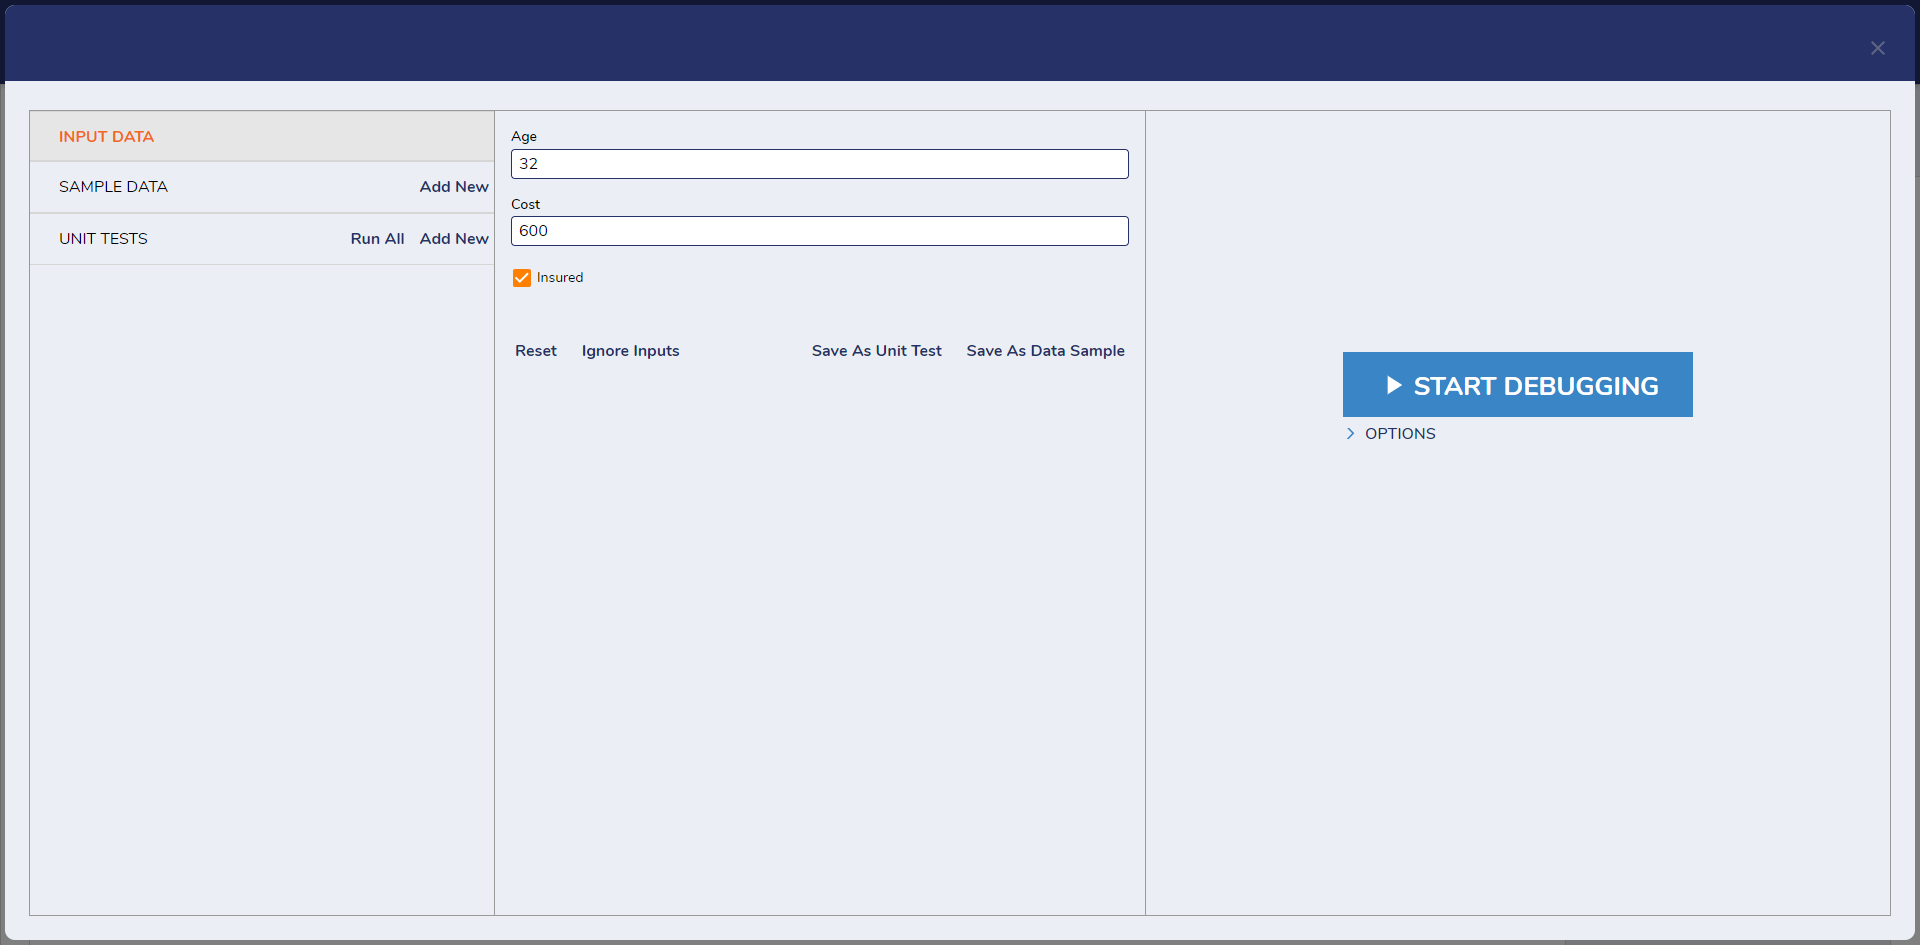
12 A window will open, allowing test values to be inputted.
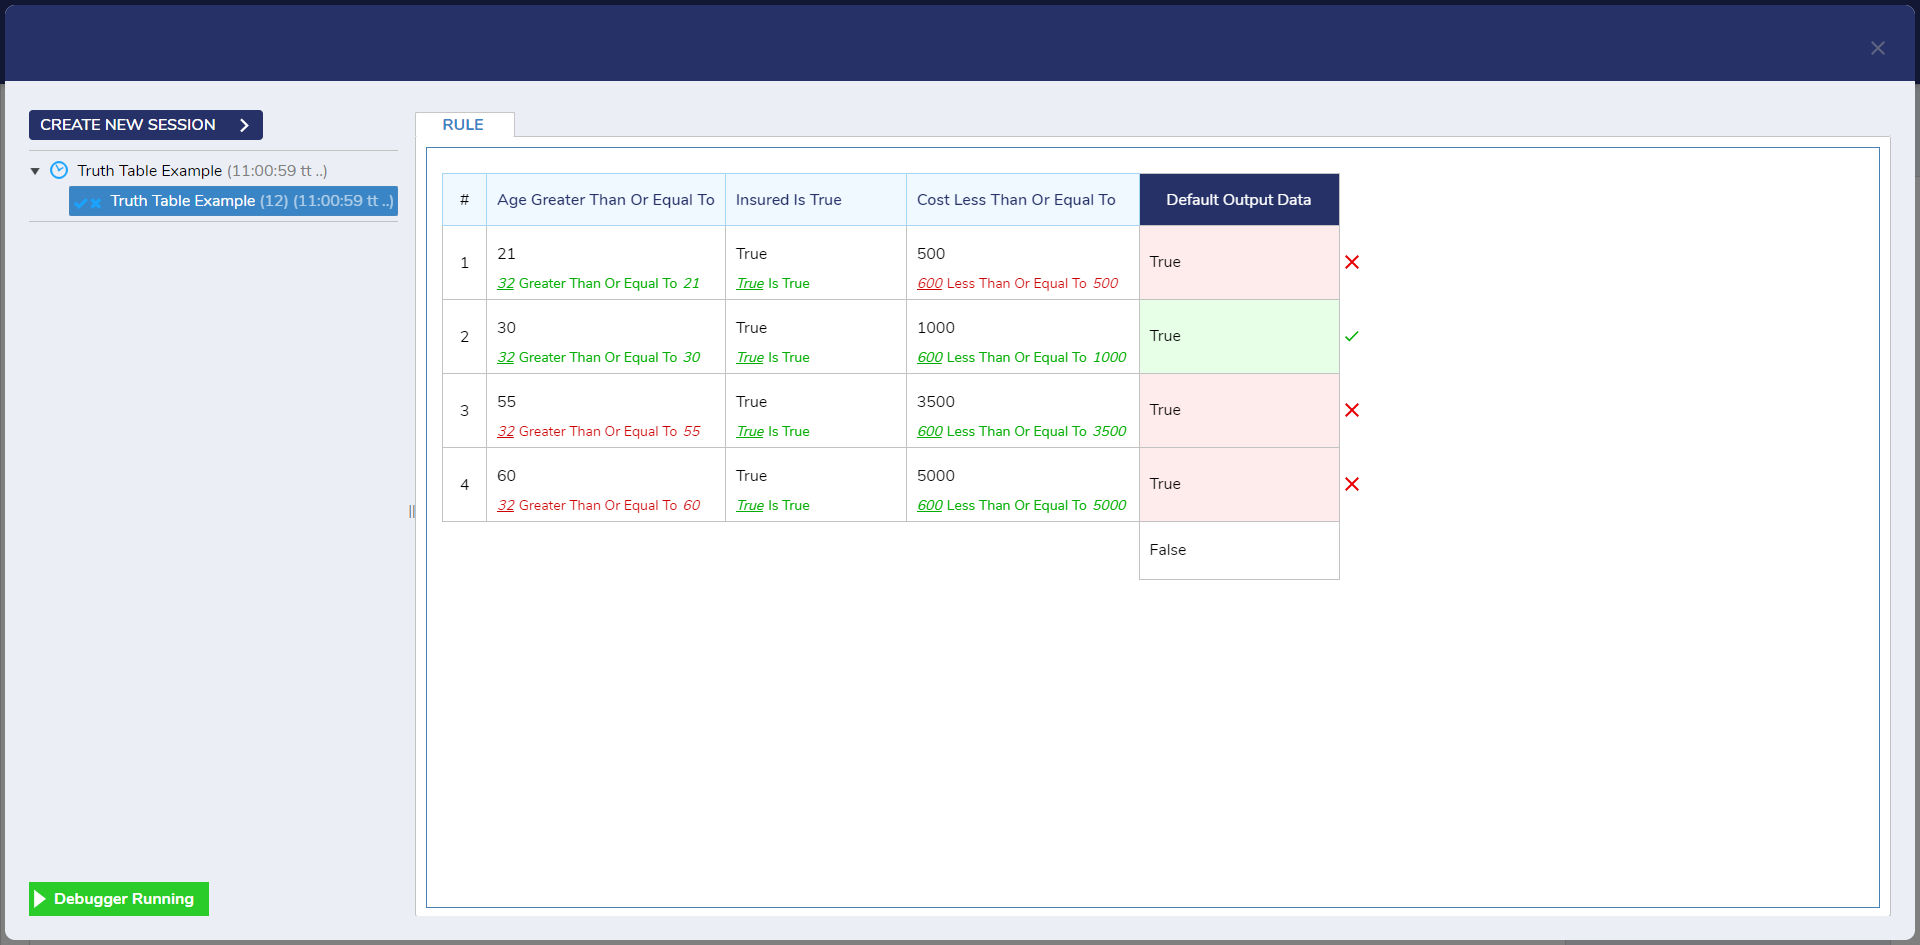
13 Once values are inputted, click START DEBUGGING. The Truth Table will then evaluate the conditions for every cell in the Truth Table; if an entire Row evaluates as True, then the result data will be outputted.
from: https://documentation.decisions.com/v9/docs/creating-a-truth-table
