Create a Custom Assignment Notification Email

1 From the previously created example Assignment, navigate to the Assignment's Properties.
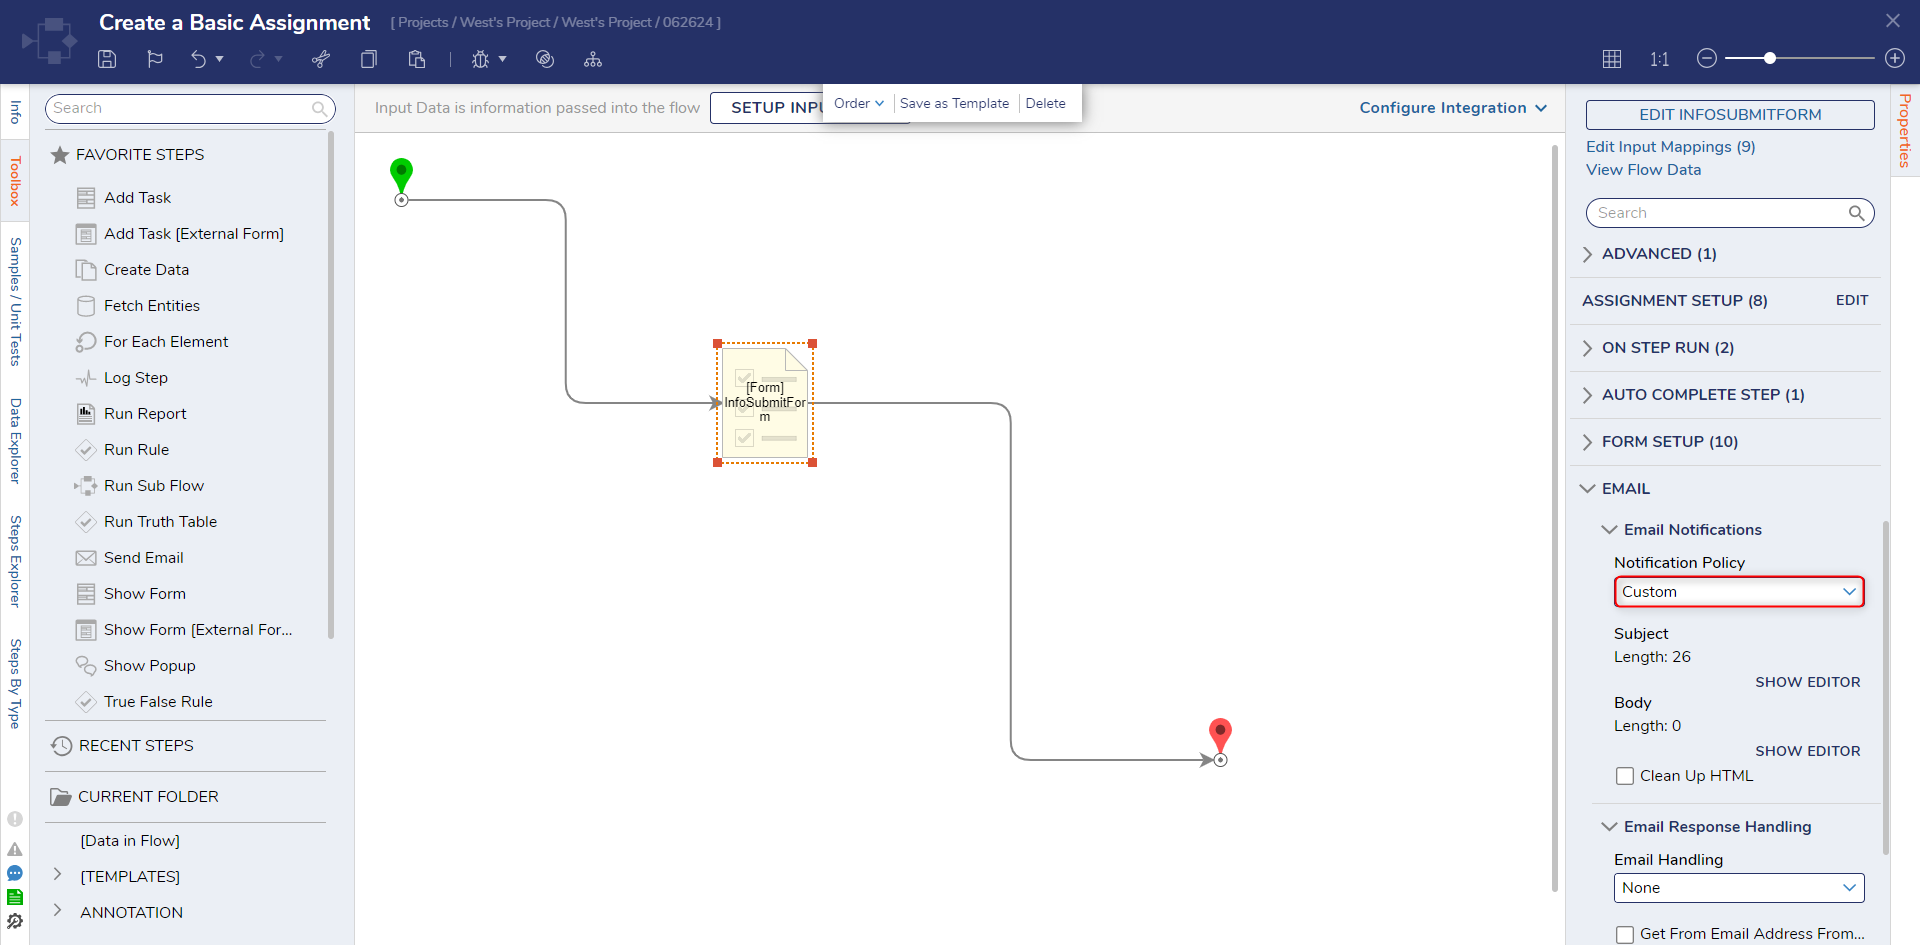
2 Under the EMAIL category, set Notification Policy to Custom.
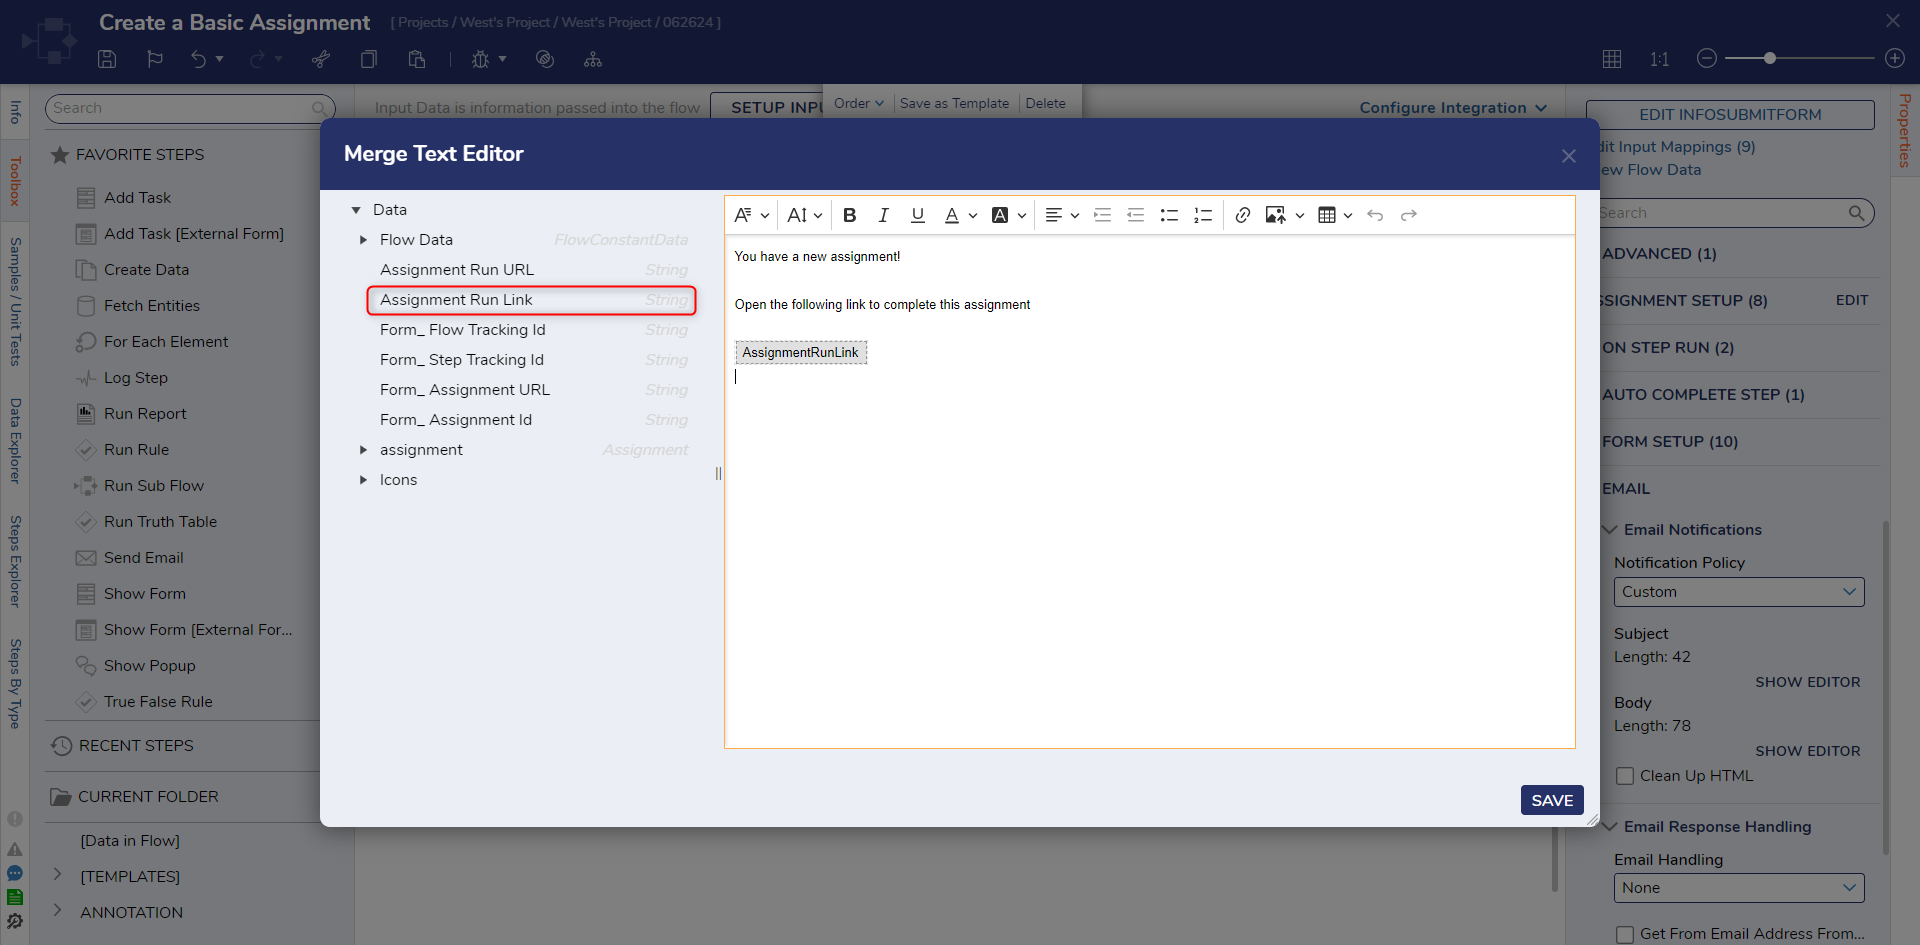
3 Under Subject, click SHOW EDITOR. In the resulting Merge Text Editor, define the Email Subject as desired. Then, click SAVE.

4 Repeat the process for the Body by selecting SHOW EDITOR under Body, defining the Email Body, and clicking SAVE; include the Assignment Run Link to allow navigation back to the Assignment, by adding it from the Data Tree on the left.
5 Once the desired configurations have been completed, save the Flow. Then, select Debug on the Top Action Bar.
6 After the Flow runs, navigate to the Assignee's Email Inbox and verify that the Notification Email is received as expected.
from: https://documentation.decisions.com/v9/docs/creating-custom-assignment-notification-email