Creating an Active Directory (AD) Sync Job

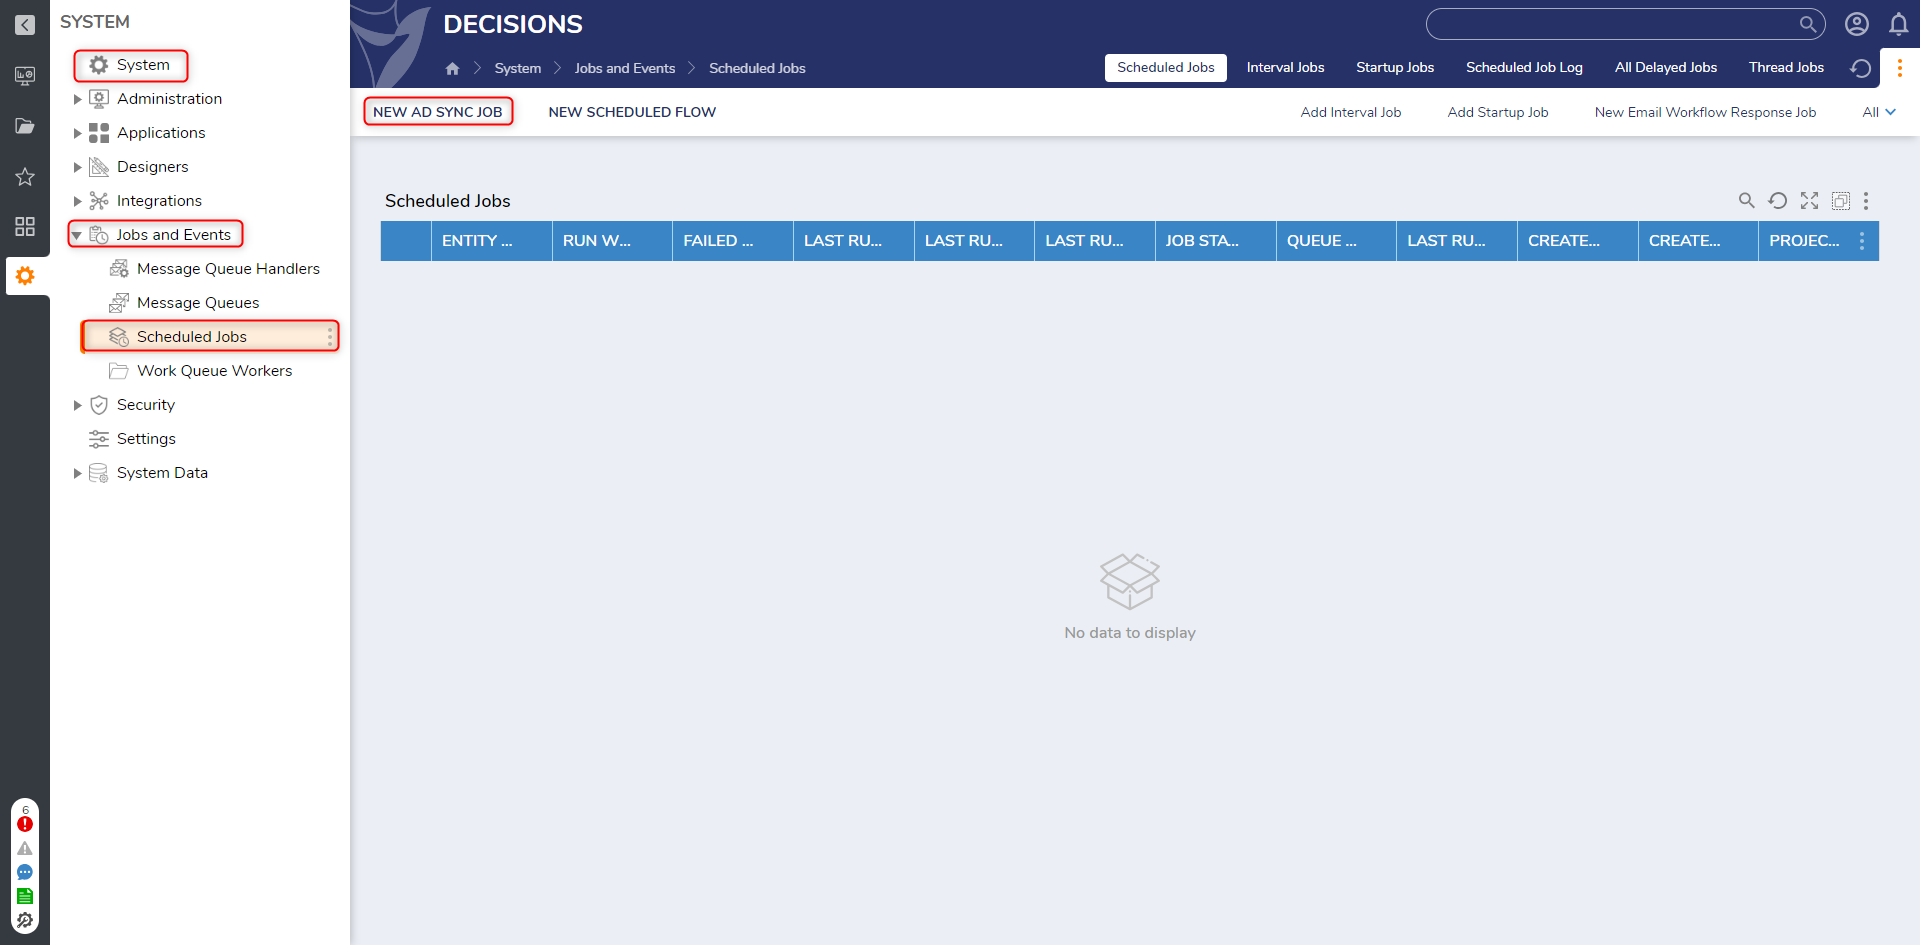
1 Navigate to System > Jobs and Events > Scheduled Jobs.
2 Select NEW AD SYNC JOB.
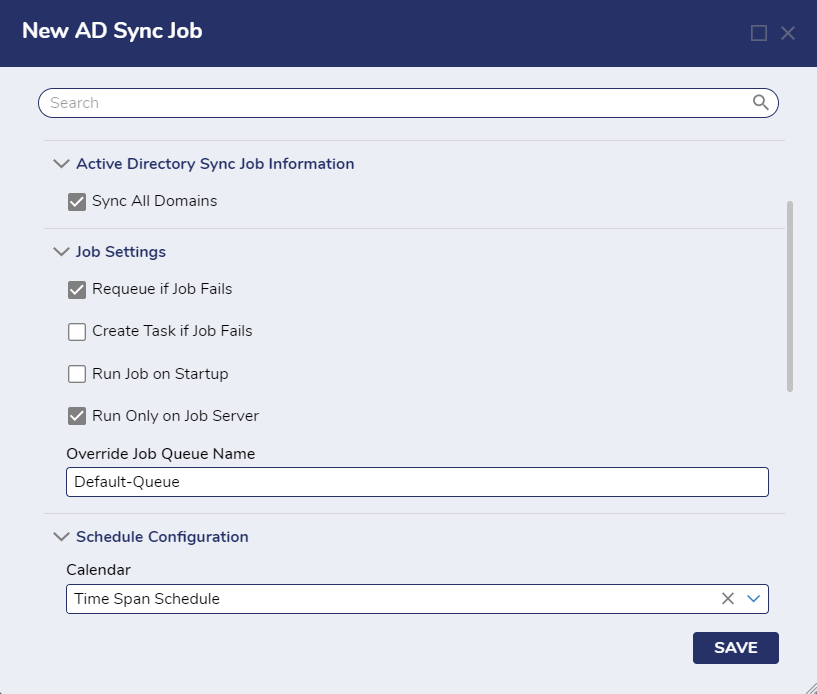
3 In the New AD Sync Job dialog, select the Sync All Domains.
4 Select the Requeue if Job Fails checkbox to ensure that this sync job is re-queued in the event of a failure.
5 Under Schedule Configuration, in the Calendar drop-down, select Time Span Schedule.
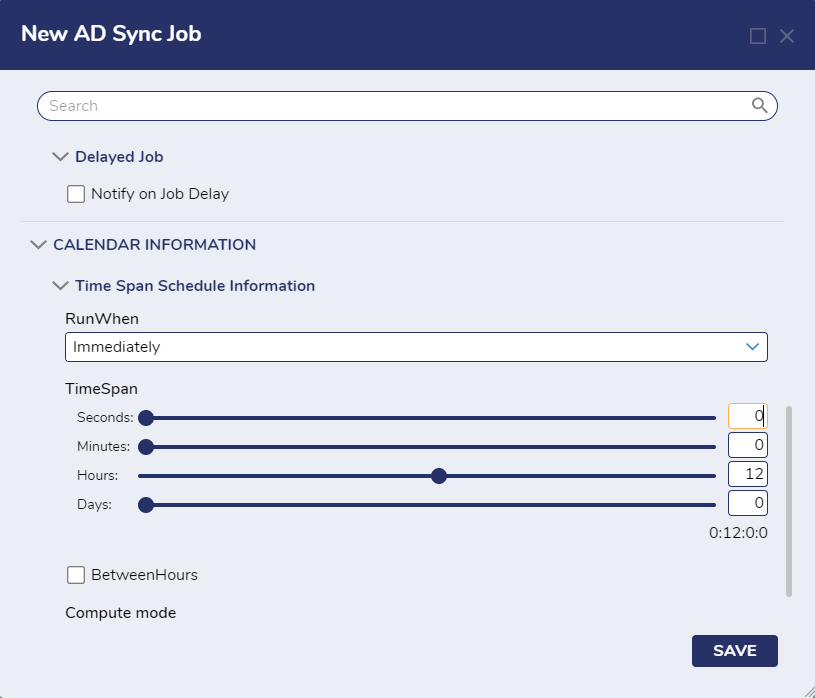
6 Select Immediately in the RunWhen drop-down list.
7 Use the TimeSpan controls to define an interval of 12 hours. This means that every 12 hours, the system will immediately try to synchronize with the AD server.
8 Select SAVE.
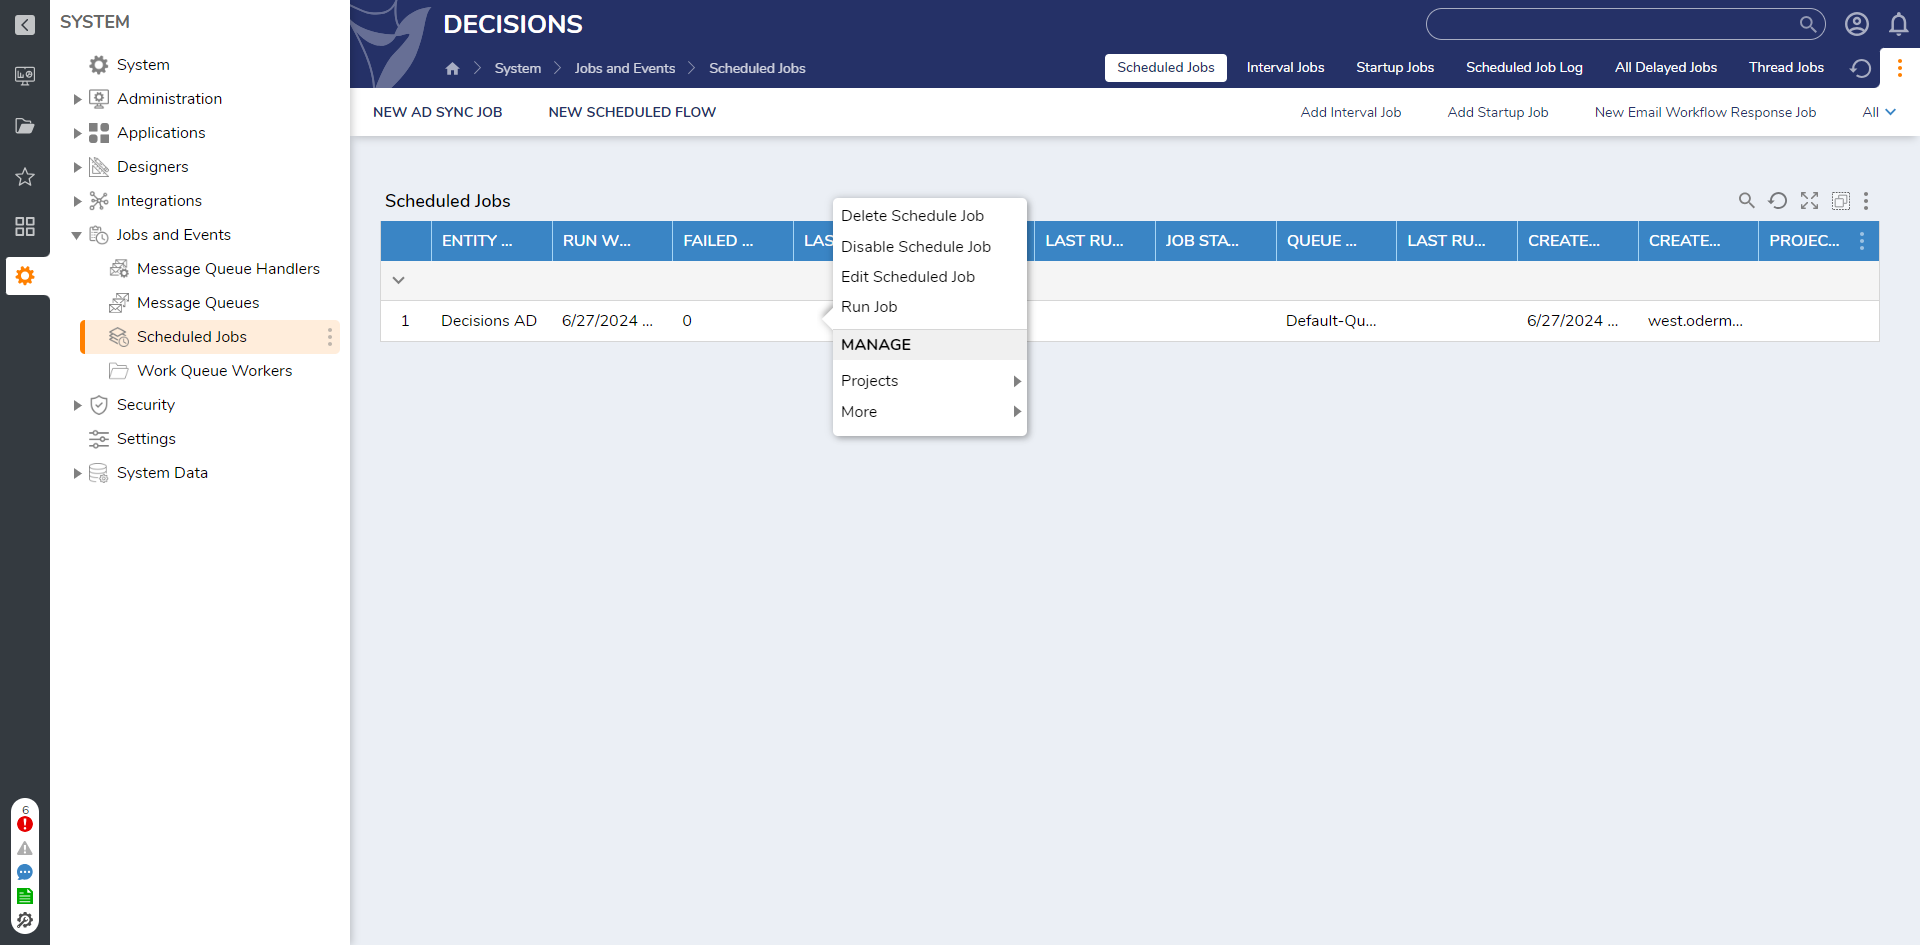
9 The new AD Sync Job will appear in the Scheduled Jobs folder, where further actions can be taken on it.
from: https://documentation.decisions.com/v9/docs/creating-an-active-directory-ad-sync-job