Creating and Using Assignment Roles

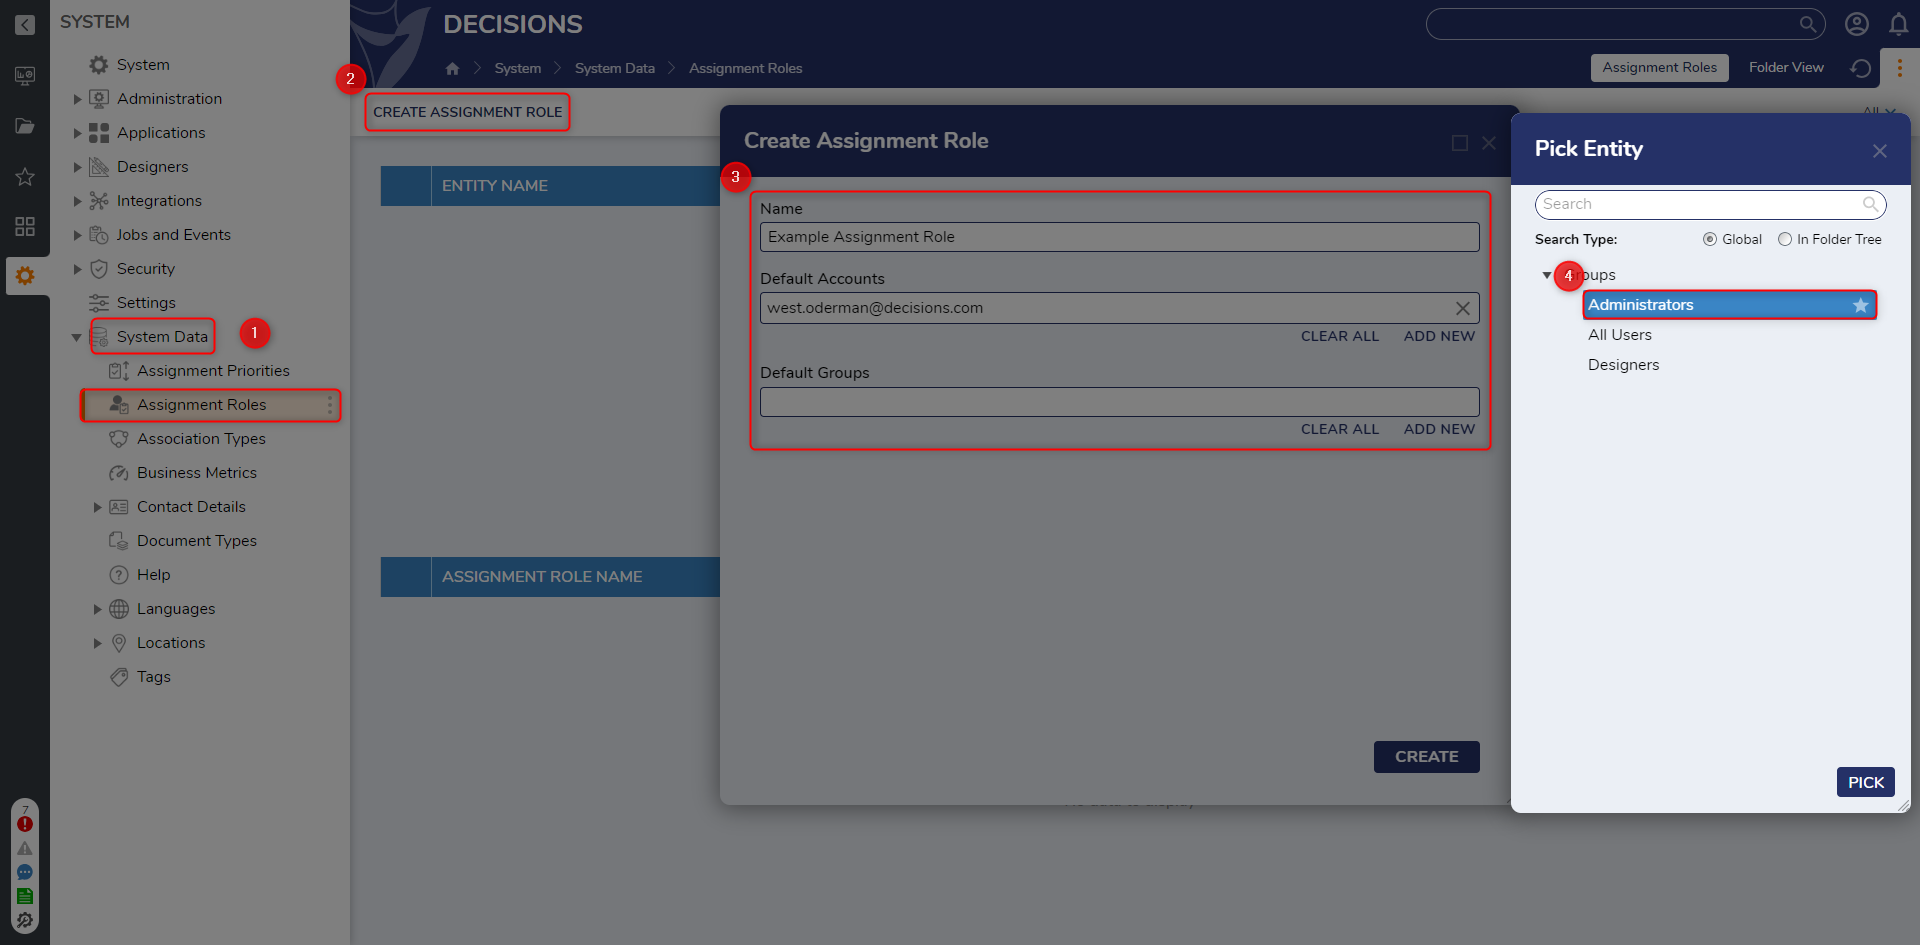
1 From the Decisions Studio, navigate to System > System Data > Assignment Roles. Then, click CREATE ASSIGNMENT ROLE.
2 Provide a Name in the respective text box. Then, under Default Accounts and Default Groups, select ADD NEW. Choose the default Accounts to add to the Assignment Role.
3 PICK the desired Account and or Group, then click CREATE.
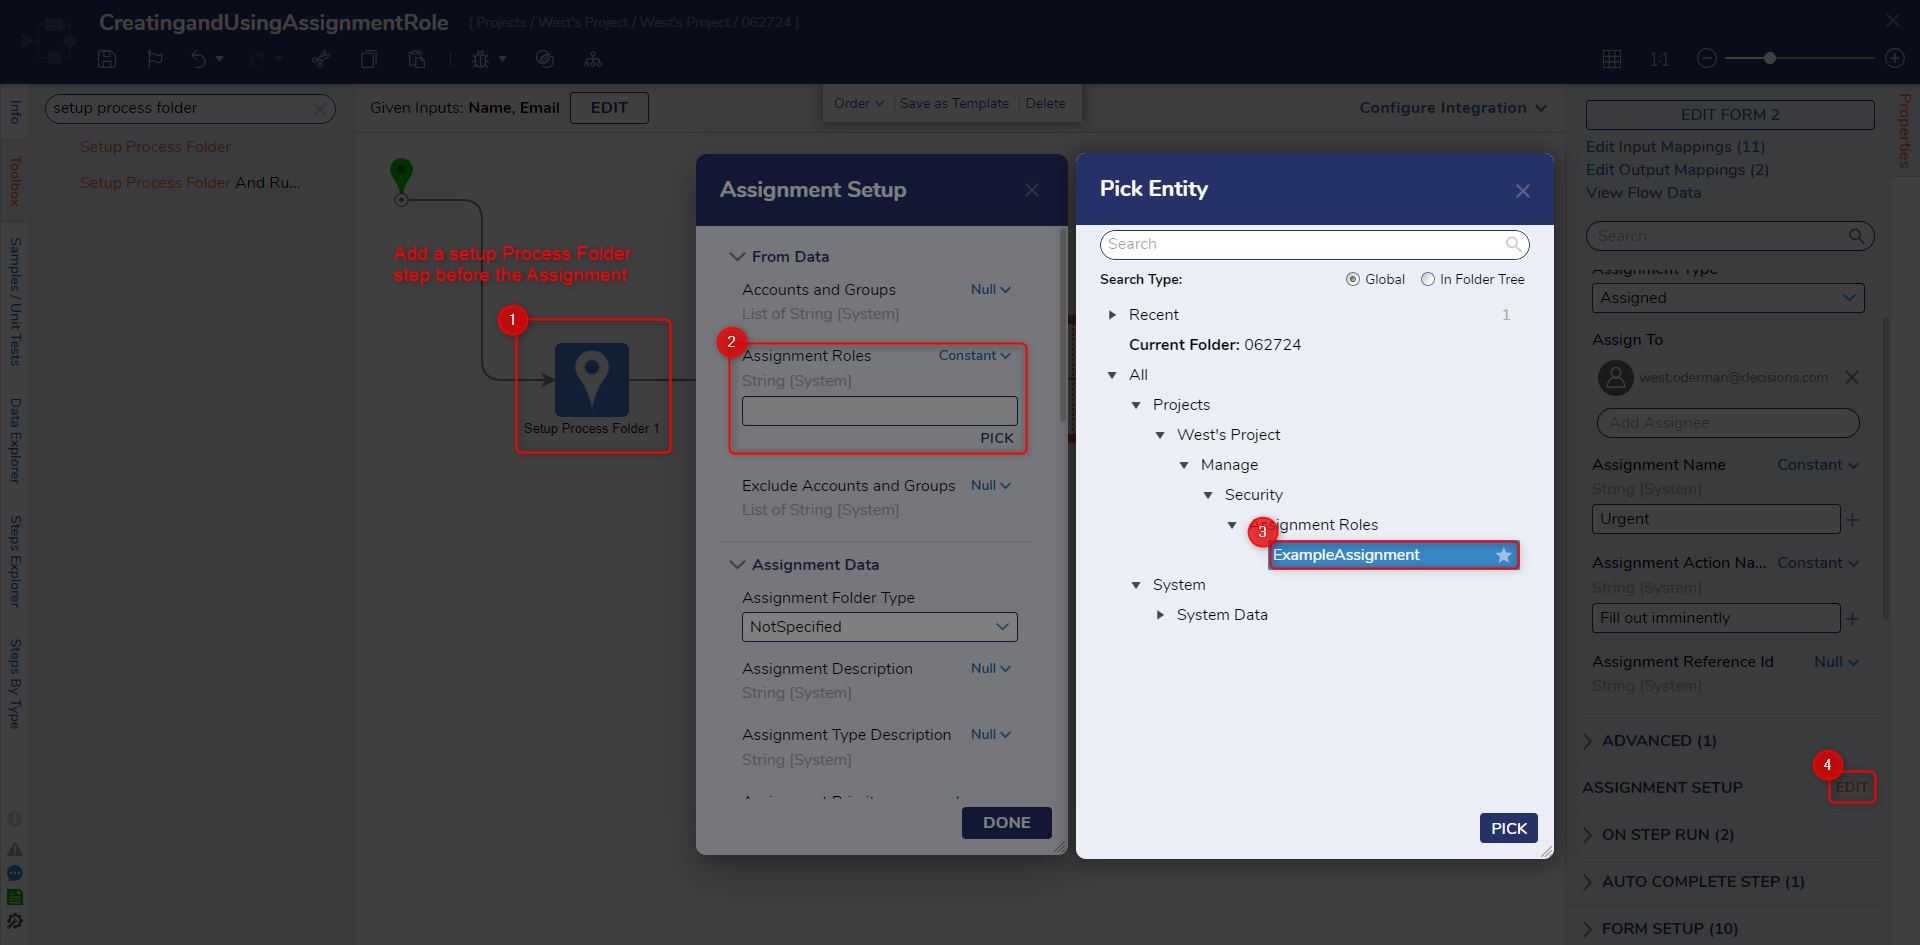
4 From a Flow containing an Assigned Form, add and configure a Setup Process Folder step before the Show Form or Add Task step; this helps mitigate/track progress within a the Assignment Process.
5 From the Properties of the Assigned Form, navigate to ASSIGNMENT SETUP and select EDIT.
6 Under From Data > Assignment Roles, set the mapping to Constant, then PICK the Assignment Role that was previously created and click DONE.
7 Save the Flow, then Debug it.
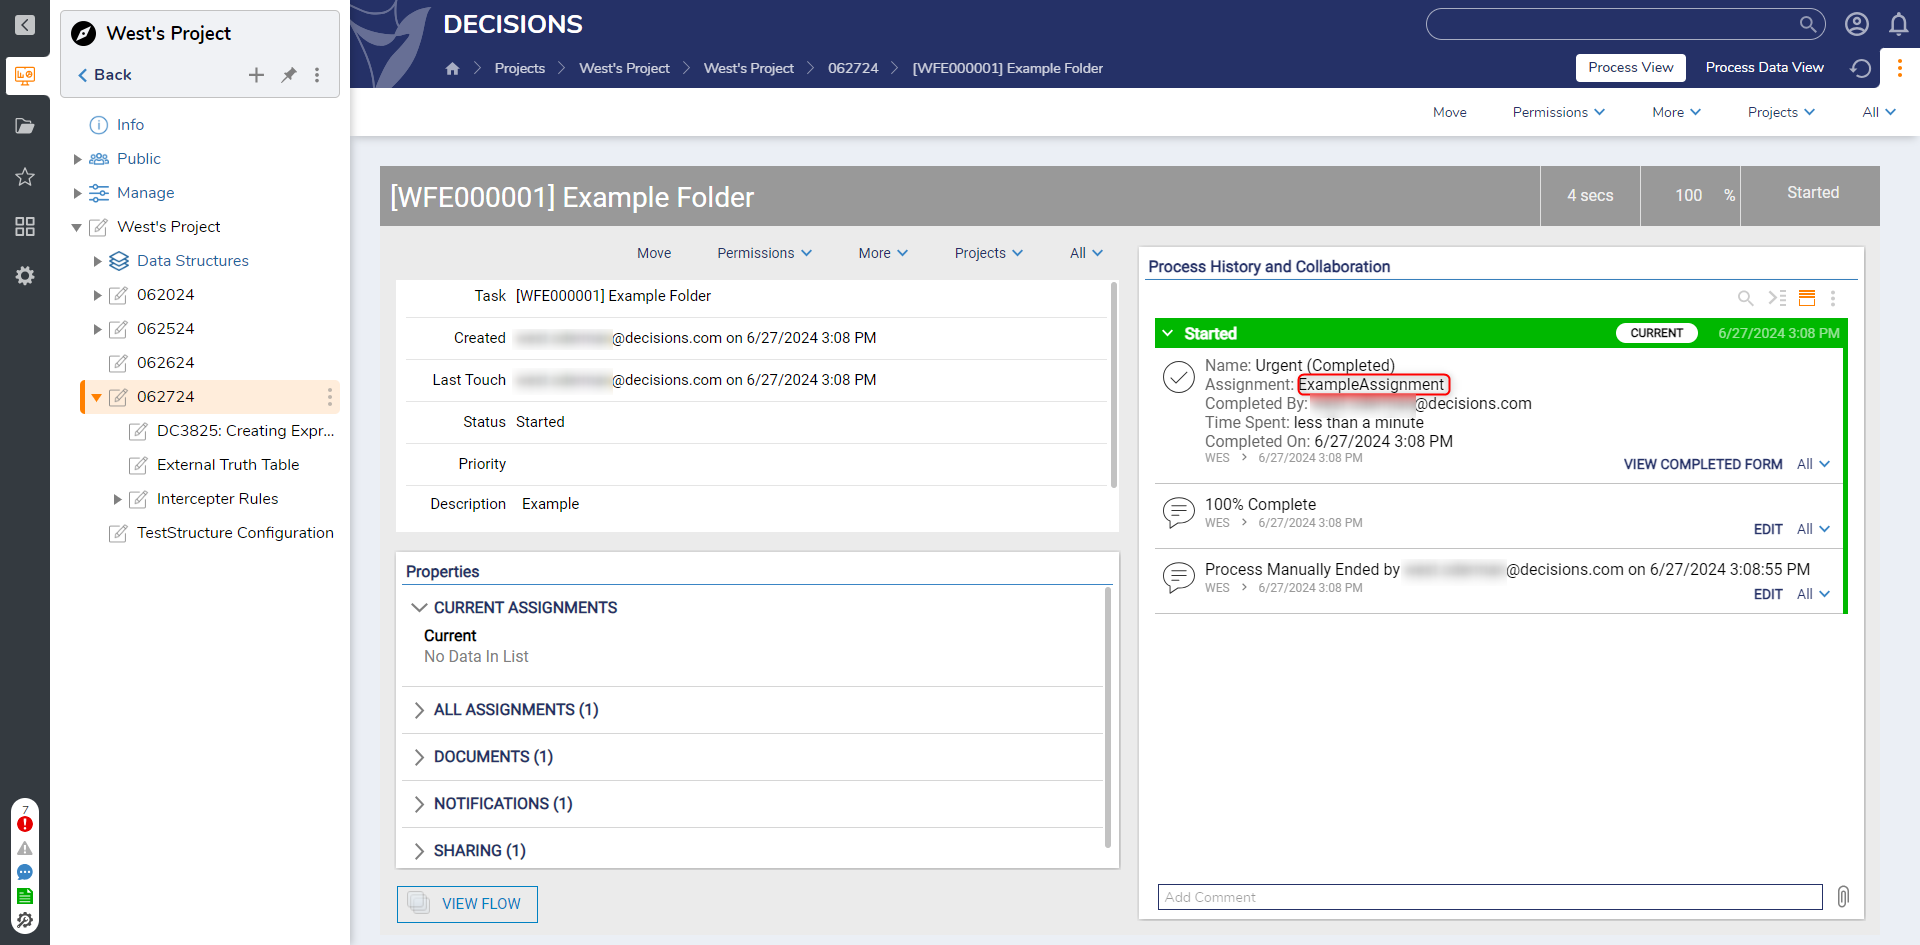
8 After the running the Flow, navigate to the Process Folder that was created via Setup Process Folder. Verify that the Assignment Process Data displays the designated Assignment Role.
from: https://documentation.decisions.com/v9/docs/creating-and-using-assignment-roles