Date Range Filter on Pages

1 CREATE a Page that contains a Report Viewer Control.
2 From the Properties of the Report Viewer, select PICK OR CREATE DEFAULT REPORT, then CREATE a new Report.
3 From the Report Designer, design a Report that utilizes the Account Data Source.
4 Under Data Fields, Add Email Address and Created On Date. Then, under Filters, Add a Date Range Filter.
.png)
5 In the Properties of the Date Range Filter, change THIS YEAR to CUSTOM under SETTINGS > Date Range. Then, click APPLY.
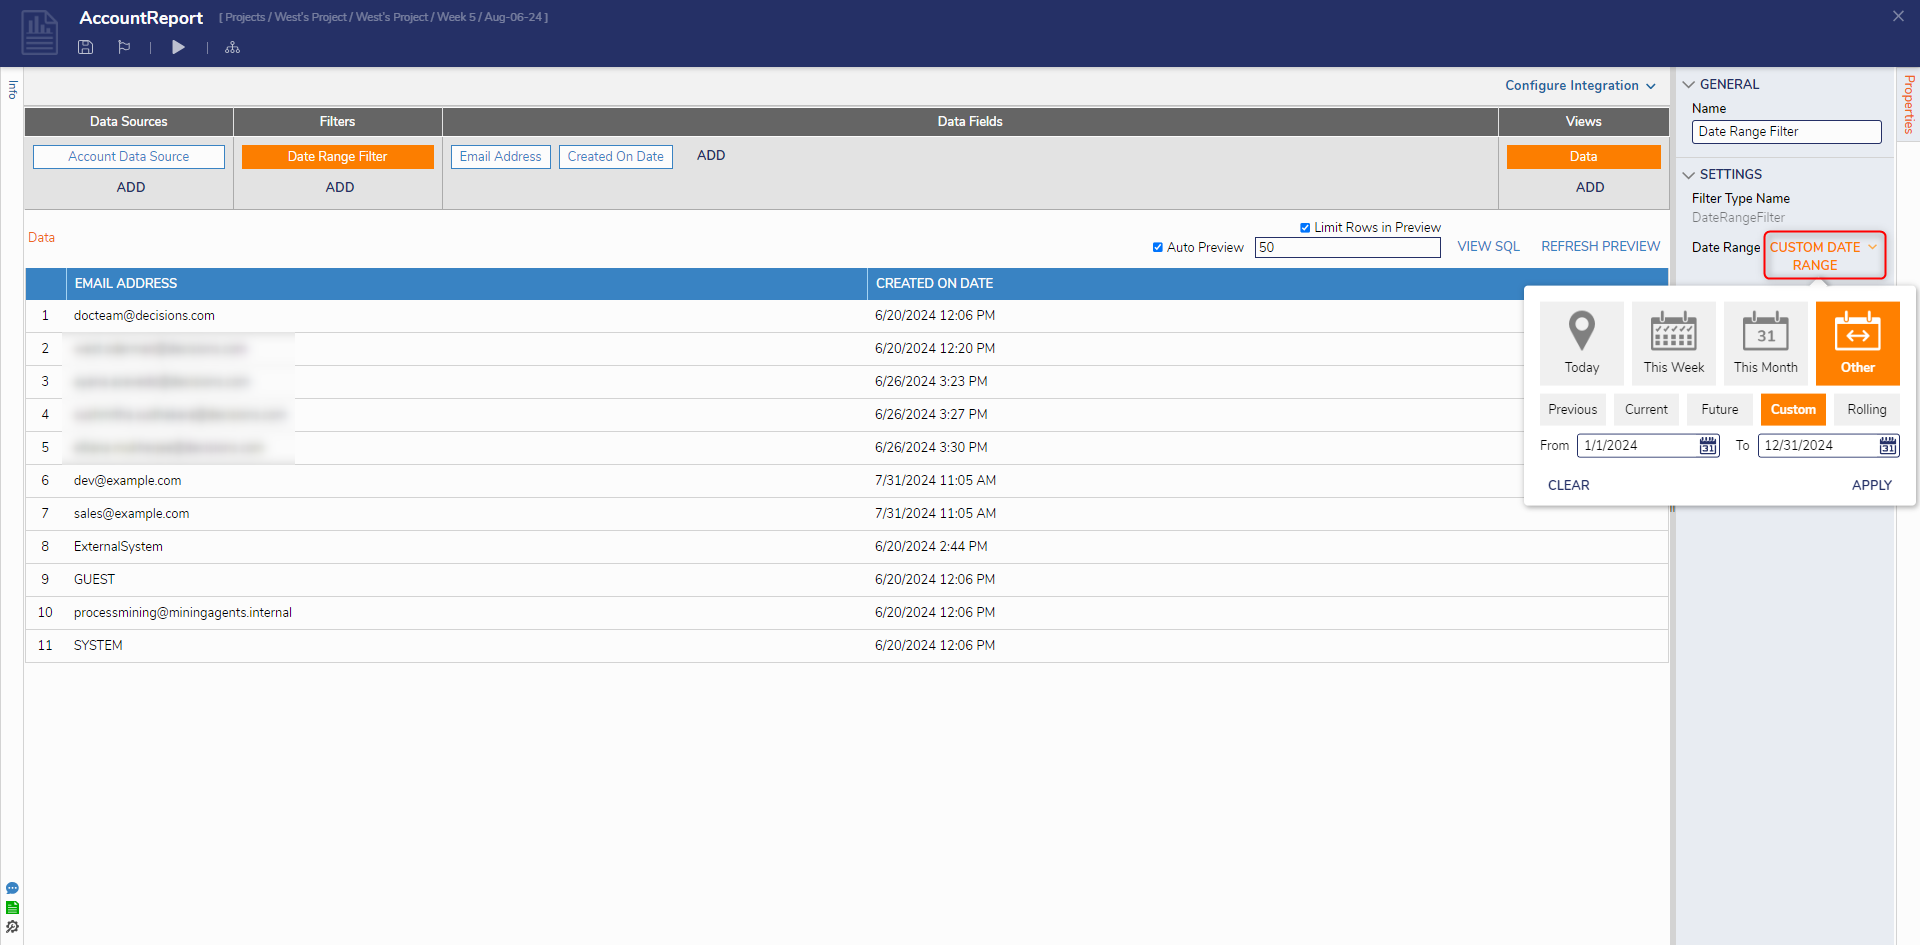
6 Under SETTINGS > Date Field, select Create on Date from the drop-down; Save and close the Report Designer and the Page Designer.
.png)
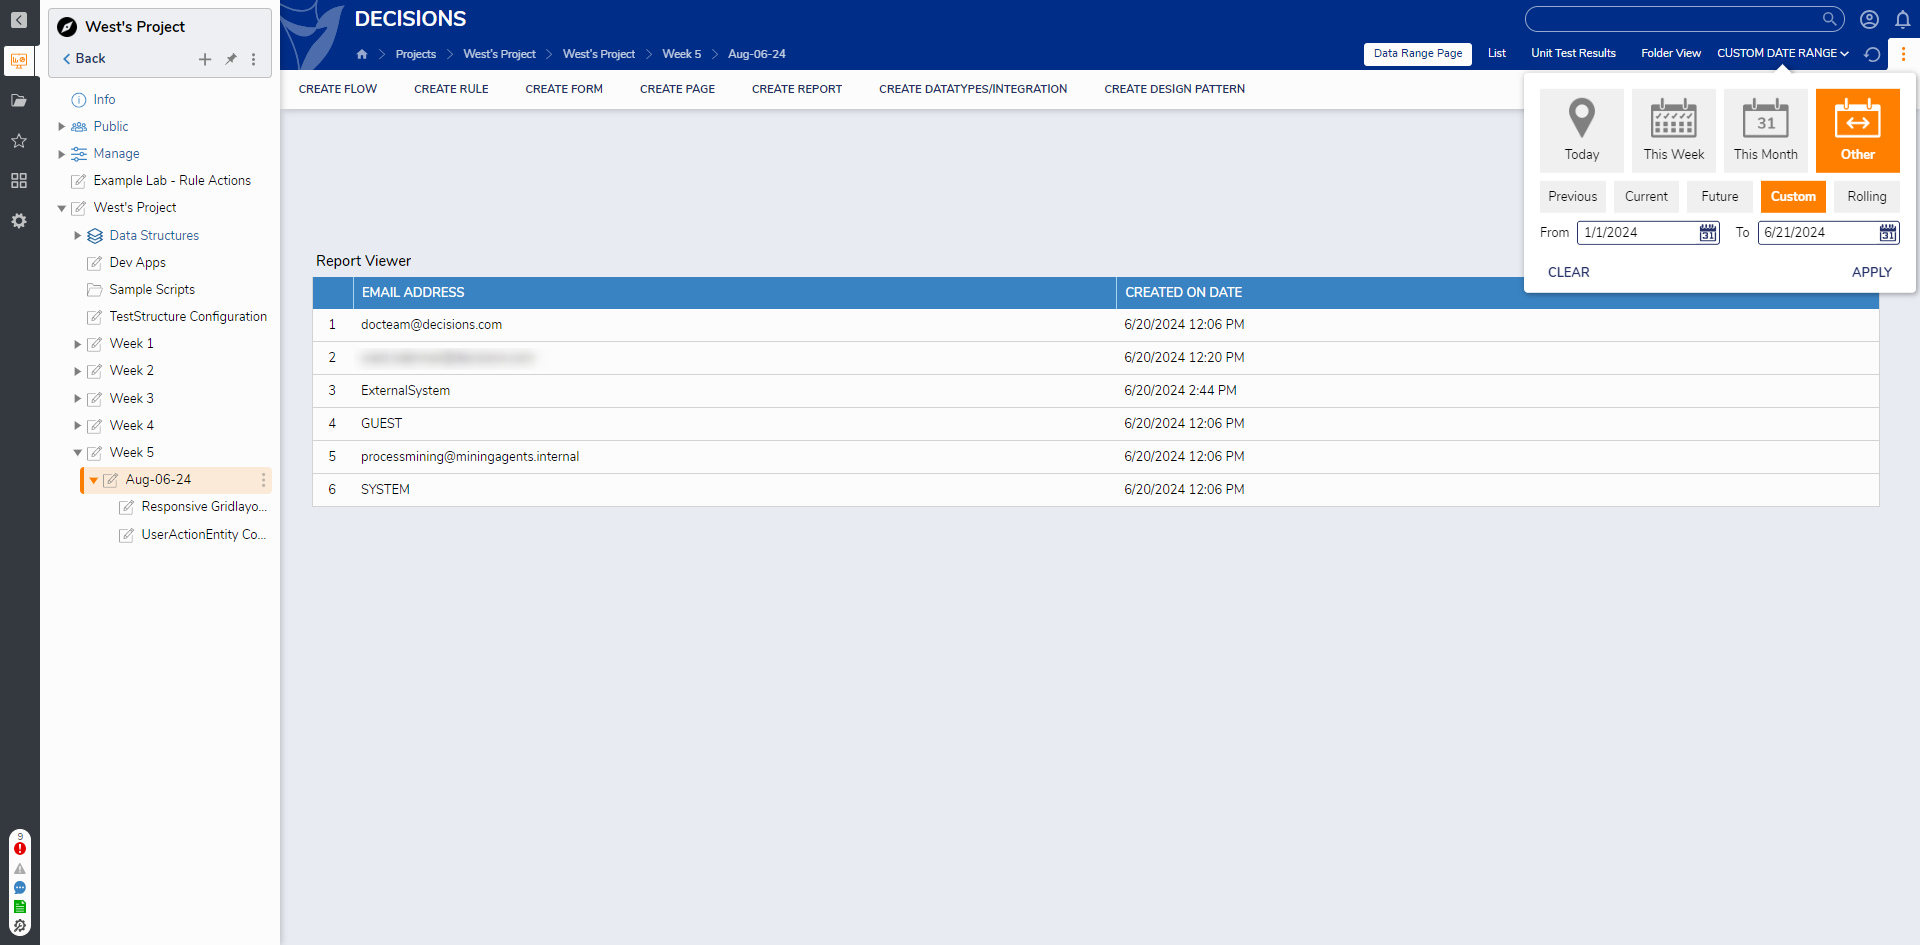
7 From the Decisions Studio, Add the Page to a Designer Project.
8 Navigate to the added Page via the tabs at the top of the Page. Then, via the CUSTOM DATE RANGE drop-down, set a Date Range by establishing a From and To Date, and click APPLY.
9 Verify that the Report is displaying entries within the defined Date Range.
from: https://documentation.decisions.com/v9/docs/date-range-filter-on-pages